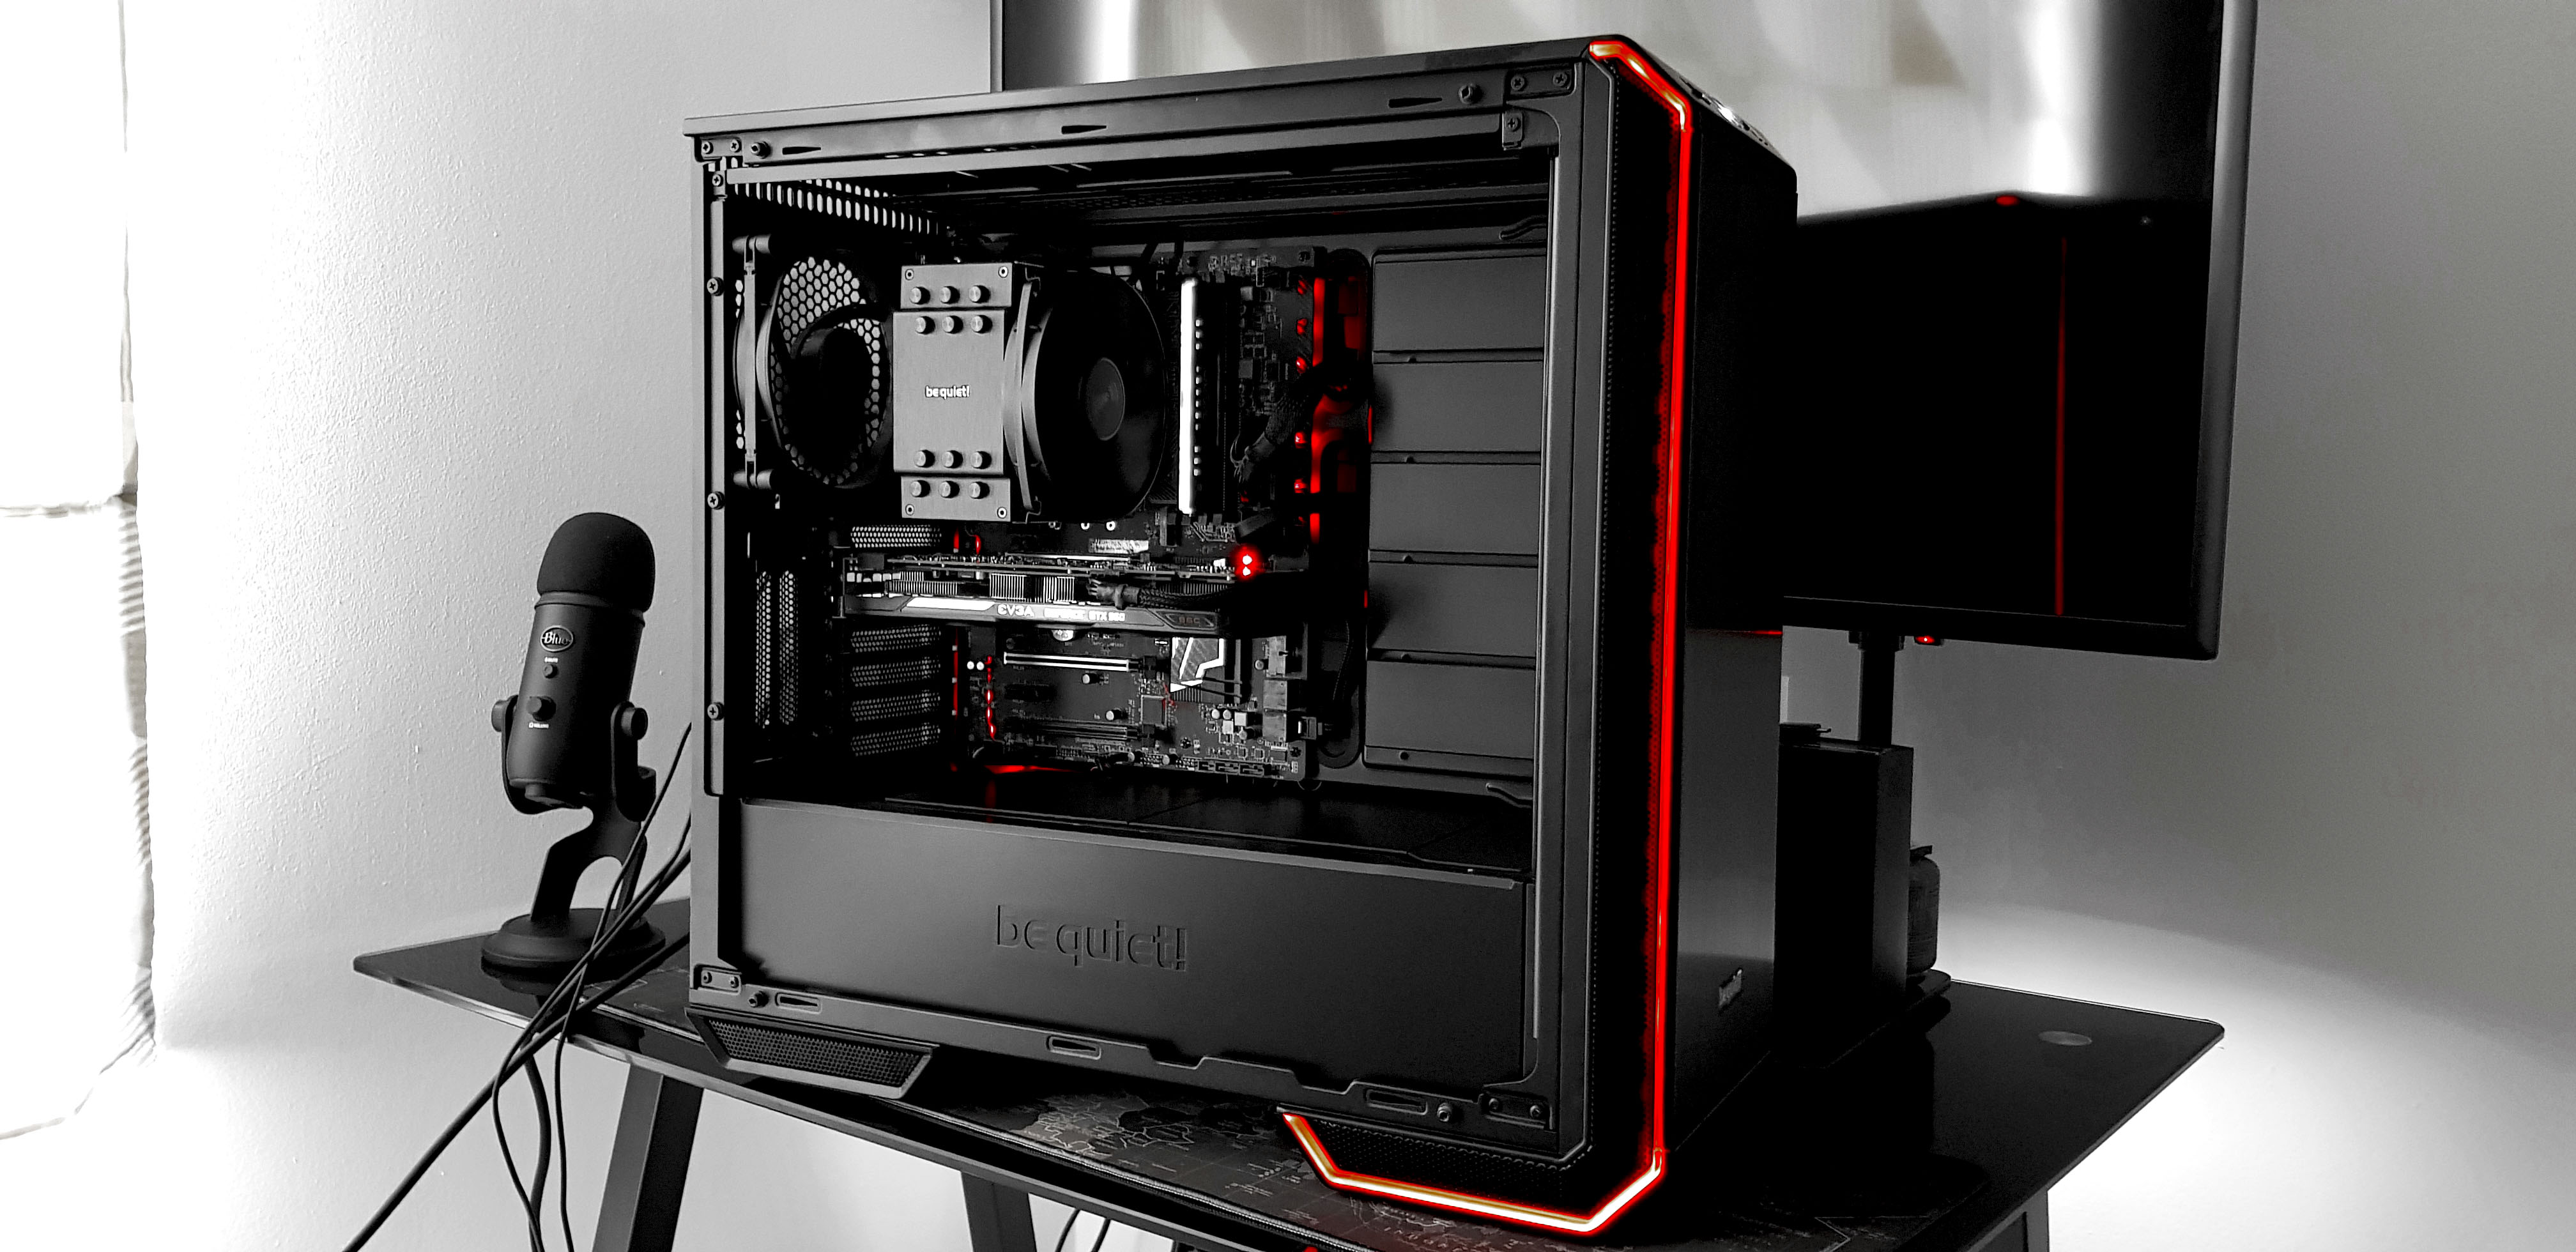
It’s been a while since the last time we reviewed a case, so let’s catch up on that. There are very few components in the computer world that don’t loose their value or utility per say. The list in my opinion is very short. These are power supplies and cases. Because these two if bought correctly they will last you many generations to come unlike CPUs, GPUs which get obsolete very quickly. Thus a good computer case, which is the first thing you will see of the PC, represents your vision of what you want that computer to do or represent.
Be Quiet! also offer cases and if you saw the last reviews which show how epic their products are, then this is good indication that we are in for a treat ! Their high-end range is named “Dark Base” and promises “Unrivaled flexibility with impeccable cooling and silence features”. Today we are going to review their mid tower option the - Dark Base 700 RGB.
First about BeQuiet!
BeQuiet! is a premium brand manufacturer of power supplies and cooling solutions for your desktop PC. With numerous awards under their belt they are considered the best German power supply manufacturer from Germany since 2006 - proved by being awarded with, no less than nine times in a row, the “Manufacturer of the Year” in the power supply category by the readers of the well-known German hardware magazine PC Games Hardware. In the category “fans”, be quiet! earned the first rank five consecutive times and belongs to the Top 3 CPU cooler brands for more than three years in a row. The community of Hardwareluxx also voted be quiet! as “Manufacturer of the Year” in the PSU category for four consecutive years.
Prices and Availability
Below we have the prices in three different currencies.
Presentation and Specification
* Courtesy of their website
In 2016 Be Quiet! launched their fist full tower series the 900 Dark and 900 Dark Pro which got a great reception. One year later they extended the range with this 700 series, which is a mid-tower option. Even though it is smaller than the 900 Dark, addressing a much broader audience, it still maintains all the key features from the big brother such as high versatility in cooling, great noise reduction and modularity. Also, it still uses premium materials like aluminum, tempered 4mm thick glass side and some very unique tricks up its sleeve. With all of these combined it could make this case one of the best choices out there in this catagory !
OUTSTANDING FLEXIBILITY AND SILENCE
* Motherboard tray and HDD slots with enhanced possibilities for individual requirements
* Two be quiet! Silent Wings 3 140mm PWM fans
* the 4-step dual-rail fan controller is switchable between Silence and Performance modes
* Ready for radiators up to 360mm
* PSU shroud, ingenious cable routing and HDD slot covers for a neat interior
* Fully windowed side panel from tinted and tempered glass
* Exterior RGB LEDs with six switchable colors and motherboard control option
* Three-year manufacturer’s warranty
* German product conception, design and quality control
The main unique trick up this ones sleeve is that it has a fully modular design including the fact that you can reverse the motherboard tray so you can change the layout of the case to face you, from whichever side you desire.
Then you can even install your graphics card vertically for an even better eye candy display mode.
These complete the idea of how versatile the case is and how much you can put inside of it. We are talking about a potential of seven 3.5″ HDDs or up to seventeen(!) 2.5″ SSD/HDDs. This is only possible if you get all the drive bay cages though, you get three included. Fourteen can go in the seven possible cages and then three more can go on the motherboard’s back tray.
Cooling possibilities again are varied all the way to 360 AIO/rads either on the front or the top of the case. Many more tricks will be revealed as we explore further, I’m sure.
Visual Inspection
So far Be Quiet!’s design is very recognizable; an all black theme with clear branding and a visual depiction of the actual product.
It’s a big case so a big box is required to fully protect the case. As big as my whole desk space.
Protection is offered by two Styrofoam pads and a very nice black dust cover.
This case is pure and simple - beautiful ! The first thing you see is the tempered glass which reflects everything from certain angles almost like a mirror. Then the whole case oozes quality from so much metal and the brushed aluminium finish that is used on the top and the front.
Comes with a big box of accessories and the instruction manual.
Now let’s analyze the case. The front panel is very generous. From left to right we have:
* The fan speed control with 4 settings including auto mode
* USB Type-C 3.1 port
* Audio & Mic jacks
* Big illuminated power ON button
* A reset button which acts as the HDD LED as well
* Two USB Type-A 3.0 ports
The back has these sleek exhaust ports.
Now here we have the Be Quiet! logo and just look how the glass panel is shaped and perfectly fits with the case’s lines. Those meshes help airflow and we also notice the LED plastic strips that will provide the extra eye candy.
The case sits on these big feet like a statue almost that offer some ground clearance to provide extra cooling for the PSU.
They also have these anti slip pads.
Zooming out this is the whole bottom area. We see one big removable dust filter which you remove from the front.
To remove the glass panel, you must first unscrew by hand these bolts. Four of them.
Just look at the attention to detail, the glass sits on rubber grommets to protect the panel from shocks.
Speaking of details, look at this now. They colored the top and bottom ends of the tempered glass to match perfectly with the case.
Removing the tempered glass will reveal an all black interior with a continuous PSU shroud on the bottom. This case supports all the way to E-ATX motherboards (30.5 x 27.5 cm), a plethora of storage options, 3 big cable routing ports with rubber opening, five of the seven available locations that will accept the storage bays and we see one of the included 140 mm Silent Wing 3 fans.
Which has its own anti vibration technology and looks very overbuilt.
On the front we find the other one.
The upper area has this removable tray which helps to mount your cooling radiators all the way to 360 in the easiest way possible.
Even the top has the noise dampening material.
Below is the fully covered PSU area, if you remove this panel, you can see how much space there is for the PSU and any extra wires. Next we see two of the seven 3.5″ HDD bays.
Now to remove the metal panel from the other side. This one is fully covered, at least 80% of its whole surface, with a thick anti noise foam material.
Let’s finish the outside. One more panel to remove which is the front one. It reveals another vertical air dust filter. So far we know that the front panel has LED illumination as well. But where are the wires that we see in most cases?
Well, Be Quiet! took it to the next level, with a very smart and elegant approach - contact pins. Done. Also notice the front panel has the same thick anti noise material on it.
Now slide the bottom dust filter.
A quick look at the back will show how wide the case is and notice the extra two vertical exhaust ports where you can fit your GPU the same way.
Any PSU up to 285 cm is accepted and they will sit on these big, thick rubber pads.
Even the exhaust perimeter has rubber pads.
Now for the back area where we discover a lot of wire management areas, the fan control hub, the storage options and the front panel I/O cables.
There is plenty of space for routing the cables, even the thickest ones.
The central hub can accommodate up to six fans and one LED strip. The other ports are for the front I/O. Next to it we see one of the three vertical 2.5″ storage brackets. The other two are in the upper part on a removable tray.
Notice in the center of the hub a switch that controls fan modes.
You get two 3.5″ cages already installed down in bottom area. The third one is in the accessory box all with thumbscrews. Notice the top holes and another set on the other side? This is how you can mount the additional four optional cages, so two 2.5″ per cage equals up to fourteen SSD/HDD 2.5″ drives just in the cages alone, if you choose to buy them. Insane.
Just remove the plastic covers and then you can slide the cages in. We will see more in the next chapter were we start the assembly of the components.
All the front connectors are as follows:
* HD audio (headphone jack/microphone jack)
* USB 3.1 Type C
* USB 3.0
* On/Off Switch, Power On LED, Disk Operating LED, Reset
That wraps up this chapter. Now let’s build in the Dark Base 700.
Testing Methodology & Component Installation
We will:
* Cram as many regular components as we can and point out if any problems arise
* Overclock the CPU so we can test some of the case’s airflow.
* Test the wire management capabilities
* Measure the noise output from the case’s fans and overall noise with our Pyle PSPL01 noise meter placed at 30 cm from the fully built case.
Hardware used:
- CPU: Intel Skylake i5 6600k - 4c/4t - OC’d at 4.5 Ghz @ 1.380v
- CPU Cooling: Be Quiet! Dark Rock 4
- Motherboard: MSI Z170a Carbon Gaming Pro ATX
- SSD: Samsung 840 Pro 128 GB MLC
- RAM: 8GB (1×8) Crucial DDR4 Tactical Tracers 2666 Mhz
- Video card(s): EVGA GTX 960 SSC 2G - then OC’d at +150 MHz Core +50 MHz Memory
- PSU: Be Quiet! Straight Power 11 850W
Software:
– Windows 10 Pro x64 Version 1803
– NVIDIA GeForce WHQL 398.82
- MSI Afterburner v4.50 - To OC the video cards and monitor the GPU temperatures
– CPU-Z v1.71 - To verify the CPU’s and RAM’s statistics
- CoreTemp v1.6 - To see in real time temperatures of all the CPU’s cores and threads
- Assassin’s Creed Origins - One run of its built in benchmark suite - All settings at HIGH @FHD
Let’s start with the storage options. For the 3.5″ drives, just unscrew the cage and slide in your HDD. Secure it into place via the included screws.
If you have less than 2 drives, best place is here - out of sight.
If you plan to build a crazy storage PC, then buy more cages and start to populate the other bays. Remember, by doing this you are limiting the video card length to 286 mm.
As for the 2.5″ SSD/HDDs. The best place for anything under three items is on the back of the motherboard tray.
Next up is the power supply. The case is big enough to hide any unused wires even if you use a non modular PSU.
Time to install the motherboard. If you don’t have the cooling you want available, you can easily upgrade it without taking out the motherboard because of the big cutout.
Love when cases come with this taller standoff in the middle so you know that everything is aligned and don’t have to push against the motherboard to clear the other standoffs because of the tension it has from the I/O plate.
Everything is so easy to reach and see since this case is so modular.
Even the top plates come off if you want.
Must fight the spaghetti junction monster yet again. The back will sacrifice itself if you don’t plan to make any OCD perfect wire-management. Still, with even minimum effort you can have great results. Also don’t forget to use the included Velcro straps.
So the front can start to look as ‘clean’ as possible.
There are a lot of holes and areas where you can route your cables.
Let’s finish the build and put all of the panels back into place.
Such an easy case to build in ! Once finished, behold … how sexy it can be ! Just look how much space you have left in it if you plan to do a custom WC setup or multiple AIOs.
Now for the light show, you can chose between six colours with static or a breathable effect. You can also turn the light bars off altogether.
The last piece of the puzzle goes on, the tempered glass which will transform this case into a display cabinet.
Now here is how it would look if you get a PCI-E riser ribbon extension and mount the GPU in a vertical position. Mind you, only dual slot video cards are accepted.
Testing, Results and Analysis
The build experience is a fun and headache free one. Every wire is easy to route and hide. Only one minor thing I discovered during the assembly process is there is no dedicated CPU cable cutout. You have to fiddle with it since the plug is not small enough to clear the area. Or just remove the top radiator bracket just enough for the plug to pass through. Weird and not that big of a deal but something to point out.
Now let’s have a look at the thermal and acoustic performance.
Nothing to complain about here. The level of sound deadening along with how silent the fans are, makes this a very silent case even on full load from the components.
Temperature wise, even with just those two included fans, you will not have any issues even if you use something decent for the CPU if you plan to overclock. Same story with the graphics cards, any reputable aftermarket solution will not starve for airflow. Even with the GPU mounted vertically and the tempered glass panel on, there wasn’t much of a temperature difference which can easily be marked under margin of error.
Conclusion
No matter how you look at it, this is one hell of a case ! At first glance it might look like just another case with a tempered glass side. But as we know, looks can be deceiving. The more you analyse it, the more you understand how much research and attention to detail went into creating this case. It offers you an impressive collection of features, great thermal & acoustic performance, a highly modular and versatile design, impressive build quality, all mixed together in this perfect balance of subtle and elegant looks, which makes you stare at it and admire it’s beauty. In my book, if money is the only compromise, then it is worth it. This case will not disappoint you and in my opinion is one of the best cases of 2018! There, I said it.
The good:
+ Great build quality
+ Reversible interior
+ A very easy case to build in
+ Low noise output
+ Offers great airflow and therefore good temperatures
+ Smart and elegant solution for a wireless front panel
+ Outstanding attention to detail
+ Multitude of options for storage and cooling
+ Great design
+ Control hub
+ Integrated LED light bars
+ Tempered Glass
The bad:
- GPU riser not included for the vertical installation
- Maybe one more fan to be included at this price range
- No dedicated hole for the CPU 8 pin


