We are big fans of weird, intricate, overbuilt, quirky and special products. One such perfect example is this little jewel from Asus, arguably the best mITX Z97 motherboard ever built. Don’t believe us ? We shall see.
Although late to the party with our review, this is still an excellent board to upgrade to and we strong believe that there are plenty of reasons to choose this one instead of the newly released Skylake version.
First, about Asus:
ASUSTeK Computer Inc. is a Taiwanese multinational computer hardware and electronics company headquartered in Beitou District, Taipei, Taiwan. Its products include desktops, laptops, netbooks, mobile phones, networking equipment, monitors, projectors, motherboards, graphics cards, optical storage, multimedia products, peripherals, wearables, servers, workstations, and tablet PCs.
Asus is the world’s 4th-largest PC vendor by 2015 unit and operates around 50 service sites across 32 countries and has over 400 service partners worldwide.
The name ASUS originates from Pegasus, the winged horse of Greek mythology. Only the last four letters of the word were used in order to give the name a high position in alphabetical listings.
Price when reviewed : £ 197.99 - Via Amazon.co.uk
Asus MAXIMUS VII IMPACT LGA1150 Motherboard
Specifications & Presentation
First let’s go a little back in time to understand how this niche product evolved.
A few years ago ASUS released the P8Z77-I Deluxe which at the time was the first motherboard in the mini-ITX form factor which at the time was the undisputed king of the mini-ITX form factor, having an overbuilt VRM and power design, letting you push the limits of overclocking, unheard of until then because it was only reserved to full ATX boards.
Of course, the only thing one need sacrifice was some expansion capability. Usually mini-ITX motherboards were used for things like HTPCs where space and power savings were key. No one was interested in offering such a product. ASUS changed that with the P8Z77-I Deluxe because it was the first motherboard which allowed SFF builders to have everything they could have wished for.
ASUS eventually offered the Maximus VI Impact on the Z87 chipset, that allowed them to extend their leadership in the SFF market even further. Although it carried quite a high price tag, but the performance and capability were undeniable there.
So thus let us venture to the 2nd, official ROG incarnation of the Impact series, the VII Z97. Or the 3rd one if we count the P8Z77-I Deluxe as well.
* The last one the right, is the Z170 Impact VIII / Not to scale.
These are the (quick) specs:
| Form factor | Mini-ITX |
| CPU Interface | LGA1150 |
| Chipset | Intel Z97 |
| Memory | 2 x DIMM, Max. 16GB, DDR3 1333-3300 MHz Non-ECC, Un-buffered Memory Dual Channel Memory Architecture Supports Intel® Extreme Memory Profile (XMP) |
| Video Outputs | HDMI (4096×2160 at 24Hz, 2560×1600 at 60Hz) DisplayPort (4096×2160 at 24 Hz, 3840×2160 at 60 Hz) |
| Network Connectivity | Intel I218-V 802.11ac 2T2R Dual Band WiFi |
| Onboard Audio | Realtek ALC1150 via SupremeFX |
| Expansion SLOTS | 1 x PCIe 3.0 x16 1 x mPCIe 2.0 x1 (WiFi) |
| Onboard Storage | 4 x SATA 6 Gbps, RAID 0/1/5/10 1 x M.2 x4 |
| USB 3.0 | 4 x Rear Panel Ports (PCH) 1 x On-Board Header (PCH) |
| Onboard | 4 x SATA 6 Gbps Ports 1 x USB 3.0 Header 1 x USB 2.0 Header 4 x Fan Headers TPM Header Front Panel Header LN2 Mode Header Power/Reset Buttons ROG_EXT Header ProbeIt Measurement Points |
| Power Connectors | 1 x 24-pin ATX 1 x 8-pin CPU |
| Fan Headers | 1 x CPU (4-pin) 1 x CHA (4-pin) 2 x CHA (4-pin) via CoolHub PCB |
| IO Panel | HDMI DisplayPort Two Digit Debug USB BIOS ROG Connect Button SoundStage Button Keybot Button 4 x USB 3.0 4 x USB 2.0 PS/2 Combination Port Intel Network Port SupremeFX Audio |
| Warranty Period | 3 Years |
| Product Page | Link |
Let’s analyses the features, courtesy of ASUS’ website.
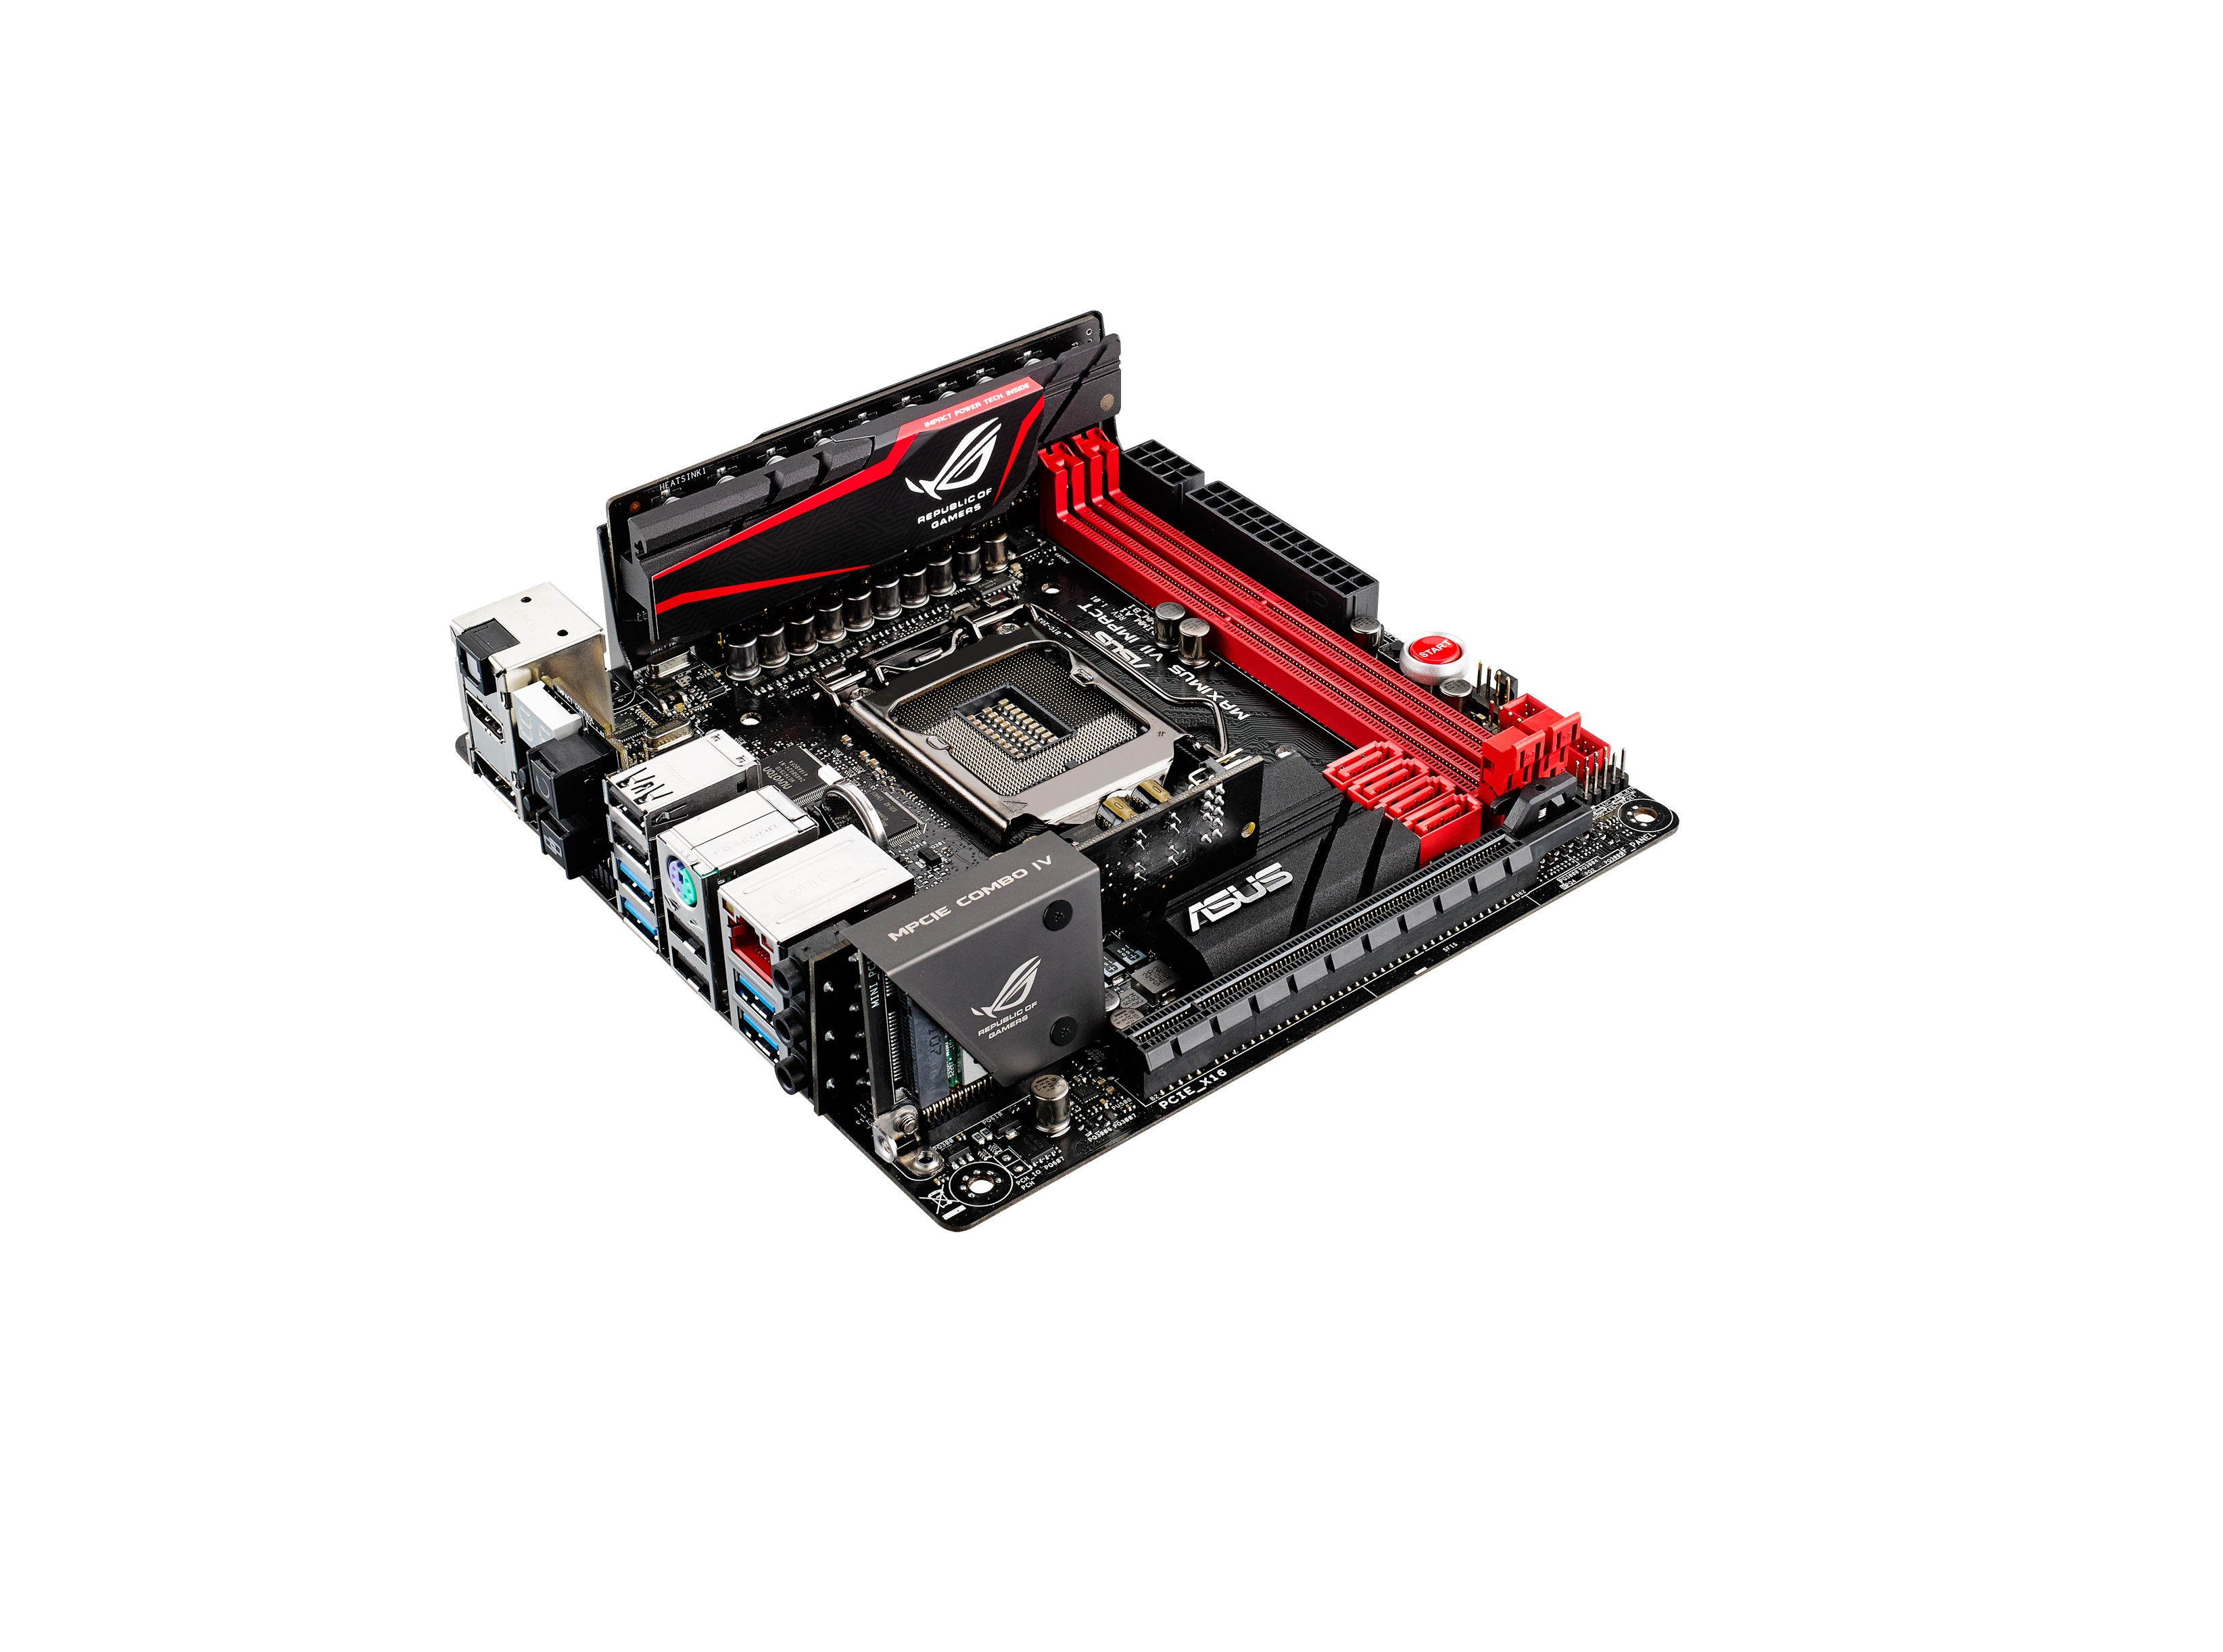
At first glance, we see the famed ROG red and black colour scheme, and that every square inch is packed.
Called Impact Power II, a separate daughter board houses an 8+2 phase power delivery system that gives the M7I strong overclocking potential.
Other key features include a 32Gbps PCIe 3.0 x4 M.2 connection, 802.11ac Wi-Fi, the innovative CoolHub fan hub, Impact Control II, and SupremeFX Impact II audio.
The power delivery is what we like to call it, overbuilt. ASUS integrated a similar power system as found on the Maximus VII Formula ATX board. The power system combines 60A-rated BlackWing chokes, NexFET MOSFETs with a 90% efficiency rating, and 10k Japanese-source Black Metallic capacitors onto an upright board to minimize the footprint of those components.
Additionally, ASUS integrated their updated SupremeFX Impact II audio system for superior audio fidelity using the included SupremeVX Impact II add-in card. Which has many of the same attributes ASUS uses on their larger ROG motherboards where an onboard audio solution is used. EMI reduction is achieved with physical isolation and a shield over the Realtek CODEC IC. You’ll also find premium Japanese-made ELNA audio capacitors used.
Then Sonic Rador 2.0 is designed for first person shooters. The Sonic Radar II is an overlay that shows where the sounds are coming from. No more worrying about where that shot came from, now you can hear and see where it’s coming from.
And what makes us giggle with joy, is the fact that is the first motherboard to have a double sided mPCIe combo card. Named exactly that, the mPCIe Combo IV features an 802.11ac/Bluetooth card on one side, and a M.2 x4 SLOT on the other. Thus making the Impact VII far as my knowledge goes, the only Z97 mITX board to support a full speed 4x M.2 NVMe SSD. The M.2 slot will support all of the socket 3 card sizes, 2242/2260/2280/22110. A very cleaver solution implemented by ASUS, no to mention the full speed support.
We tackled the main highlights. There are more which we will present later at the appropriate section.
Packaging
The box theme is what we’re used to seeing from ASUS with its ROG offering. Most of the action happens at the back and under the flap covering the front. While the front is dedicated to minimal graphics and a few icons, around back is a more detailed list of the features and specifications.
All mITX motherboards have small boxes for obvious reasons but the Impact’s has double the height because of such a rich accessory bundle which we will soon present.
Lifting the flap reveals even more features the Impact has to offer. Most of what we see here was mentioned above, but the packaging does a nice job of letting a potential buyer get a feel for the motherboard’s capabilities.
Inside we are greeted by a lot of ..stuff. It is the first layer which holds a port of the accessories.
Under all of them there is a transparent plastic cover.
All the included bundle, and we might add, it’s a lot for any board, especially of a mITX one.
1x User’s Manual
1x I/O Shield
1x SupremeFX Impact II audio card
1x mPCIe Combo IV card with dual-band WiFi 802.11 a/b/g/n/ac + Bluetooth v4.0 module
1x ASUS 2T2R dual band Wi-Fi moving antenna (Wi-Fi 802.11a/b/g/n/ac)
1x Impact CoolHub card
1x ASUS Q-Cable
4x Washers for CPU cooler backplate
4x SATA 6Gb/s cables
1x 12 in 1 ROG Cable Labels
1x ASUS ROG sticker
2x Warranty/booklets
Let’s take a closer look. First the SupremeFX Impact II audio card. Secured onto the motherboard via 2 screws. On the right we see a protection pad and this time they put the front speaker plug parallel/onward compared to the previous generation that interfered with CPU cooler because it was perpendicular.
Then the mPCIe Combo IV card adapter. ALso secured by 2 screws, 1 on the motherboard’s PCB and another one from the outside via the I/O shield.
On this side we see the dual-band WiFi 802.11 a/b/g/n/ac + Bluetooth v4.0 module.
And the plugs that fit the included WiFi antenna.
And on the other side is the slot where a M.2 SSD will slide in. A very clever design made my ASUS and thus it will accommodate any M.2 length.
ANd finally the Impact hub. It offers 2 extra 4 pin fan connectors which brings to a total of 4 on the motherboard. And it also has a LN2 jumper if you wish to do some extreme liquid cooling as well.
Let’s proceed onto the board.
Visual examination
Being a ROG board it caries the well known red and black color theme. Then it impresses you by how crammed it is with features but still very well distributed.
The secret to so many features is that after the engineers used every square millimeter of the PCB, they started to go vertically. Up to 7 draughtboards. For example the VRM and power delivery. With a very nice heatsink. On the left we see the main CPU 4 pin/PWM connector.
On the other side it also has a protective plate plus a sticker.
The LGA 1150 socket it located in the center of the motherboard thus it should give enough clearance for many CPU coolers and combined with the well placement of everything on the board, there should be no no interference.
Another example of this is that the 8 pin EPS and the 24 pin plugs, both are in the same location, parallel with the 2 memory DDR3 slots, greatly improving airflow, cable cluster and overall a clean look. Again it is all in the details and this motherboard is a prime example of this philosophy.
Then on right side we have the start/power on button and the second 4 pin/PWM fan header. Moving a little down, we have 4x SATA 3.0 plugs, the front USB 3.0 header, the Z97 chipset’s heatsink and on the bottom the single PCI-E 16x slot, in black (the MI6 had it red). Under the socket lays the removable BIOS chip.
Onto the left the Sumpre FX Impact II audio card, right below it even has voltage check point and the bracket for the mPCIE combo card.
Upwards we have also mounted vertically in its own special slot, the battery. Looking close we see the nuvoTon NCT6791D Super I/O Controller, then next to its right diagonally the ASUS KeyBot Microprocessor. Finally the TPM and Impact hub headers, near the I/O ports.
Speaking of I/O ports, the rear panel of the motherboard integrates the Impact Control II PCB, giving users a two-digit debug LED as well as BIOS Flashback, ROG Connect, SoundStage and KeyBot buttons. Added into the mix are two digital video outputs (HDMI and DisplayPort), 4x USB 3.0 ports (blue ports), 4x USB 2.0 ports (black ports), a PS/2 combination port and the Intel I218V Gigabit Ethernet. Further along to the right are the audio and mPCIe combo card outputs.
The back of the motherboard, again packed with soldering points and in the center we have the socket bracket.
And here are some size references to put into perspective how tiny this board is.
Next to the Asus ROG Maximus Hero VI Z87 which is an ATX board - 244 by 305 mm.
The Build
Hardware used:
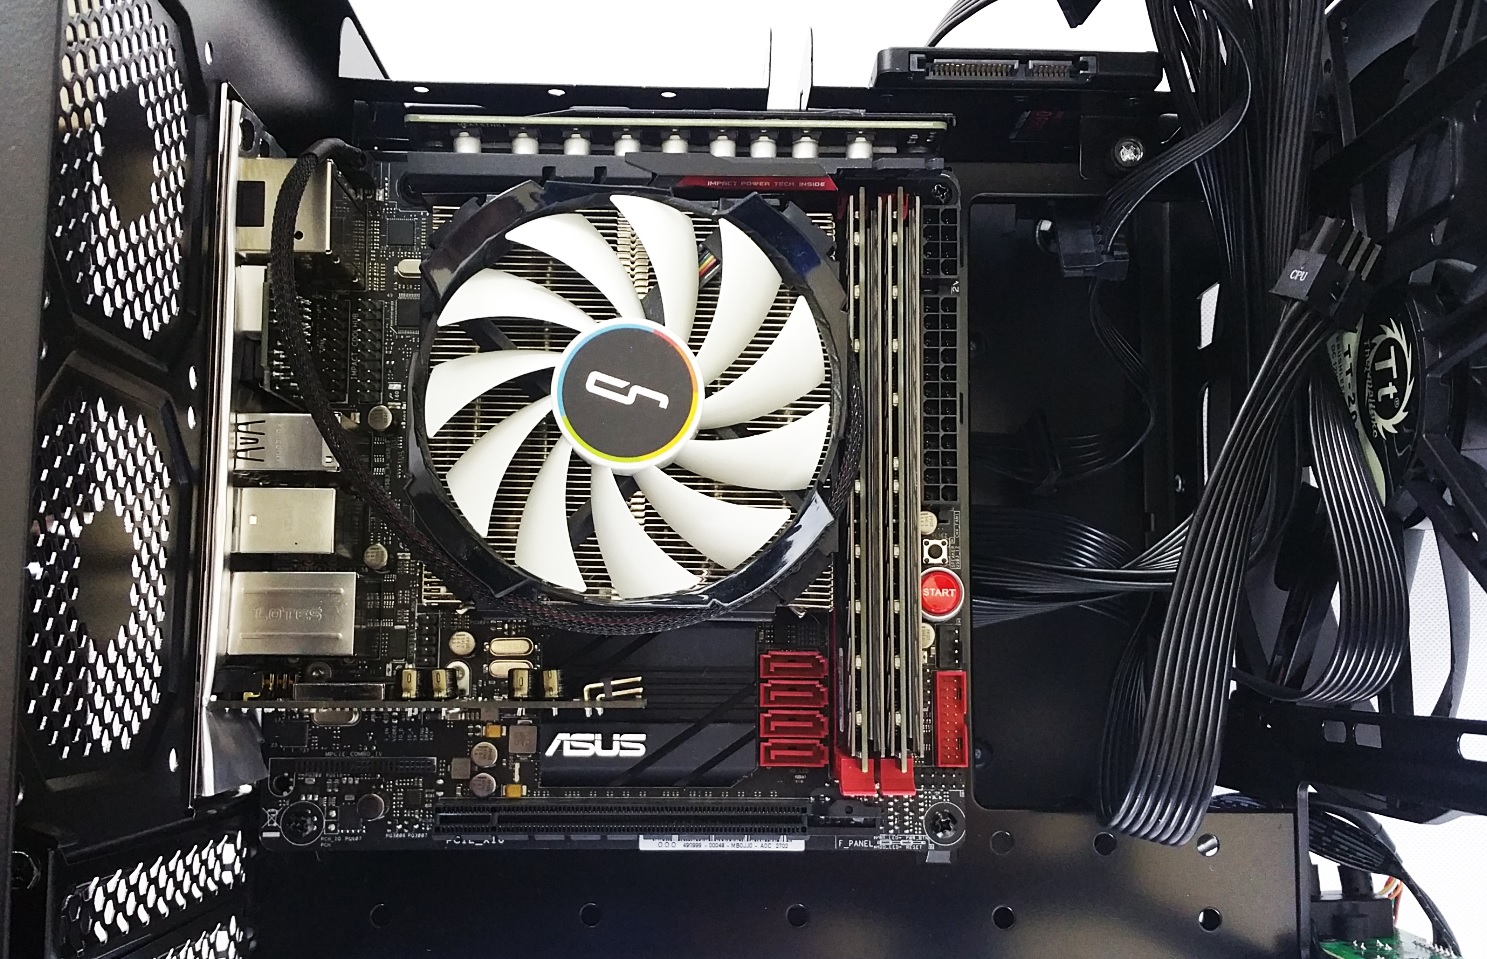
- CPU: Intel i7 4790k
- CPU Cooler: Cryorig C7 & Reeven Okeanos
- SSD: Samsung 840 Pro 512 GB MLC
- *M.2 SSD: Samsung 950 Pro 512 GB MLC
- Memory Modules: 16 GB (2x 8 GB) DDR3 Crucial Ballistix Tactical Tracers 1600 Mhz CL8 LED
- PSU: Corsair SFX 600W
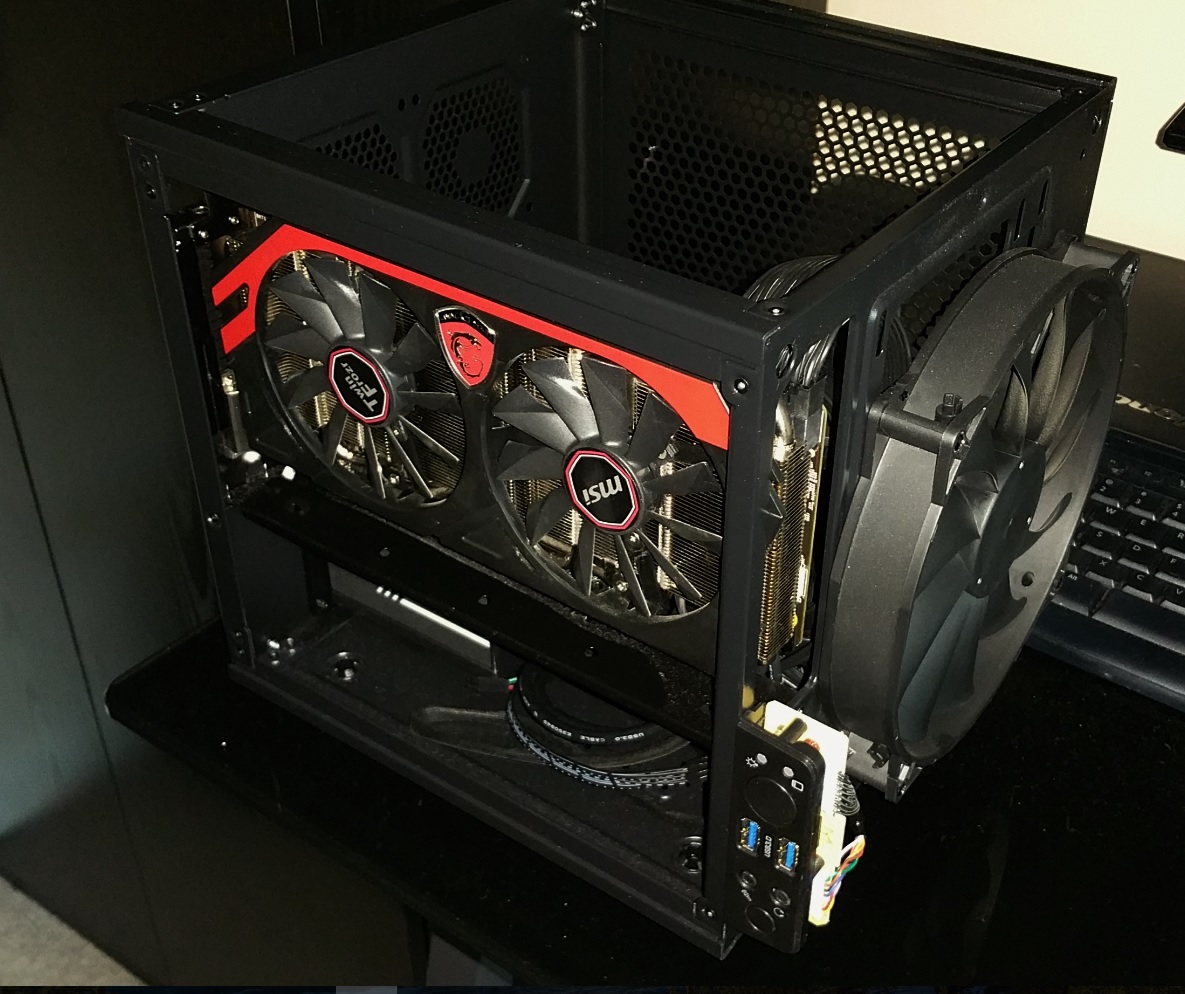
- Video card: MSI GTX 770 2 GB OC TwinFrozr IV
- Case: Thermaltake V1 Core mITX
- Fans: 1x Thermaltake 200 mm
* Updated: 30.07.16
Software:
- Windows 10 Pro x64 Build 1511.10586
- Crystal Disk Mark v3.02
- Cinebench R15
- Wprime v2.10
- SuperPi v1.90
- Gimp v2.8.16
- Handbrake v0.10.5
- MSI Afterburner v4.11
- Witchery 3 v1.21
- DOOM (2016)
A top board like this deserves a top end CPU like the i7 4790k.
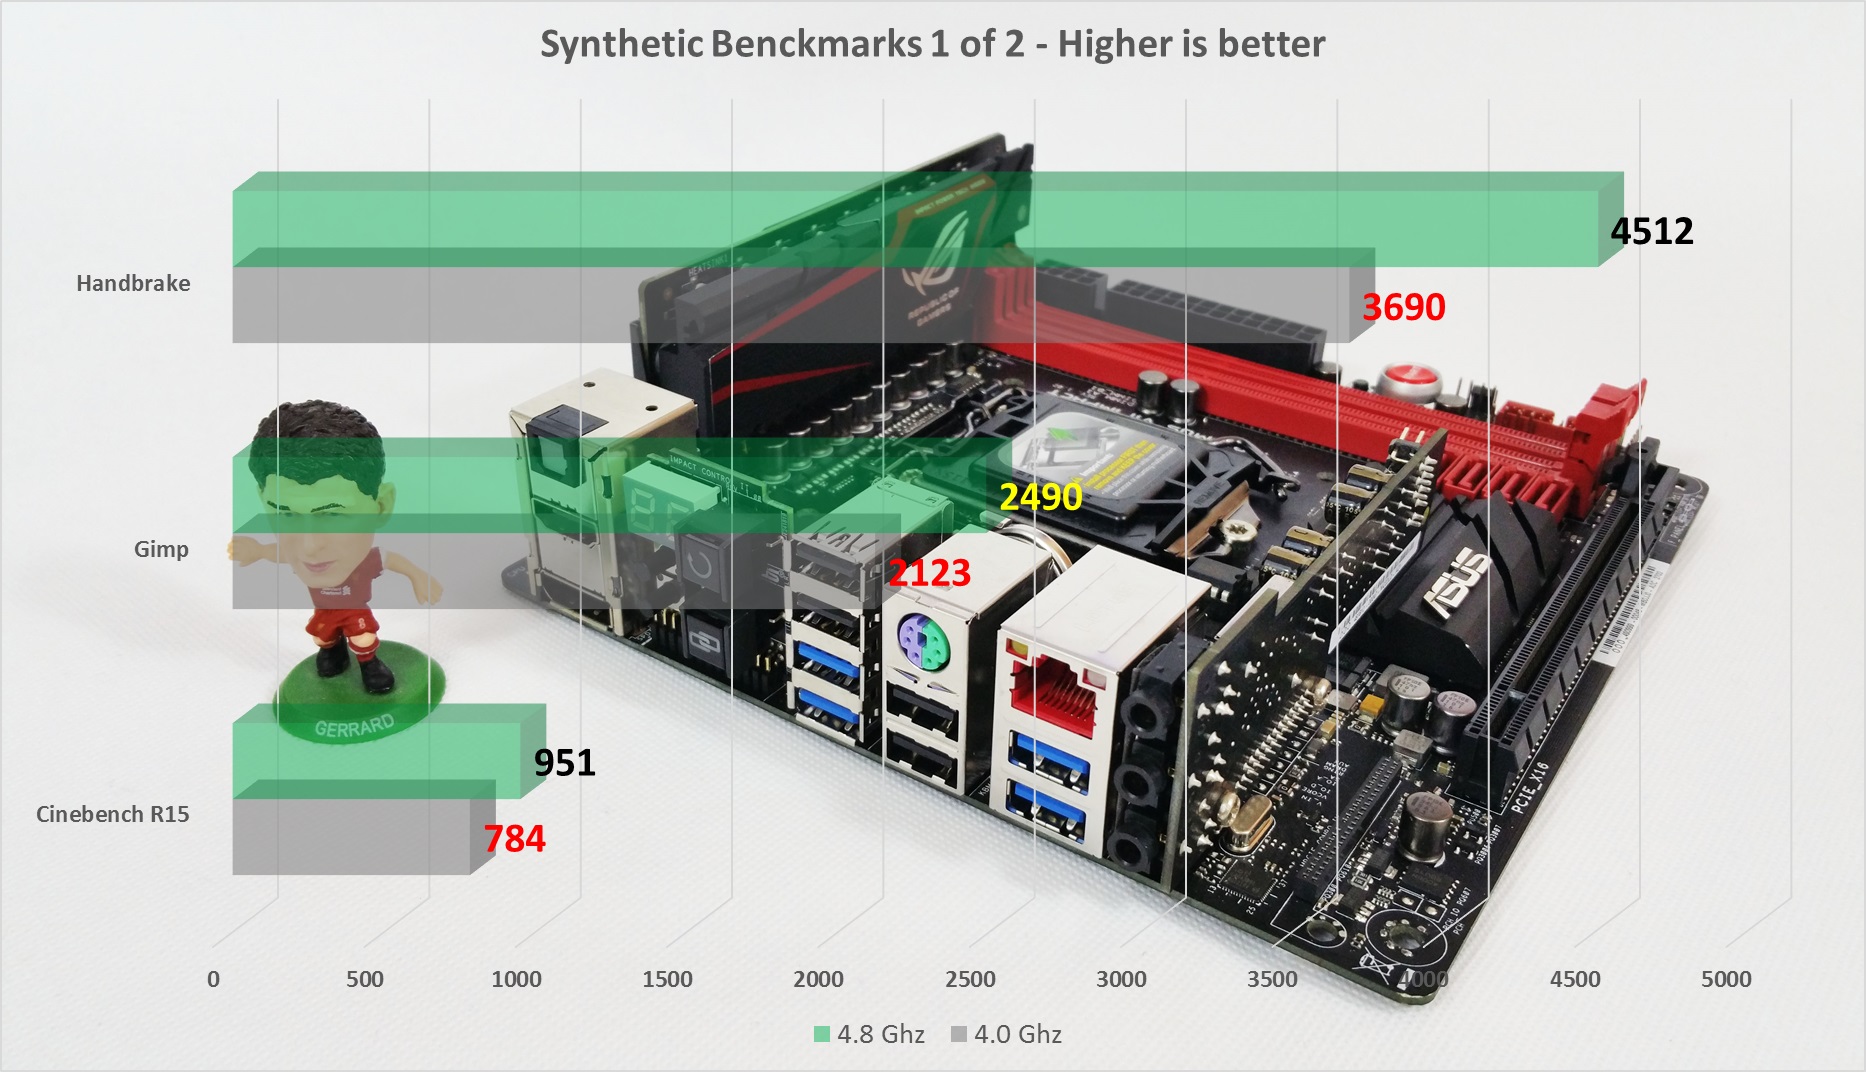
We will run the tests at 4.0 Ghz locked with the C7 at 1.050v and then with the Reeven Okeanos at 1.310v for 4.8 Ghz.
The memory was set to its XMP profile for stock and OC testing.
Power consumption was measured via our Prodigit 2000MU wattage wall adapter.
*Unfortunately we did not have a M.2 SSD x4 to test the capabilities of the port but we will revise the results when we get our hands on one.
Updated: 30.07.16 - Now we do.
Take the MPCIE Combo IV and just slide in the M.2 SSD drive.
Then insert the unit in the designated spot - in between the video card and the Supreme FX 2.0 Sound Card.
Secure it via 2 screws - one from the bottom and one inwards from the I/O shield.
BIOS UEFI and Bundled Software
The BIOS of the MI7 is pure madness. 90 % of these setting are to be expected that you will will find them in professional overclocking environments.
Here we have the compact / EZ mode (by pressing F7).
Here we have the name of the motherboard, the BIOS version, the CPU installed, the speed of the CPU, the memory installed in each DIMM slot, the speed of the memory, the CPU temperature as a graph, the CPU voltage, the motherboard temperature, installed storage, an option to enable XMP, the current fan speeds, a quick overview of the fan profile, a section for EZ System Tuning and Boot Priority. As far as lists for the front page of a BIOS go, that list is pretty extensive and complete. For a system builder or debugger, this is a lot of information all at once on the first screen.
Then the Advanced Mode, pressing again the F7. Now things get even more interesting because this Impact VII is on overclocker’s dream tool. There are so many details to tweak and fine tune that makes this motherboard mind boggling.
You can control the fans individually and set custom thresholds.
The EZ Flash Utility 2 is the main option to update the bios to your motherboard. Just put your USB stick (formatted before to FAT32).
From the BIOS you can even secure erase your storage if desired.
An interesting feature is the EZ Tuning Wizard (activate it by pressing F11) that will evaluate your desired preferences and give an optimized increase/OC. In our case was offering a 10 % increase for the CPU and an 22% for the RAM.
And this is a quick glance at the BIOS because to see every nook and cranny we would have flooded the review with to many pictures.
So let’s move to the included software. Of course it offers a lot here, as well.
The ASUS AI Suite follows the same pattern from the previous iteration. Nothing to complain about.
First up is the RAMDisk which allows users to set a designated space in the DRAM for either a RAM Cache or a RAM Disk depending on how you want to use it. This will give you stellar performance. And most important you cat set up via the Junction tab where all files are automatically saved and restored to their specific locations on hard drives when you turn your PC off, then they go back to RAM when you power on again.
Another interesting one is Sonic Radar which implements an on-screen directional audio display during games. You can benefit a lot from first person shooter games, where it detects which direction the audio is coming from and how strong it is. Thus it can help you in giving you and edge in game-play.
You can fine tune it to choose exactly what you need. Mind you, take notice of the official competition to not be accused of cheating.
Then a new software specific to the 9 series Haswell motherboards, KeyBot allows users to adjust their function keys to specific macro bindings. For example users can implement a fast keyboard macro in the main section of the screen.
You can also set up your Function keys for varied needs.
Now let’s proceed with the AI Suite. This is the main interface.
The first in line is the Dual Intelligent Processors 5 which offers 5 different options.
These five options are TPU (for overclocking), Fan Xpert 2 (for fan control), DIGI+ Power Control (for digital power control), Turbo App (for overclocking targeted apps) and EPU (energy saving).
With TPU you can overclock “per core” or “all cores” plus the options for voltages.
You can even overclock the integrated graphics, when of course the user has no dedicated video card.
Then with the Fan Expert 2 you can adjust each fan separately, with options for spin up or spin down time plus a demonstration of the low speed zone in the graph. You also have set profiles and can create our own.
Next is the The DIGI+ Power that gives you control to adjust the limits of the power phases and thermal control to push them as high as possible.
The Energy Processing Unit (EPU) involves how the system delivers power and can be adjusted to deal with low power situations to limit the maximum system power as well as adjusted fan profiles.
Now let’s proceed to see how the Impact VII performs.
Testing - Benchmarks and Overclocking
Cinebench R15 - is a real-world cross platform test suite that evaluates your computer’s performance capabilities
4.0 Ghz - 784 points
4.8 Ghz - 951 points
Gimp - is an open-source image editing application that simulates how well a PC can manipulate a collection of large digital photos, and to achieve a low time requires a PC with a powerful CPU, plenty of quick memory and efficient access to storage.
4.0 Ghz - 2123 points
4.8 Ghz - 2490 points
Handbrake - is a multi-platform, multi-threaded video encoder that encodes a HD video using the H.264 codec and tests the multi threaded capability of the CPU.
4.0 Ghz - 3690 points
4.8 Ghz - 4512 points
Super Pi (1M) - is a single threaded benchmark that calculates pi to a specific number of digits.
4.0 Ghz - 9.125s
4.8 Ghz - 7.549s
Wprime - is a leading multithreaded benchmark for x86 processors that tests your processor performance by calculating square roots with a recursive call of Newton’s method for estimating functions
4.0 - 6.023s
4.8 - 4.905s
Gaming Results
Power Consumption
Thanks to it’s excellent power delivery and lower secondary voltage levels, as automatically set by the motherboard, overclocked power consumption numbers for the Impact VII Impact are really good.
Storage Tests
Again, the only mITX Z97 motherboard to support full x4 PCI-E 3.0 bandwidth NVMe SSDs.
So the numbers speak for themselves.
First is a regular SATA SSD - the Samsung 840 Pro 512 GB.
The one on the right is the M.2 - Samsung 940 Pro 512 GB
Here we have a test copy from the SATA SSD to the M.2 SSD. The a full throttle copy from the M.2 to itself. This is where we like to see how if the writes is sustained.
Mind you when using the M.2 port, the available bandwidth drops from 16x to 8x 3.0 for the video slot. Still no problems with modern GPUs but a small heads up.
Conclusion
One of the best products we have ever tested so far and one of the best motherboards, maybe the best mITX Z97 motherboard out there.
The good
+ Overbuilt power delivery
+ Innovative board layout with no compatibility issues
+ Multitude of options, features and ports
+ Excellent UEFI
+ The only Z97 mITX motherboard to support M.2 PCIE 3.0 x4 speeds
+ Overclocks like a dream
The bad
- No PWM control for the extra 2 fans, on the Impact Hub
- Very expensive, maybe the most expensive mITX Z97 but this is a niche product, almost halo.
- When using the M.2 port, the available bandwidth drops from 16x to 8x 3.0 for the video slot.


