

Today we cover the 240mm variant from Alpenföhn’s “Gletscherwasser” (Glacier Water) premium AIO water cooling solutions, that also possess addressable RGB lighting. This series includes a 360, 280 and this 240 in question but only the 360 and the 240 offer the ‘High Speed’ 120mm fans (2200 RPM vs 1600 RPM), which is our test sample as well.
To further point out is the fact that this lineup of AIOs has been done in cooperation with the overclocking superstar Roman “der8auer” Hartung. The highlights don’t end here, since you also get a Thermal Grizzly Hydronaut thermal paste and you can even change the logo plates for the CPU pump.

Alpenföhn is a company which manufacturers cooling components for IT systems, which started its activity in 2008. The Alpenföhn line includes CPU coolers, fans and accessories which include: thermal compound, storage cooling systems and fan mounting systems.
The Alpenföhn brand was created by the company EKL AG, founded in 1995, it is a company specialized in manufacturing industrial cooling solutions.
Prices and Availability
This High Speed variant retails for under £130 for this 240mm which is great value for money, given the specs and highlights alone. It’s worth mentioning that the whole Gletscherwasser series can be had in an all white flavour as well.
Presentation and Specifications
* Courtesy of their website.


Visual Inspection
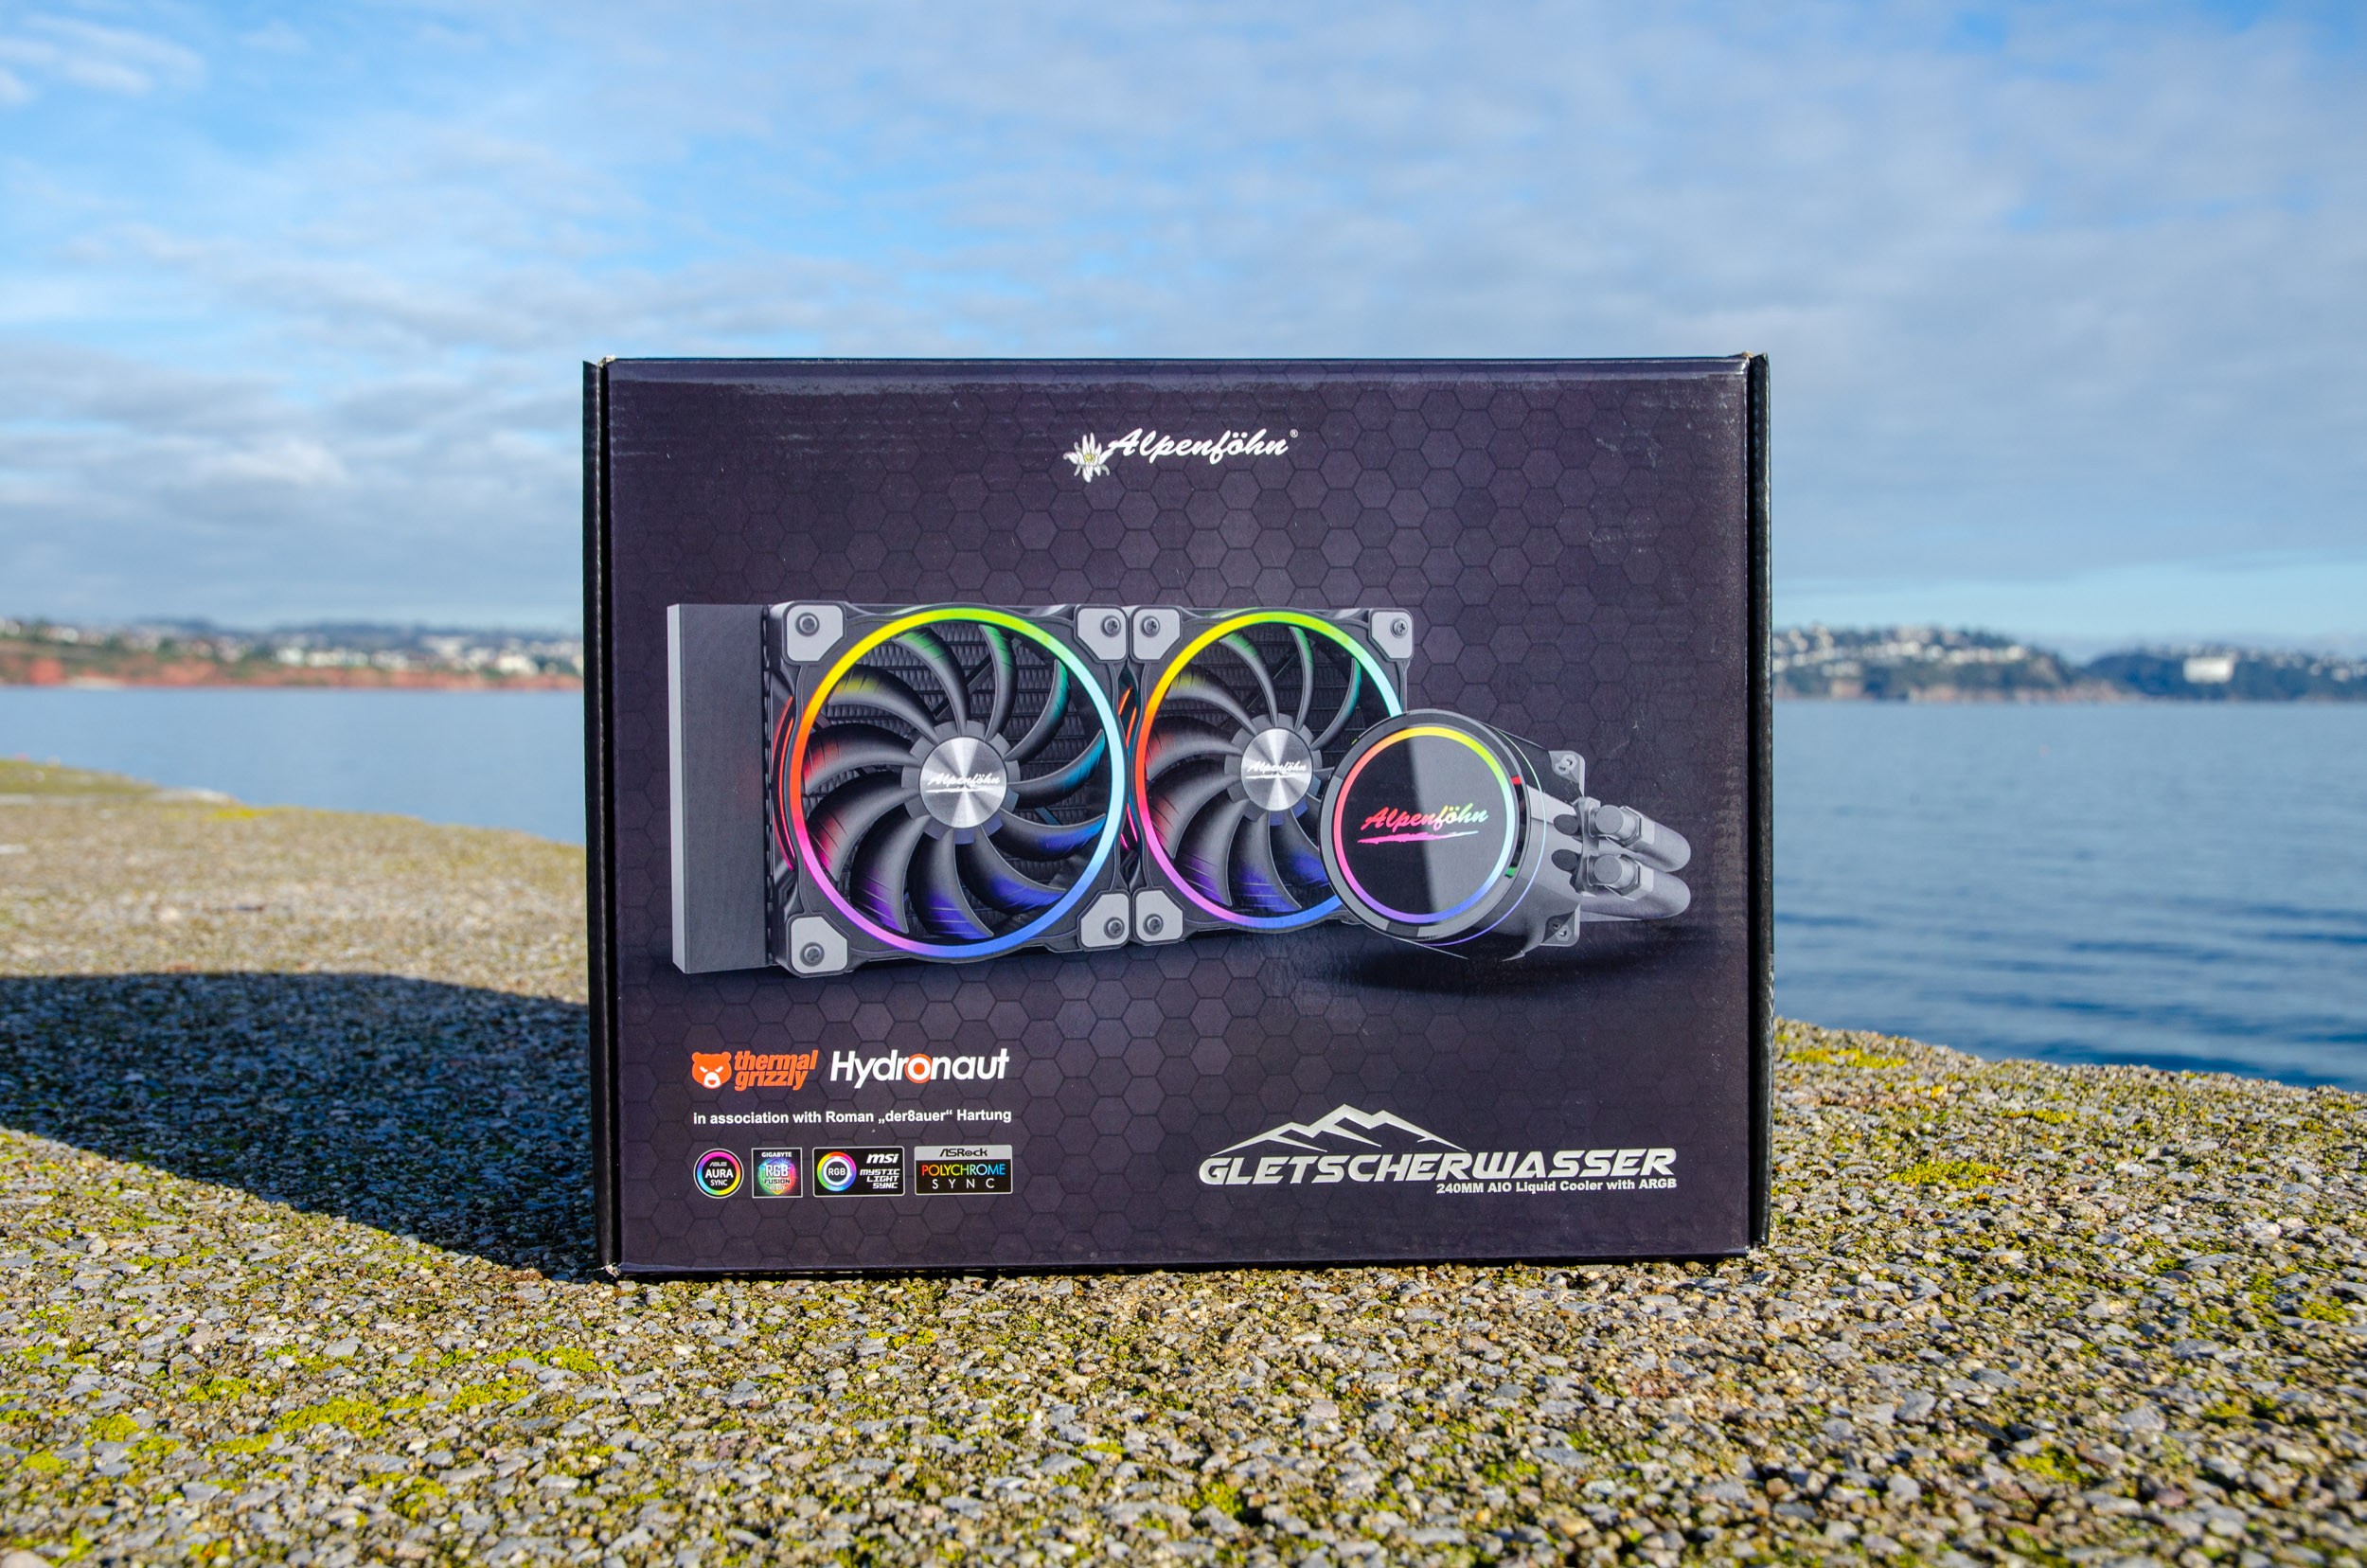
The overall theme is minimalist but vivid and reminiscent of this Crysis suit theme for the background. The most important bits include the fact that this AIO series was made in collaboration with the famous overclocker “der8auer” and that it comes with the Thermal Grizzly Hydronaut thermal paste. Regarding RGB implementation, we find out that it supports all of the lighting software from all of the main motherbaord vendors.
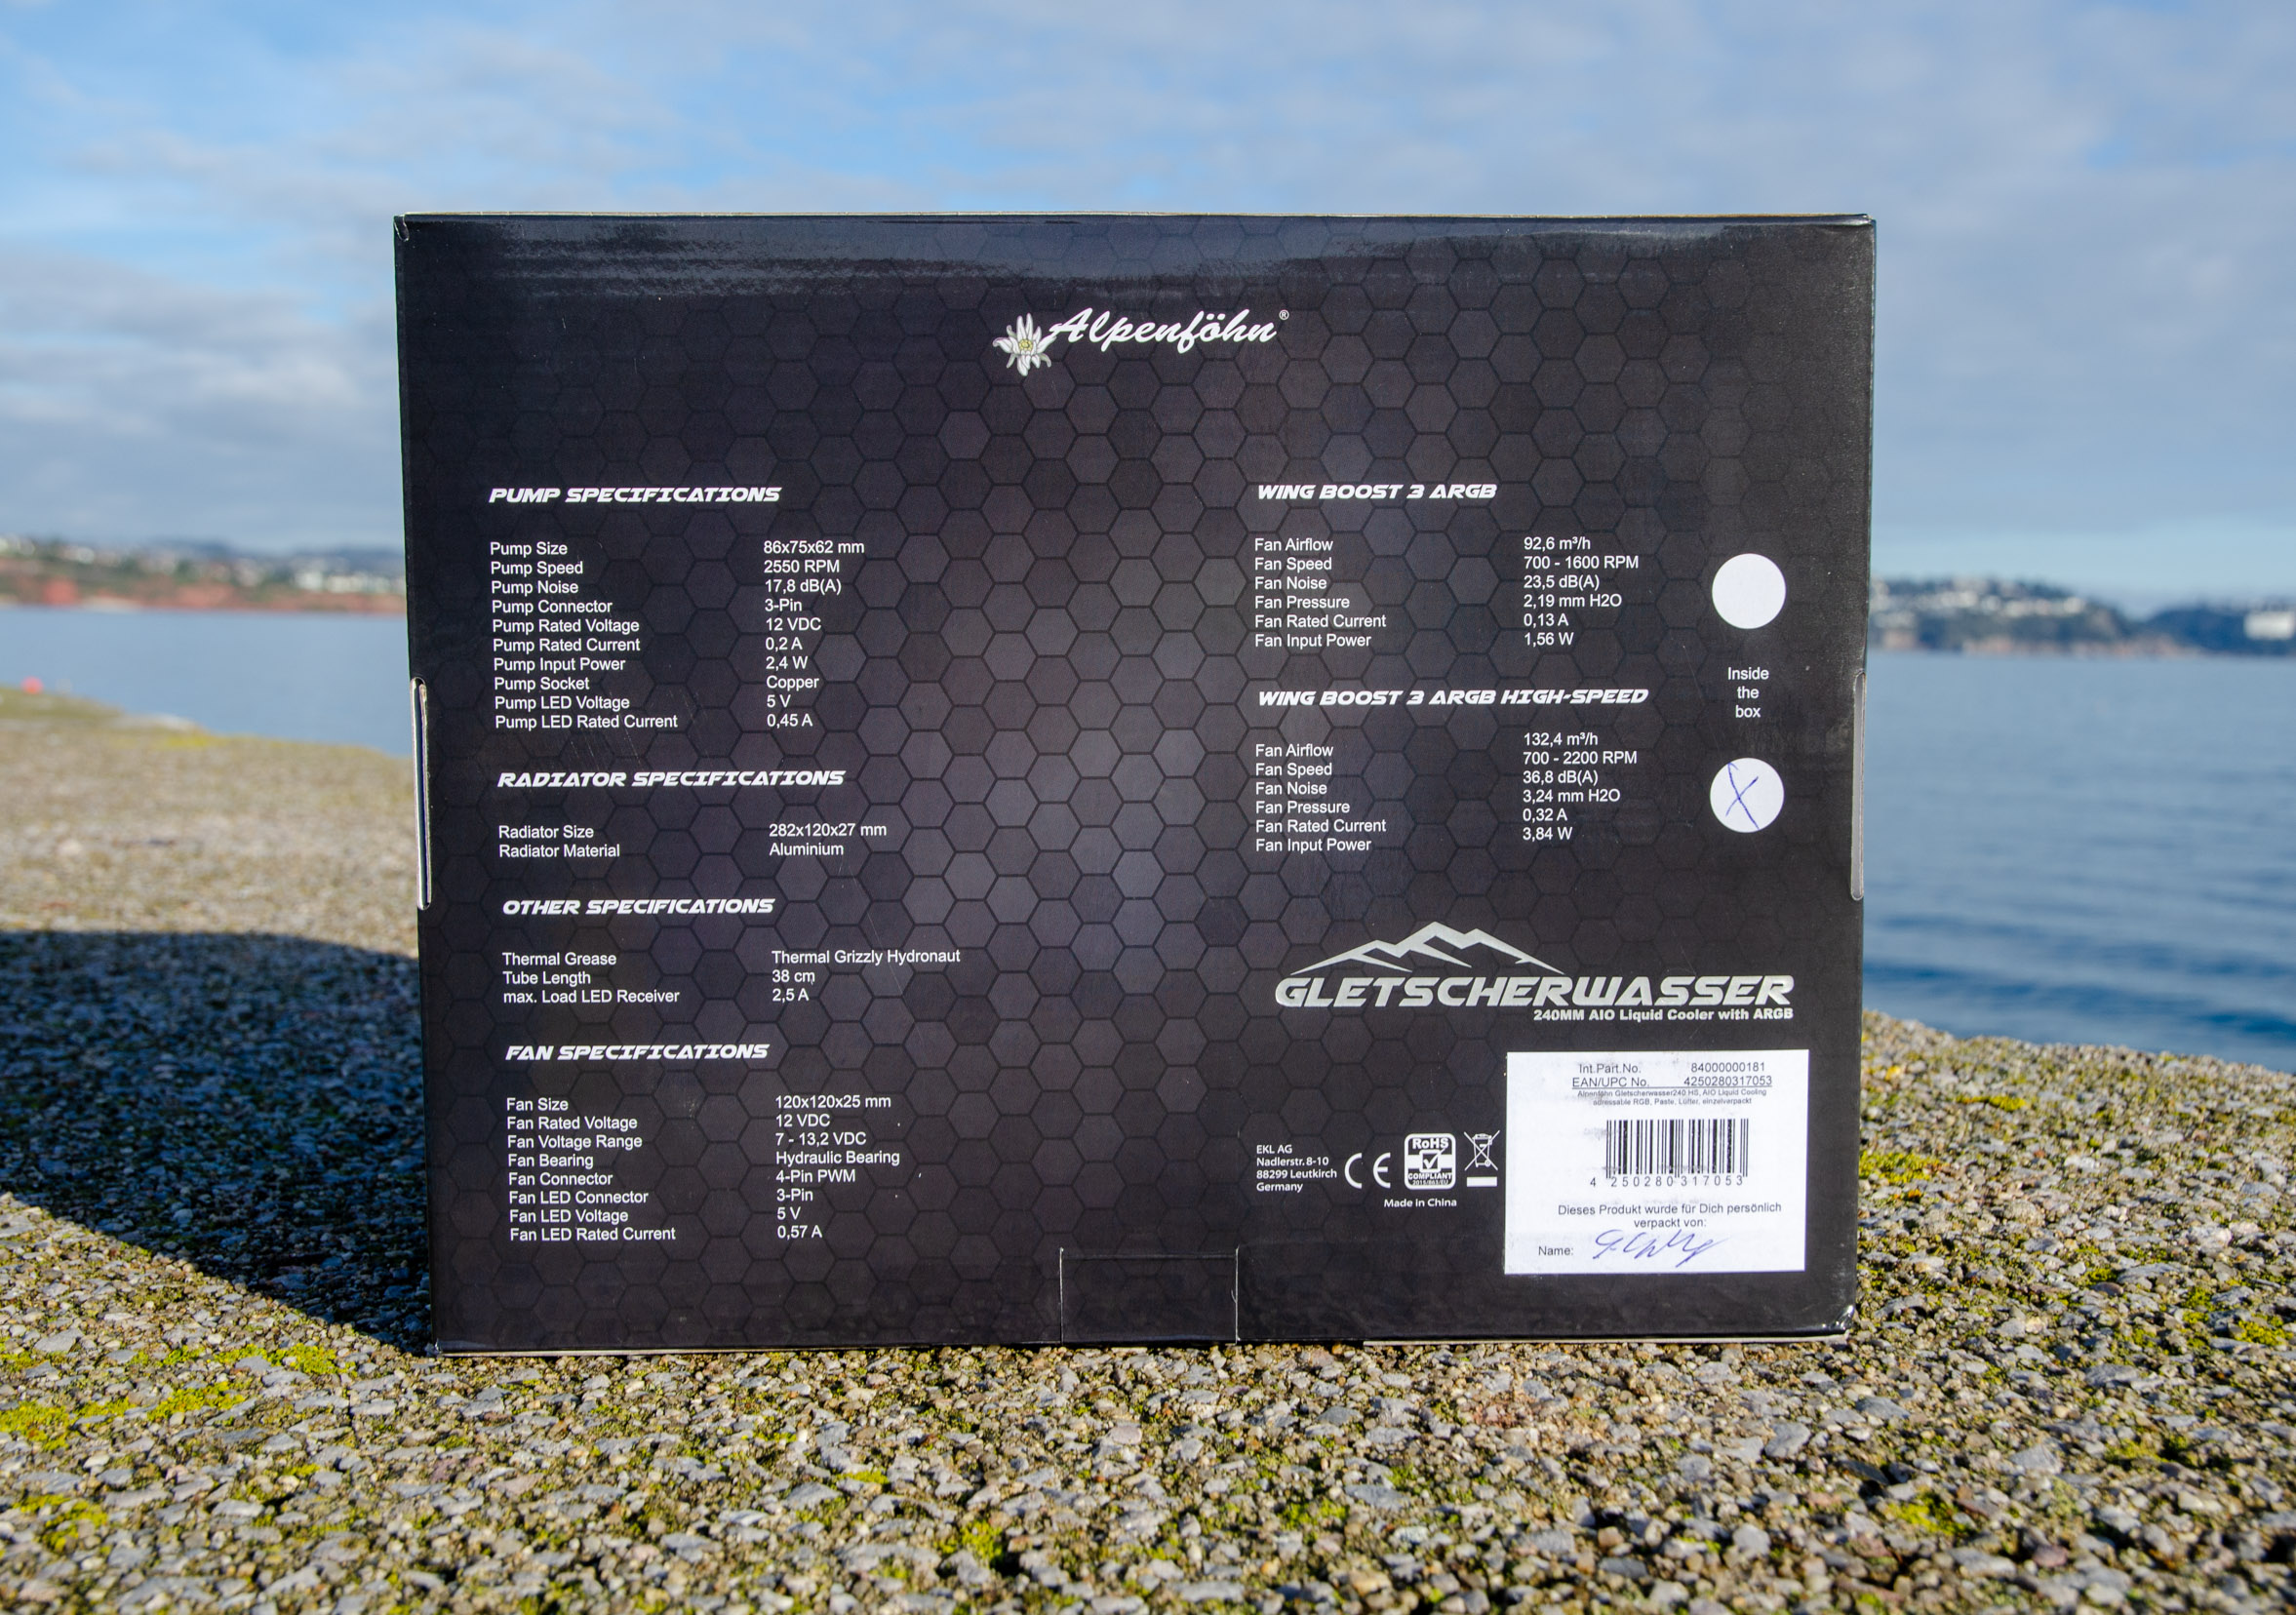
On the back we have the full specs for the radiator, pump and fans. We further notice that the ‘High Speed’ bracket is selected to reflect the contents while on the bottom right corner we have the hand signature of a quality control agent under the bar code.

This side houses a list of all of the main highlights and the socket checklist, which is present on this side as well. It’s impressive to see that it even supports the big Threadripper sockets.


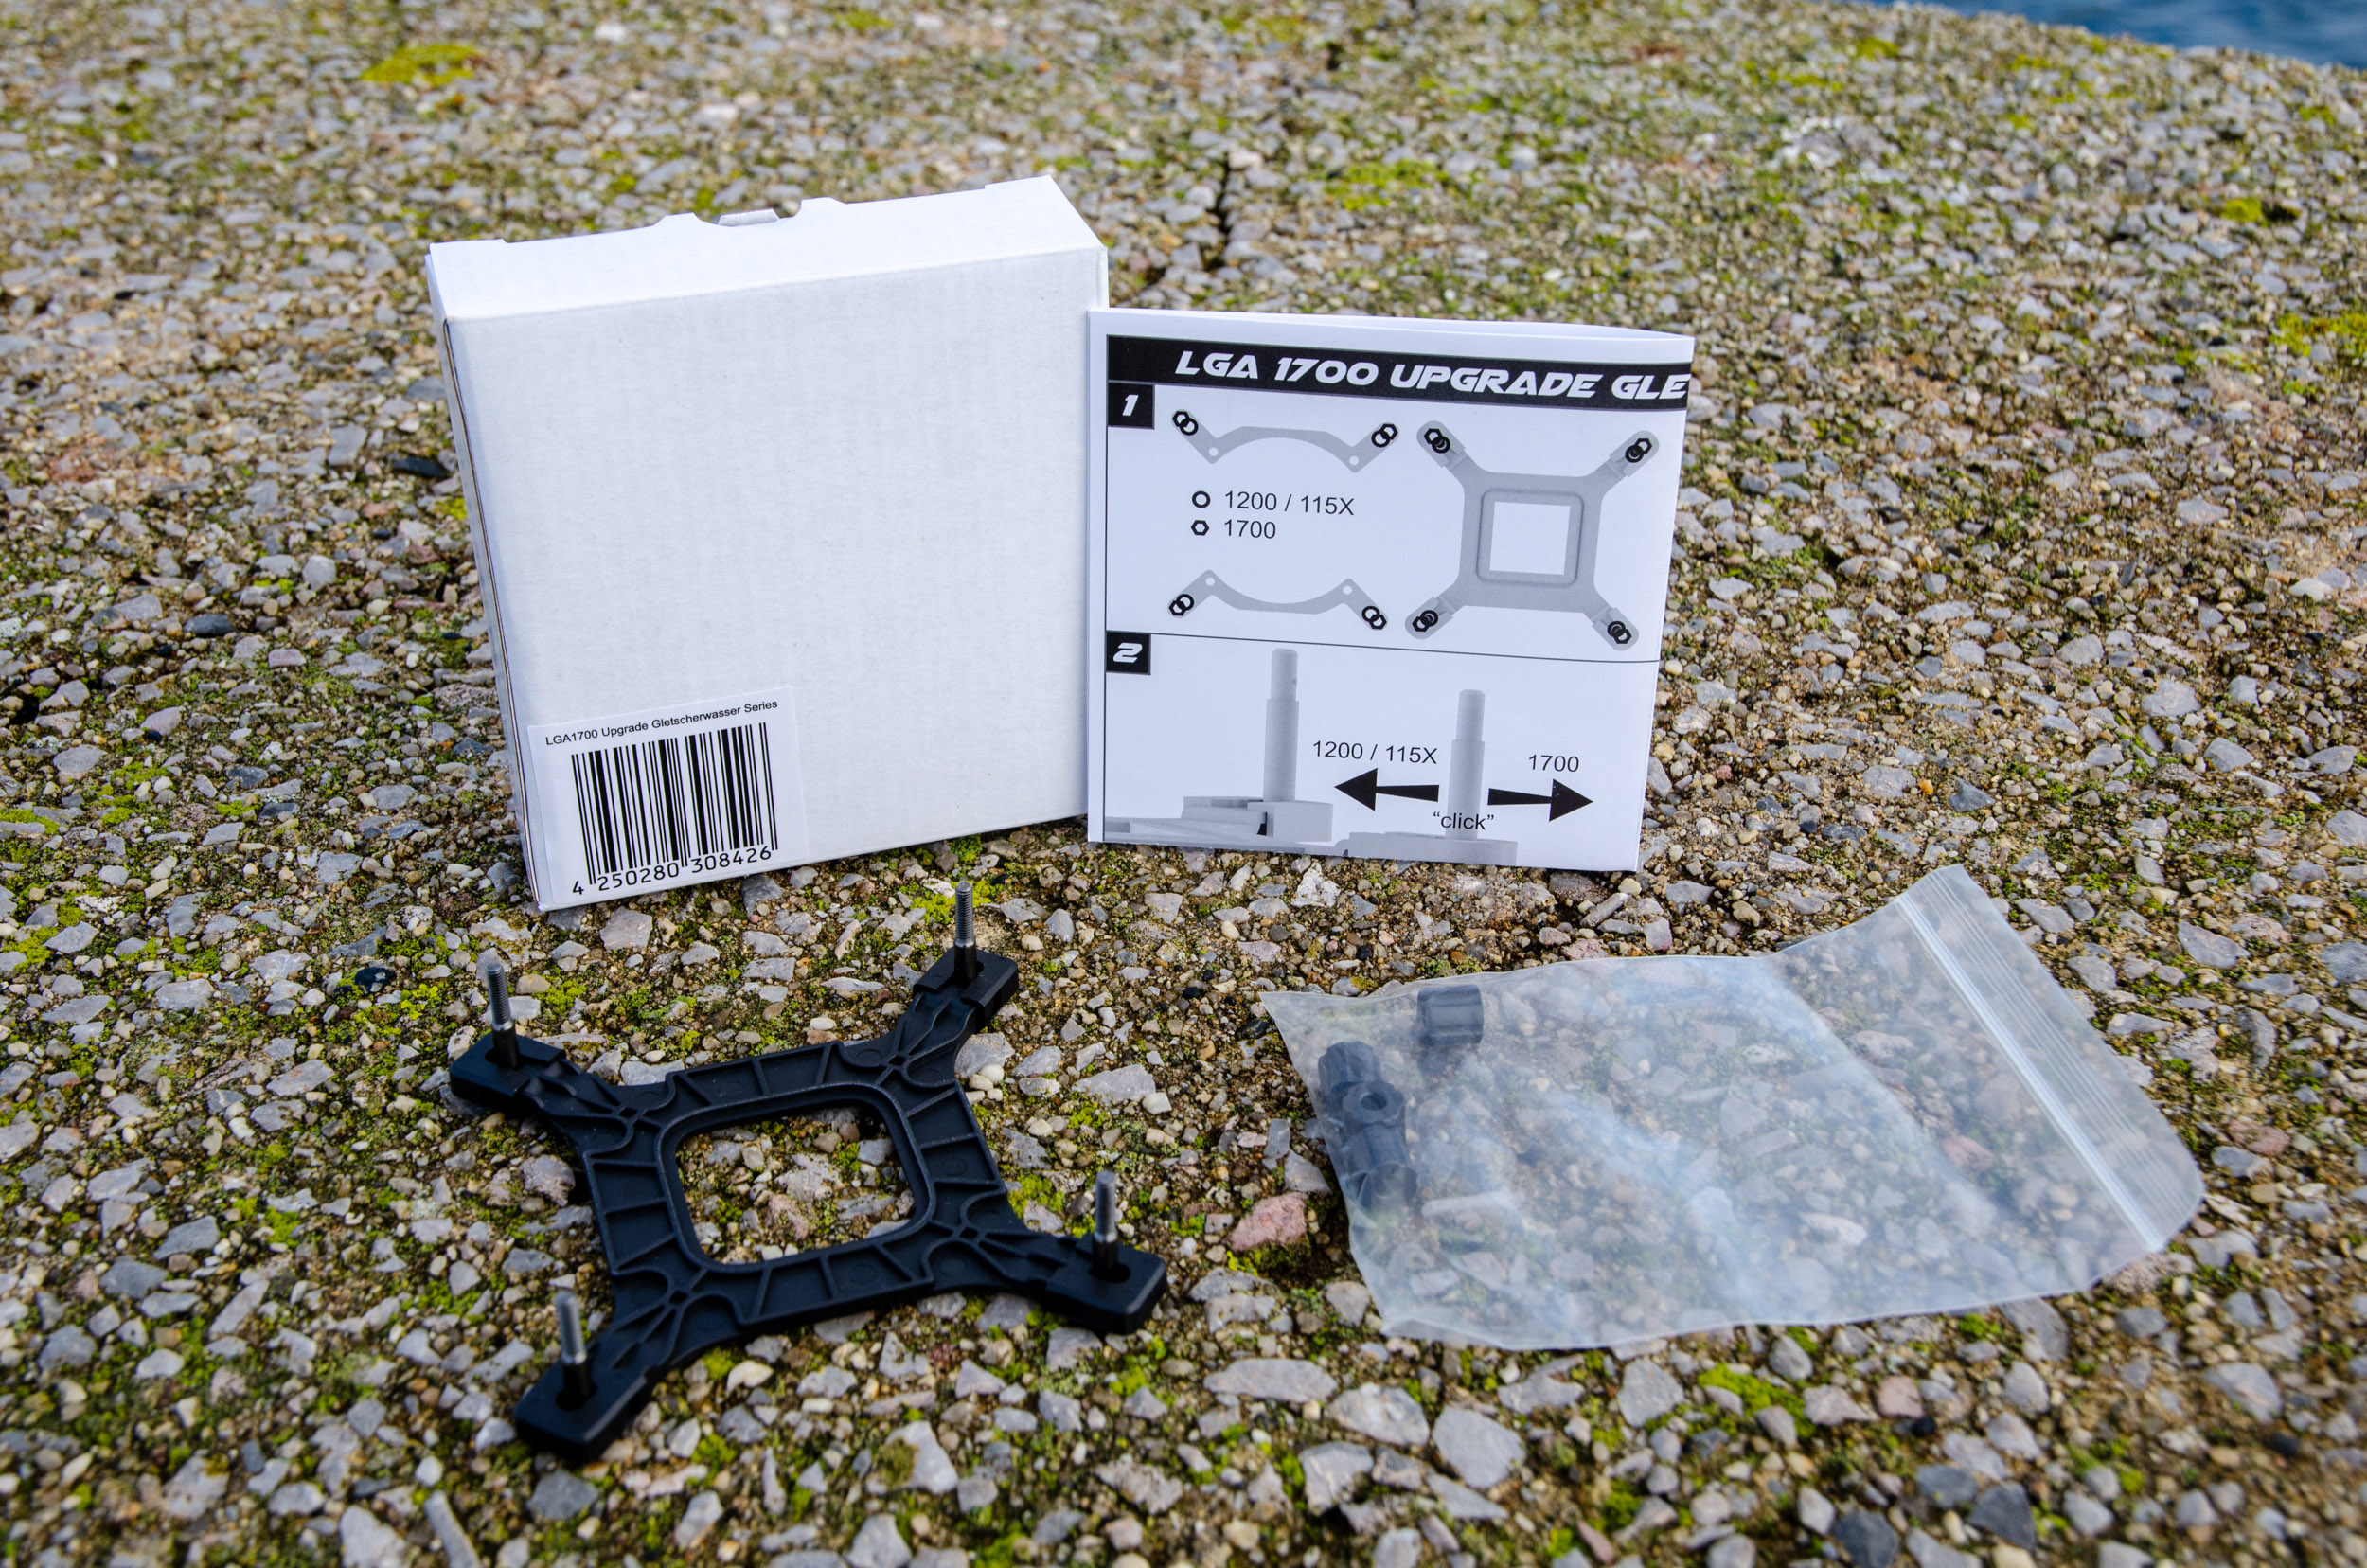
A keen eye will point out that where is the newest LGA1700 support? Well, our test sample came with this separate upgrade kit. We must assume that future retail orders will contain this kit by default or will come included in the main package.
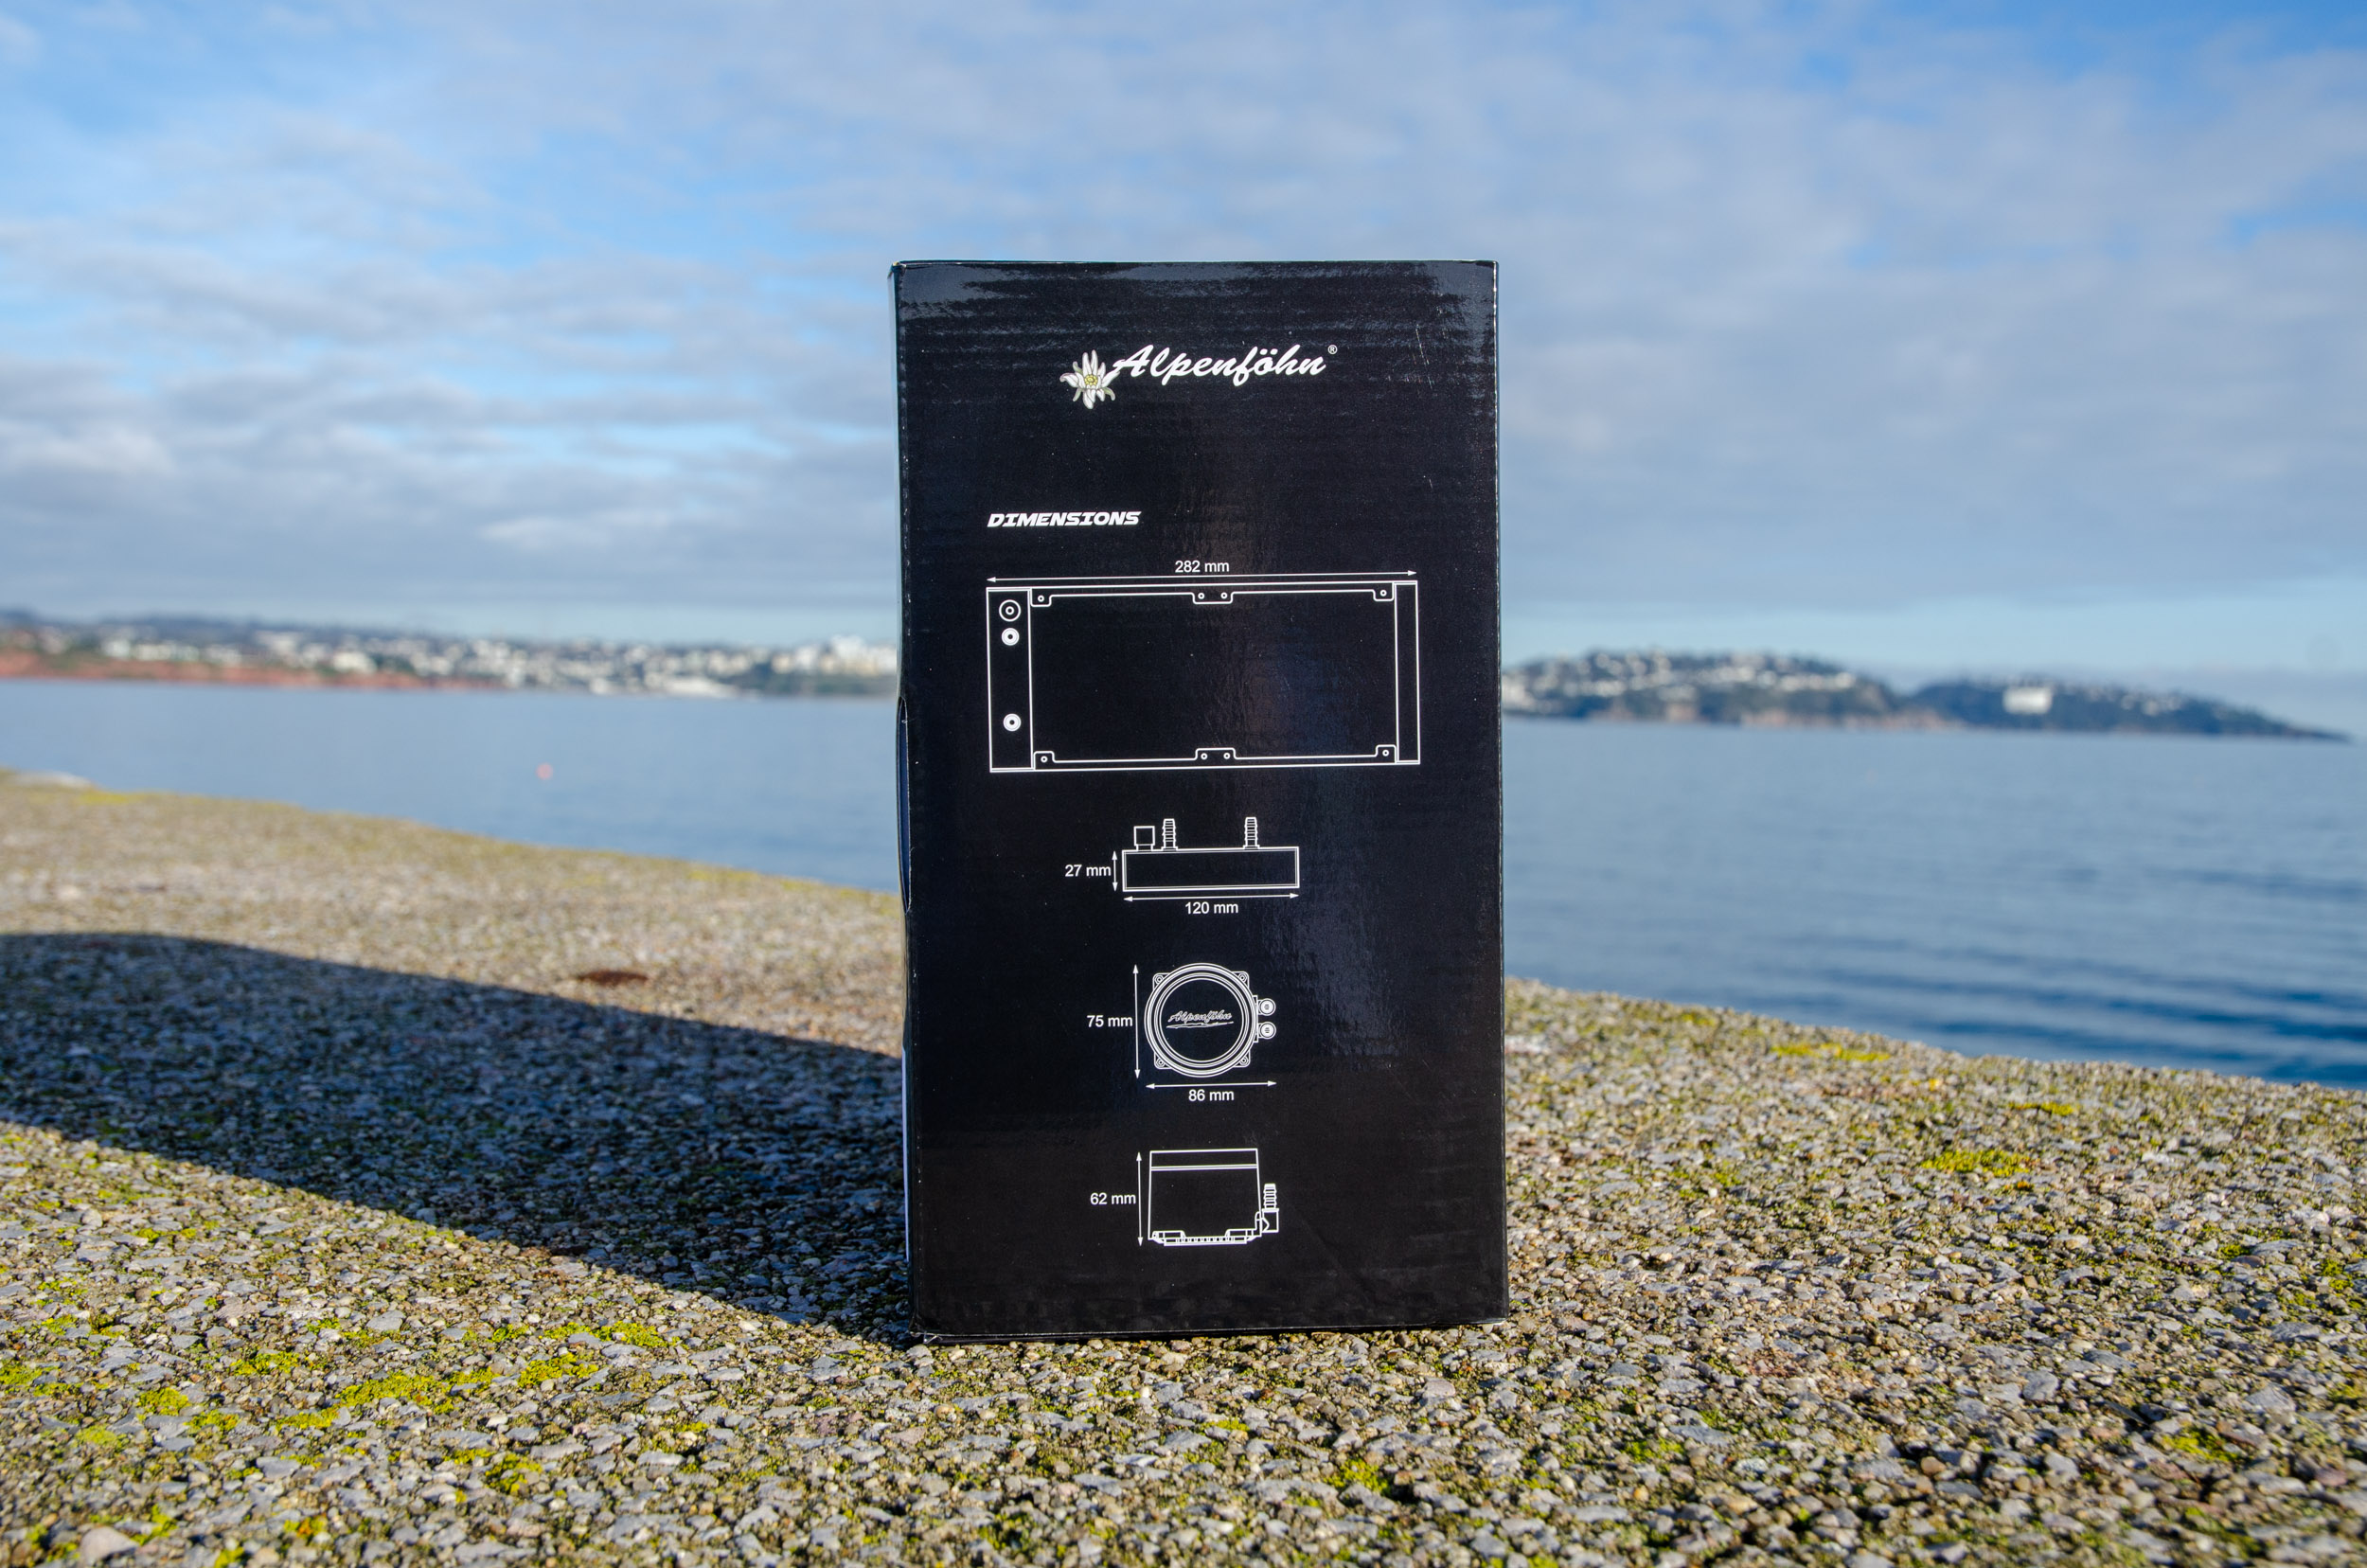
The opposite side has a quick diagram with the overall dimensions to give you an idea for clearances for your build.
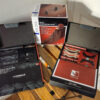
Inside, everything is neatly organised and all of the boxes are labelled but we do miss the excellent foam padding we have seen in the 280mm variant.
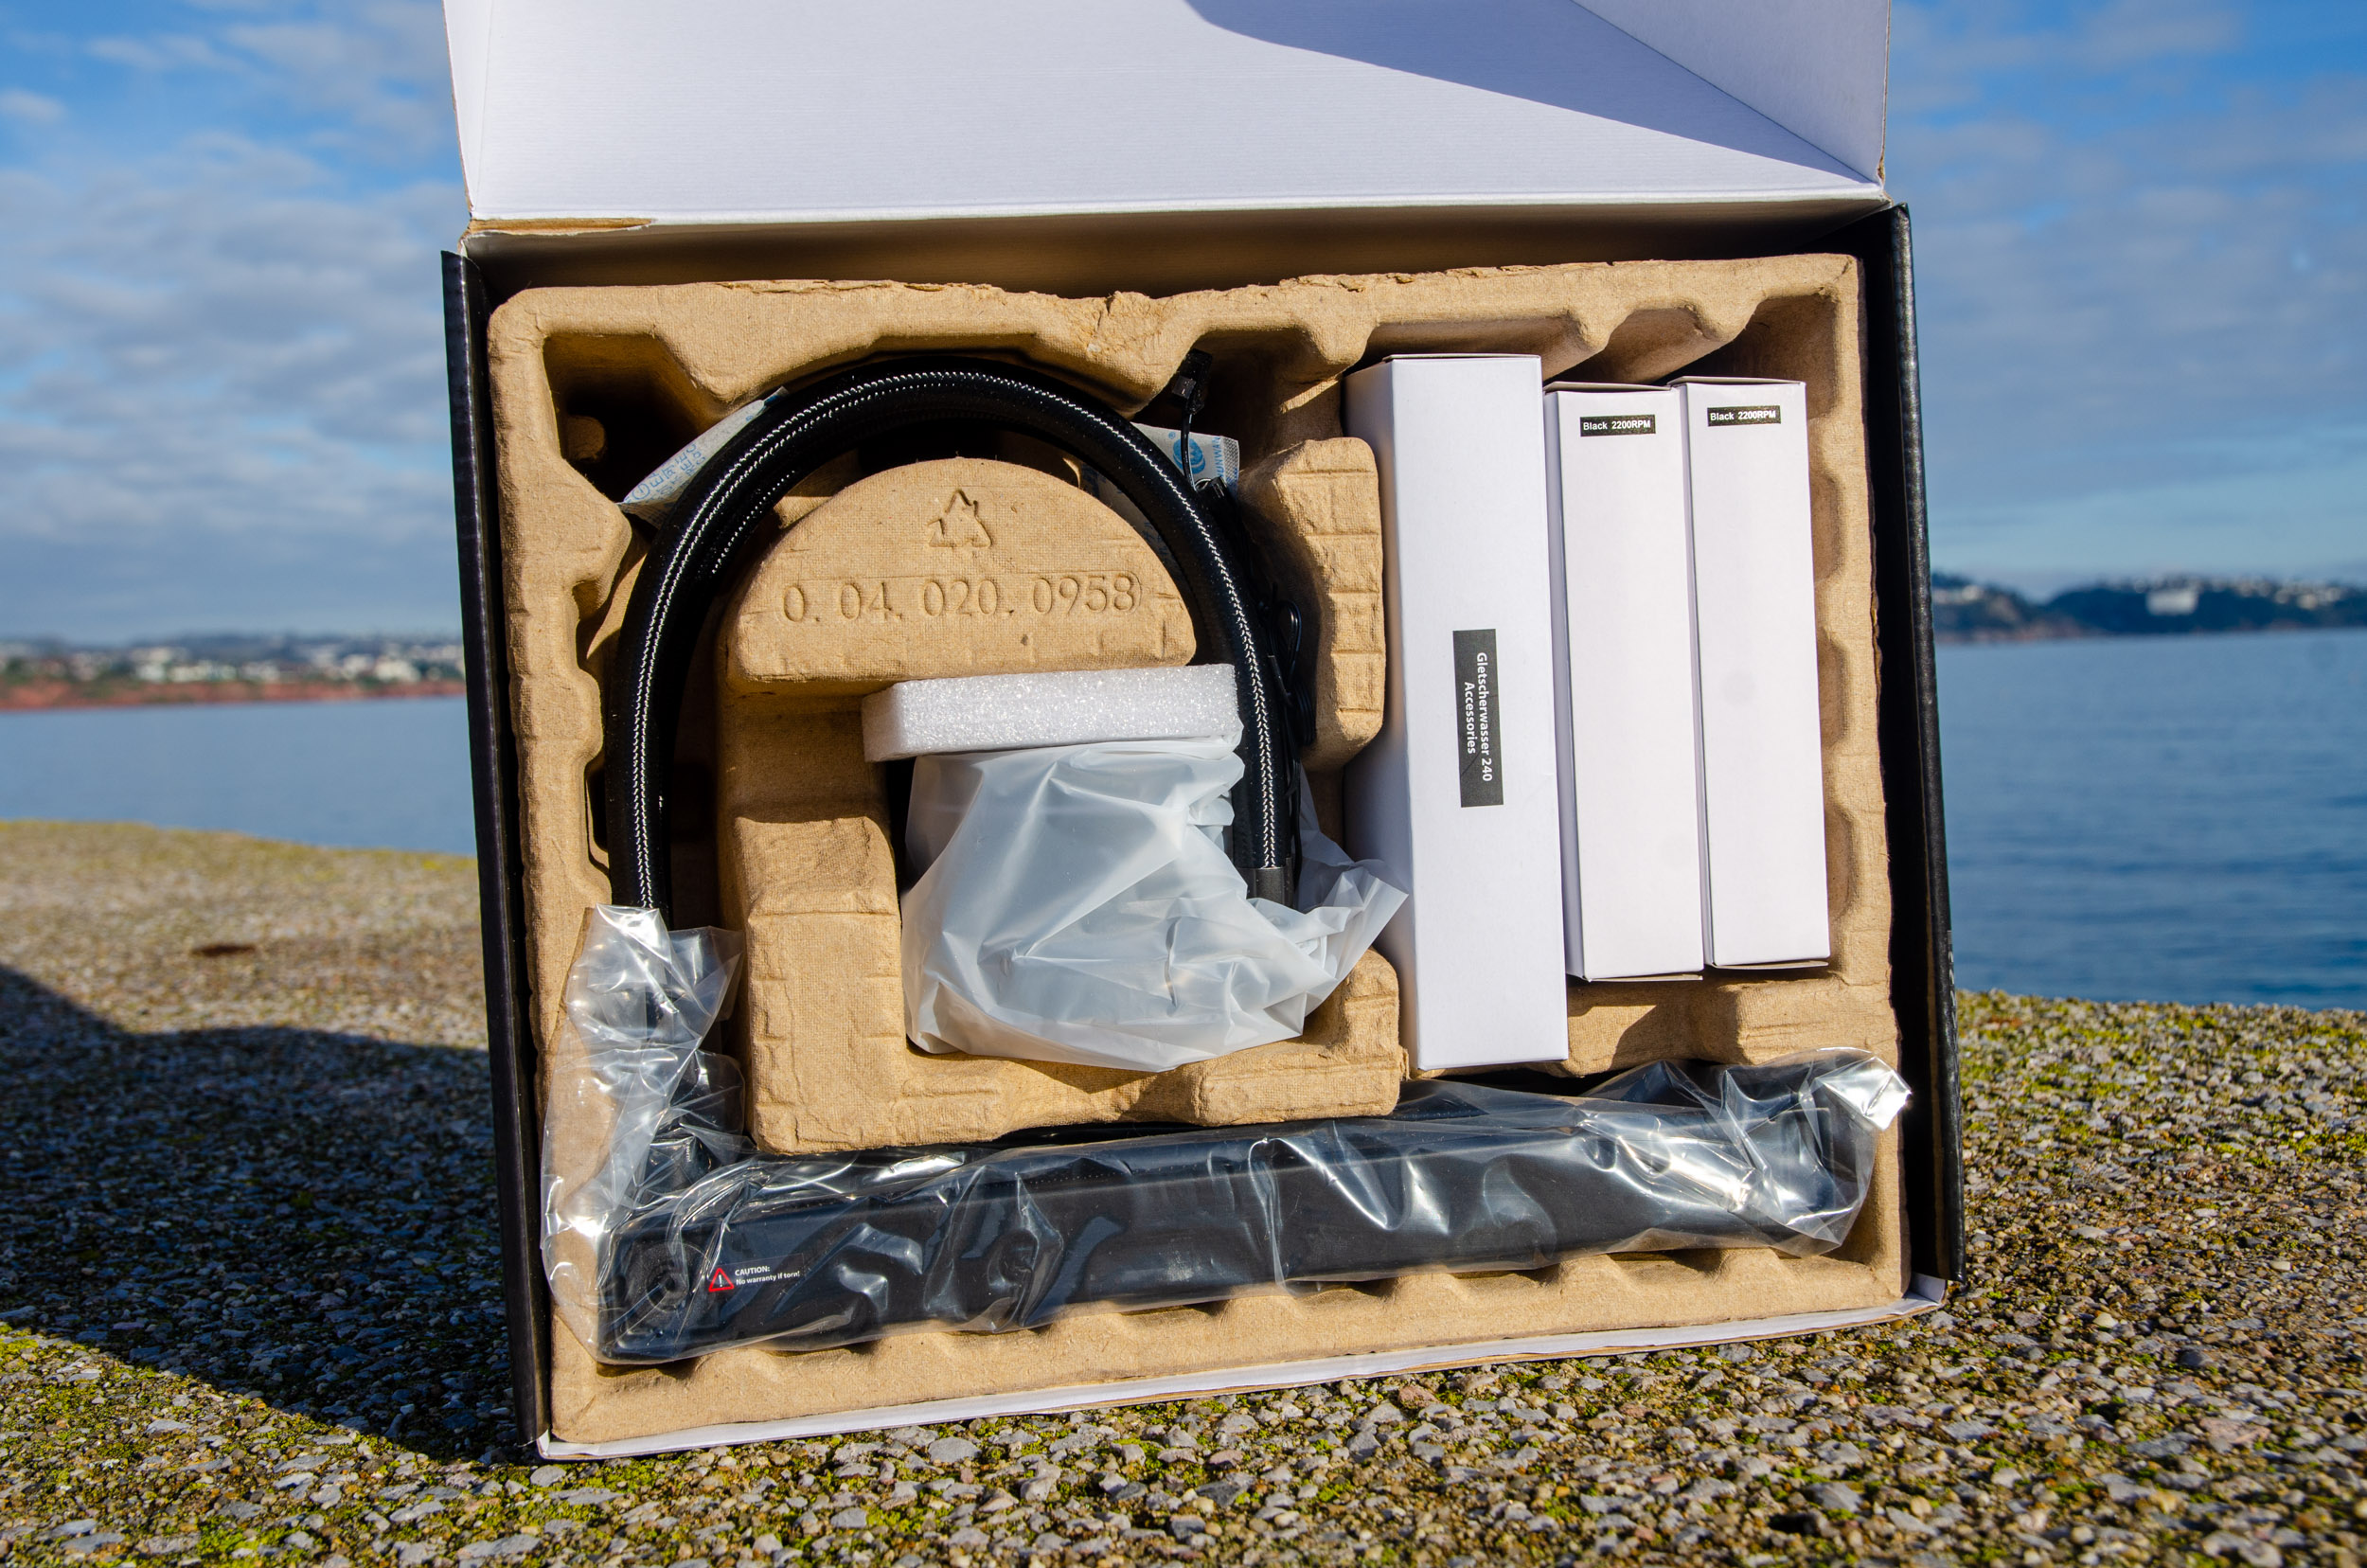
Regarding accessories, Alpenföhn provides an ample amount to cover you, basically, for any situation.
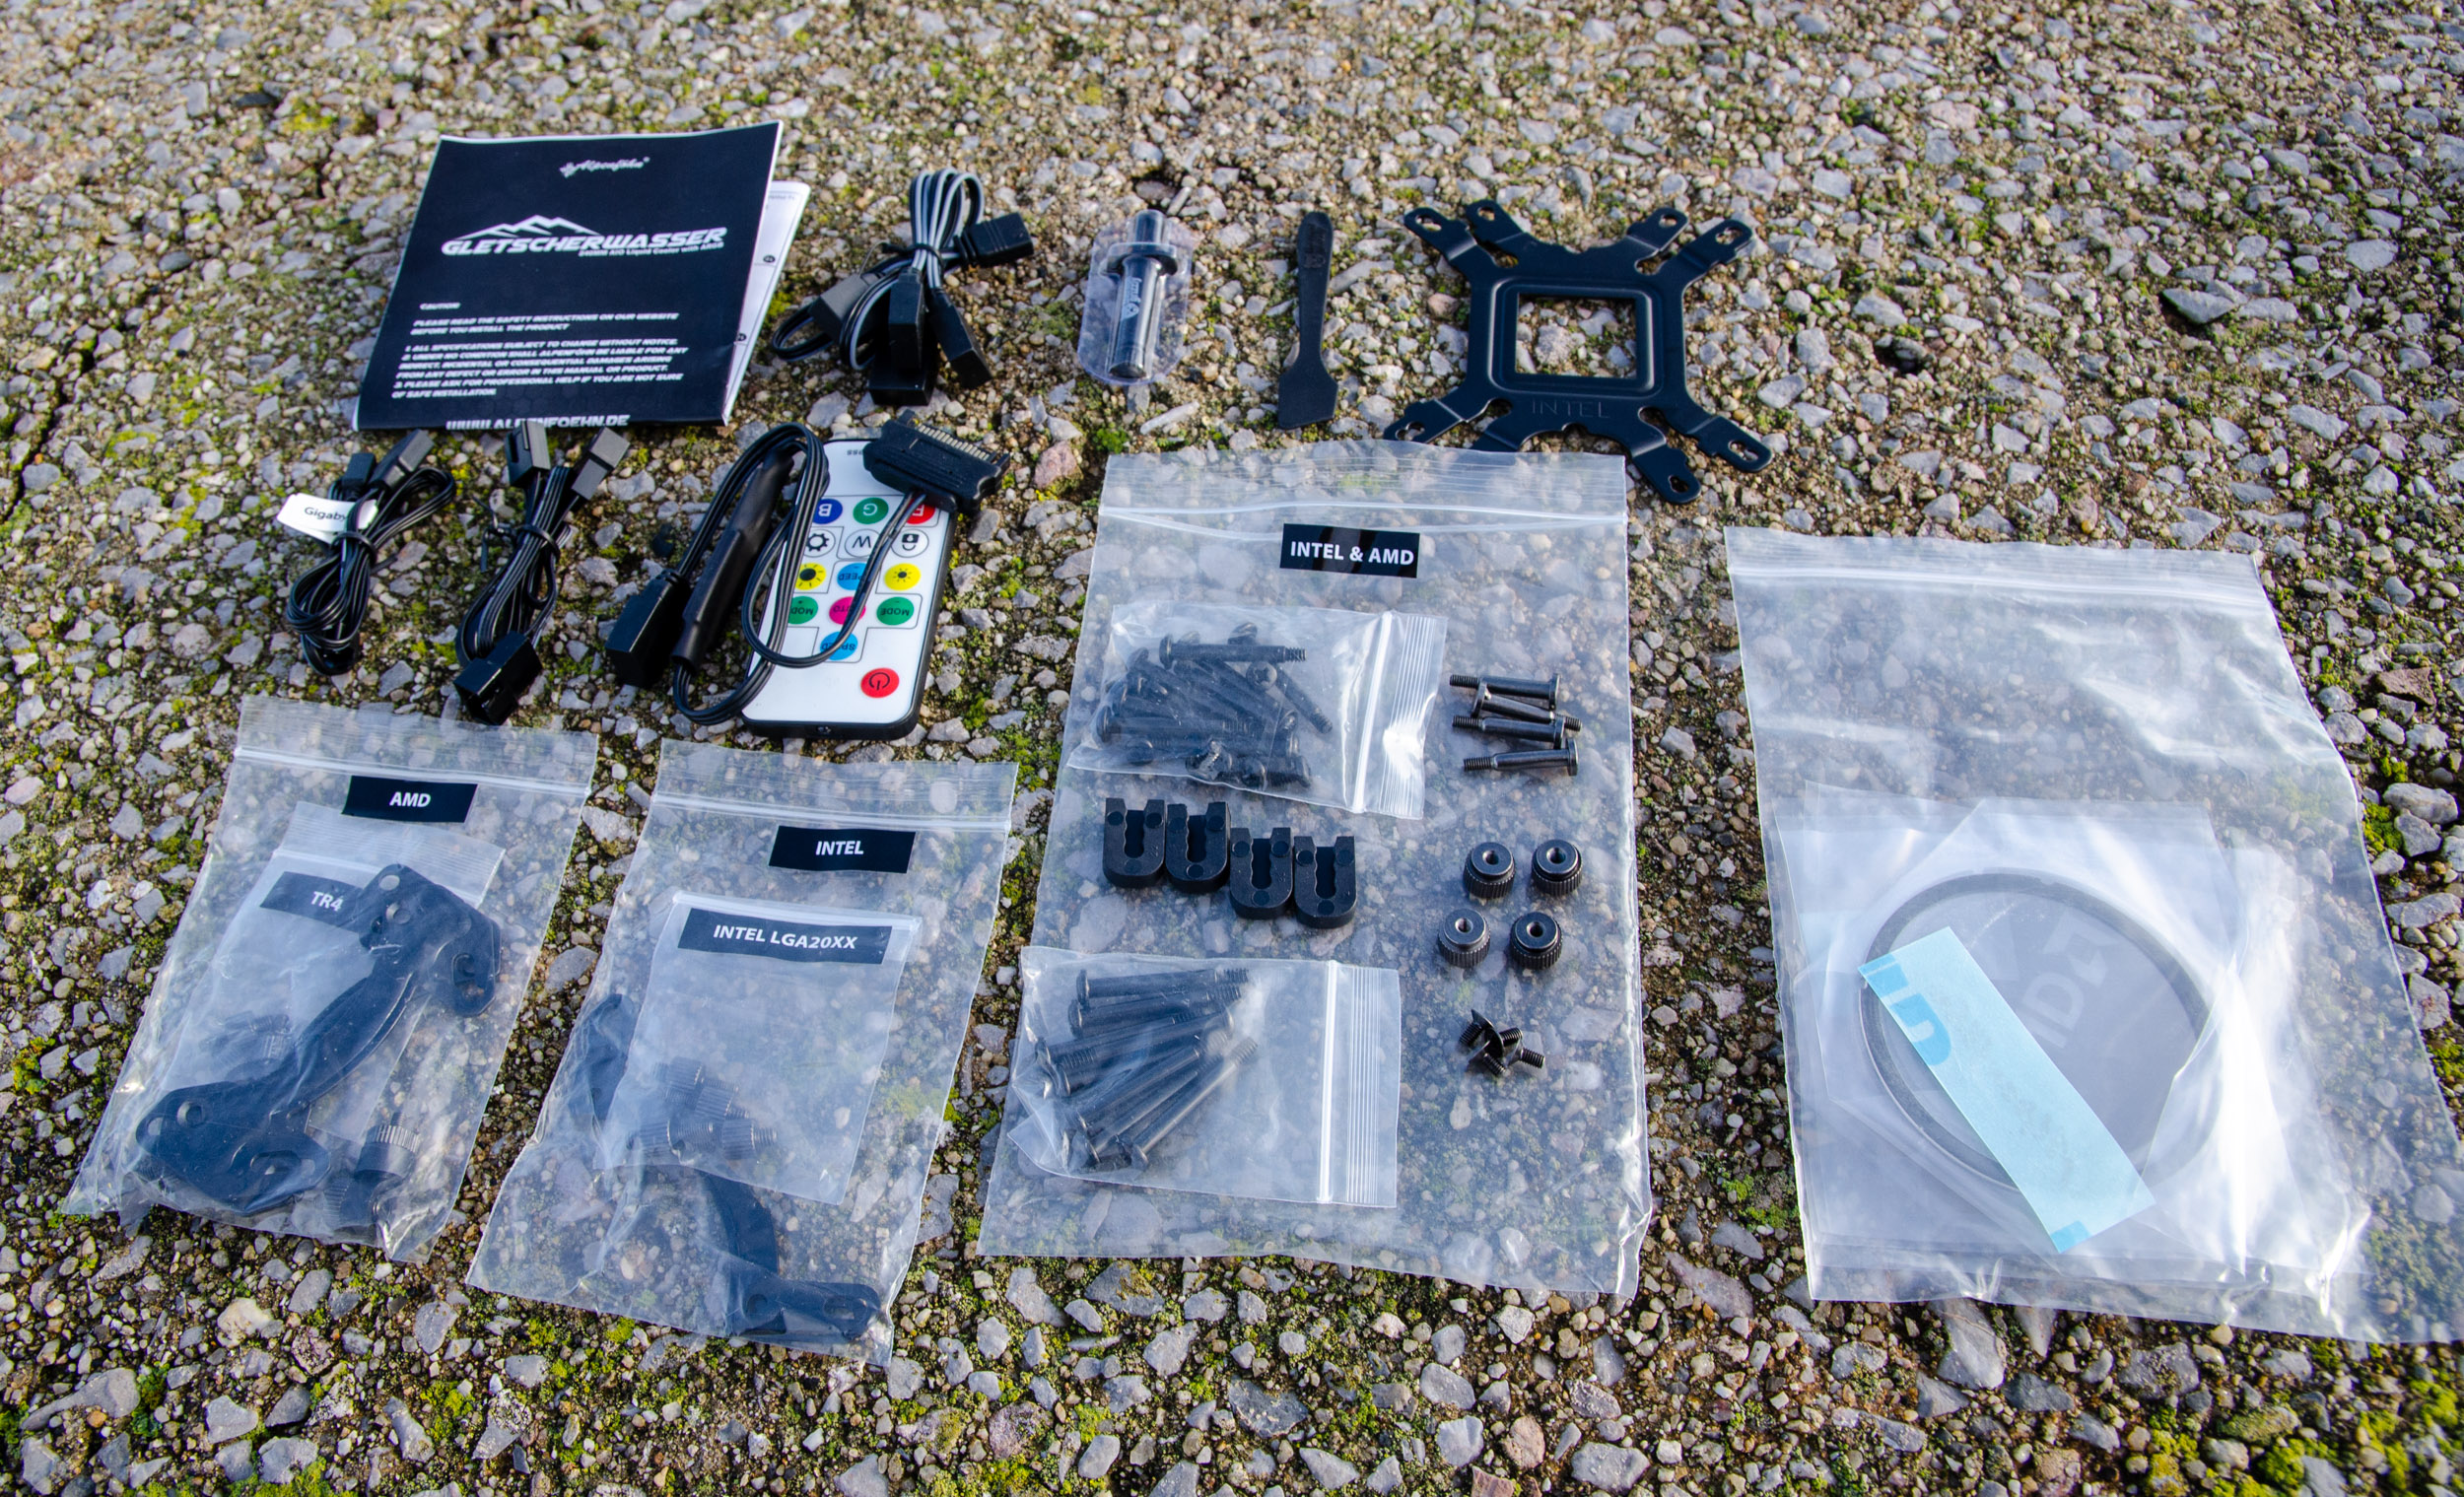
Items like an RGB remote control and SATA powered sensor system are highly welcomed because with the help of these, you can enjoy the addressable lighting show on older platforms. Otherwise, you get Y-adapters that will let you connect directly to your motherboard’s 5v RGB header and control everything via software.
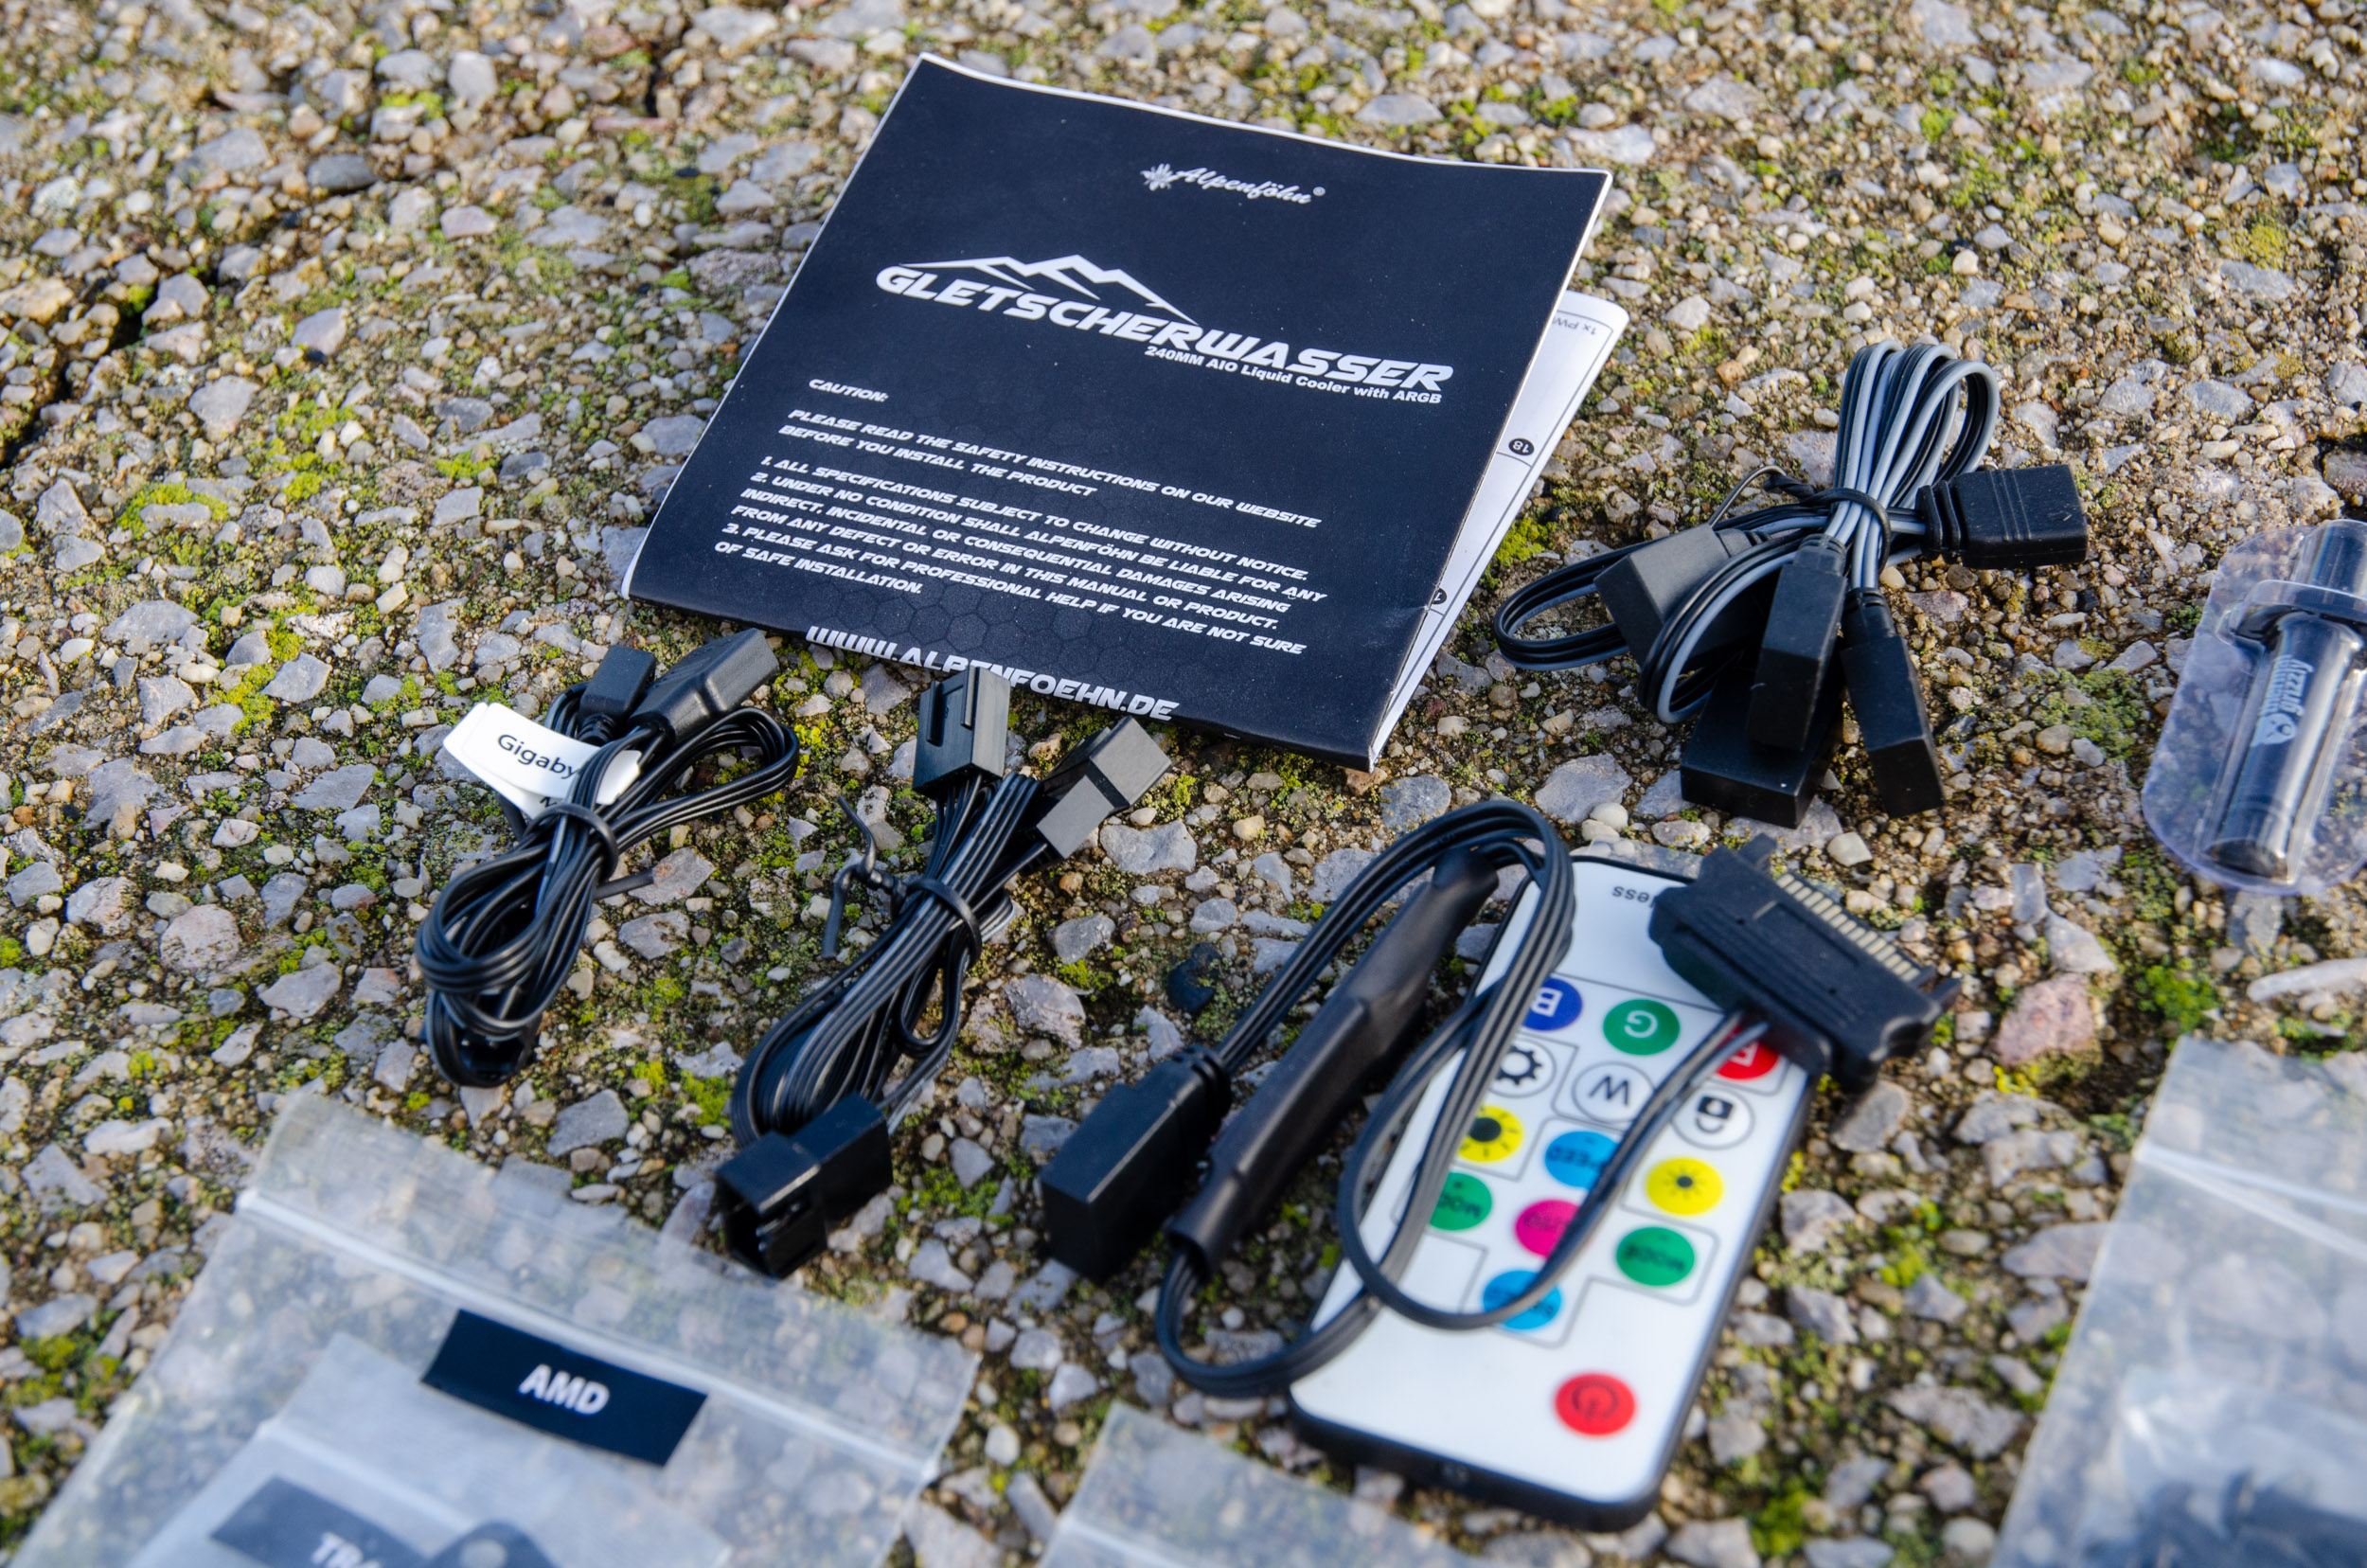
Then all of the installation parts are divided into separate socket labelled zip lock bags.


This is where you can take over and be creative with the look of the pump because you can replace the main logo plate with these 4 extra ones.

Here we have the premium thermal paste from Thermal Grizzly which even comes with branded spatula for ease of application.

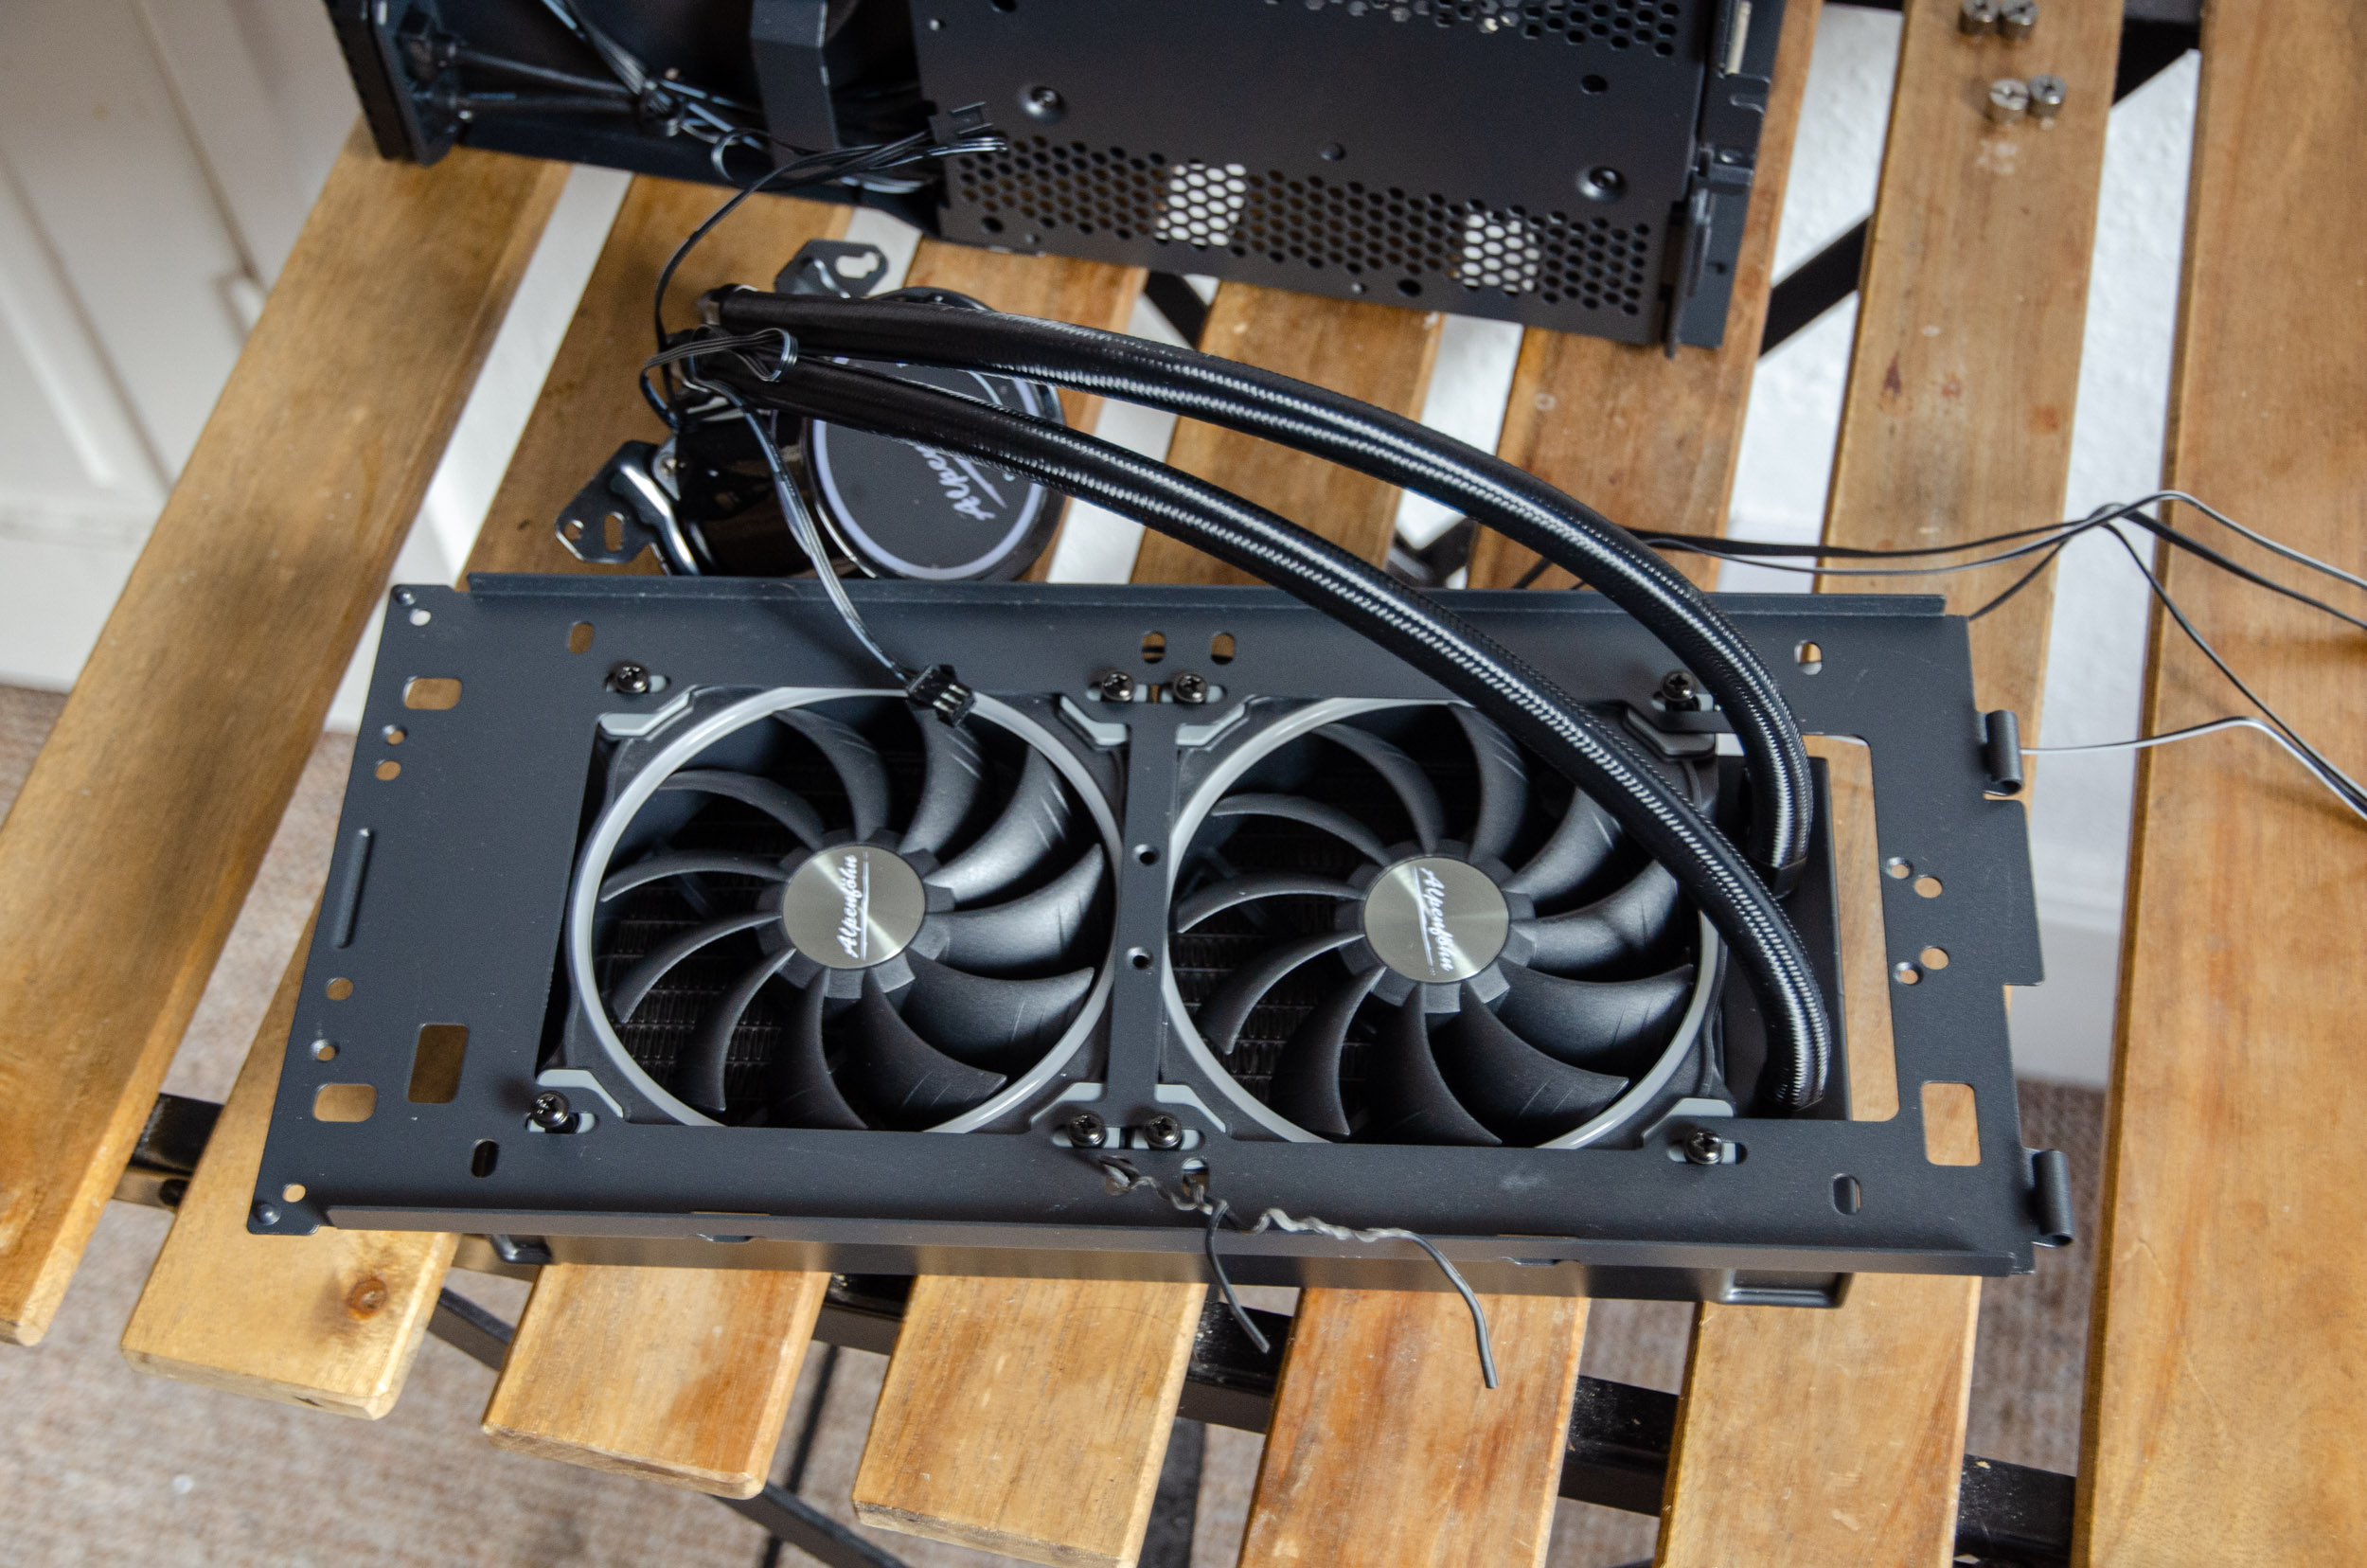
Now these are the Wing Boost 3 ARGB 120 mm ‘High Speed’ fans that are built on fluid dynamic bearings and thus will spin between 700 to 2200 RPM (vs 1600 RPM on the non-HS). They will push up to 132.4 m3/h of airflow and up to 3.24 mmH20 of static pressure while not going over 36.8 db(A) of noise output.
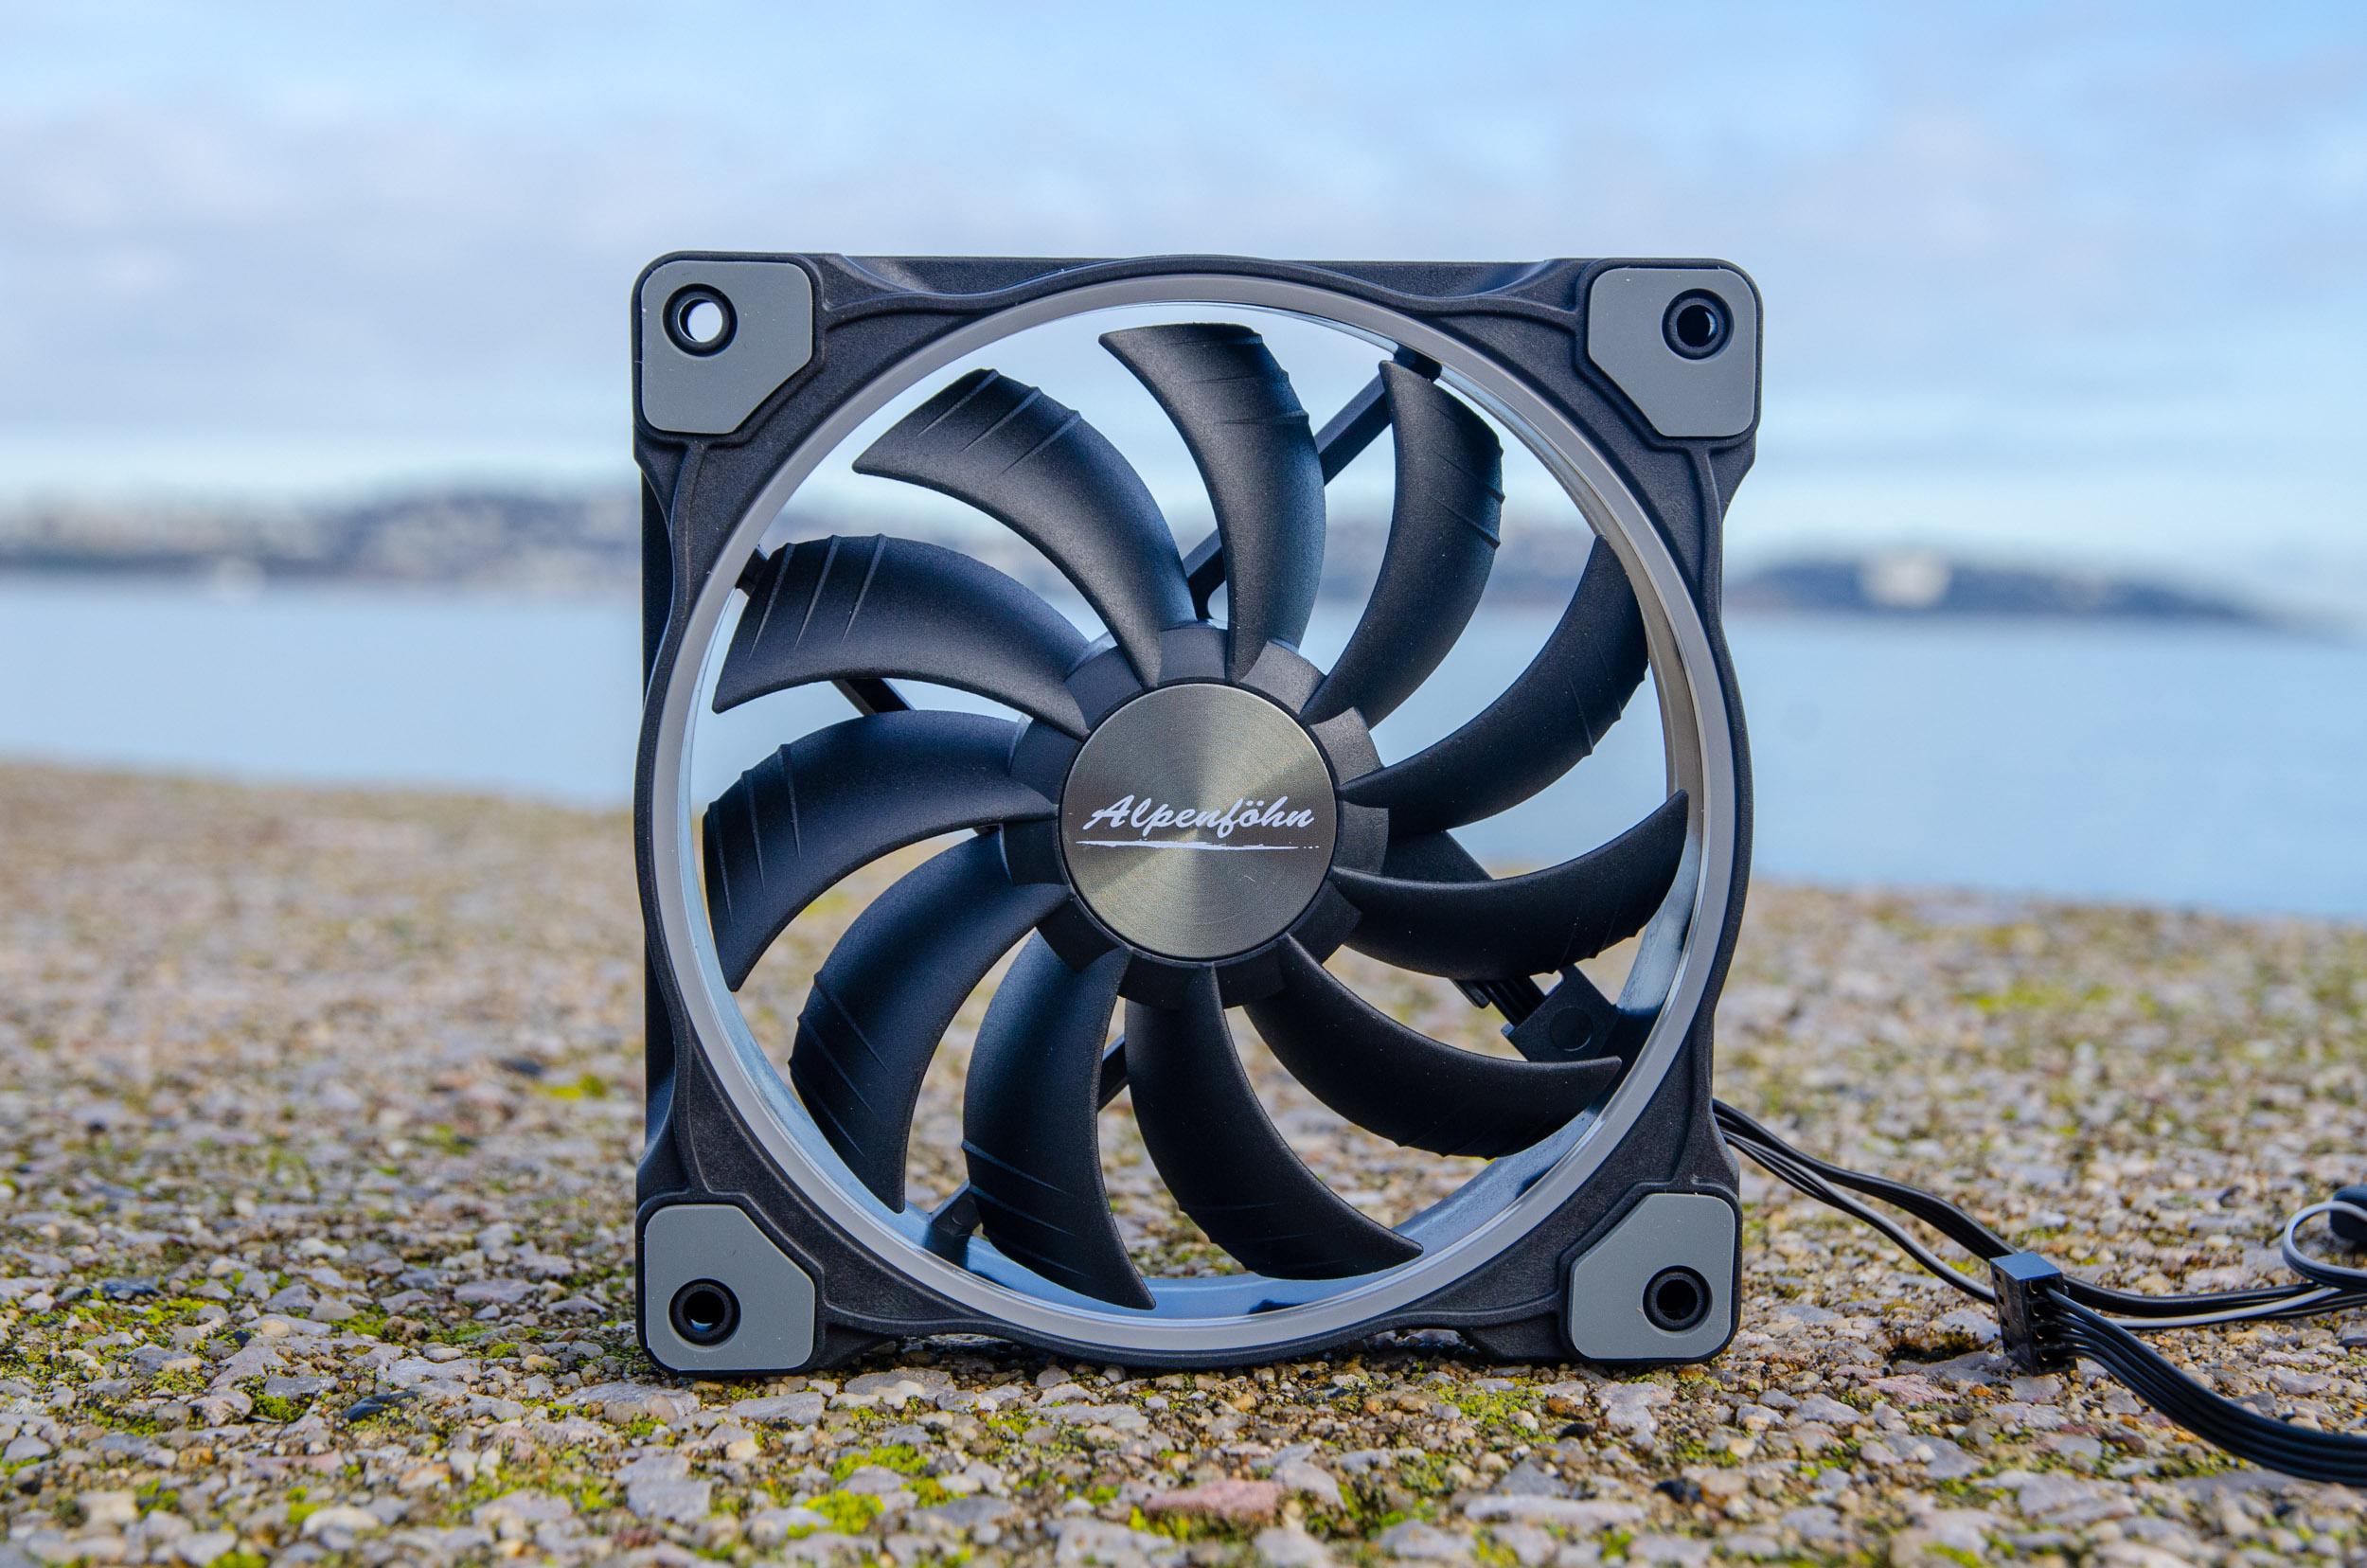
These high speed models are identical to the standard ones in visuals. So the best way to make sure which is which, is to check the RPM marking on the back of the rotor.

The 11 blades feature an aggressive geometry and 3 ribbed/protrusion fins on each blade which overall help with a better airflow, static pressure and high speed stability. They also have this extra thick rubber pads on each corner for maximum vibration reduction and the overall frame construction is reinforced.

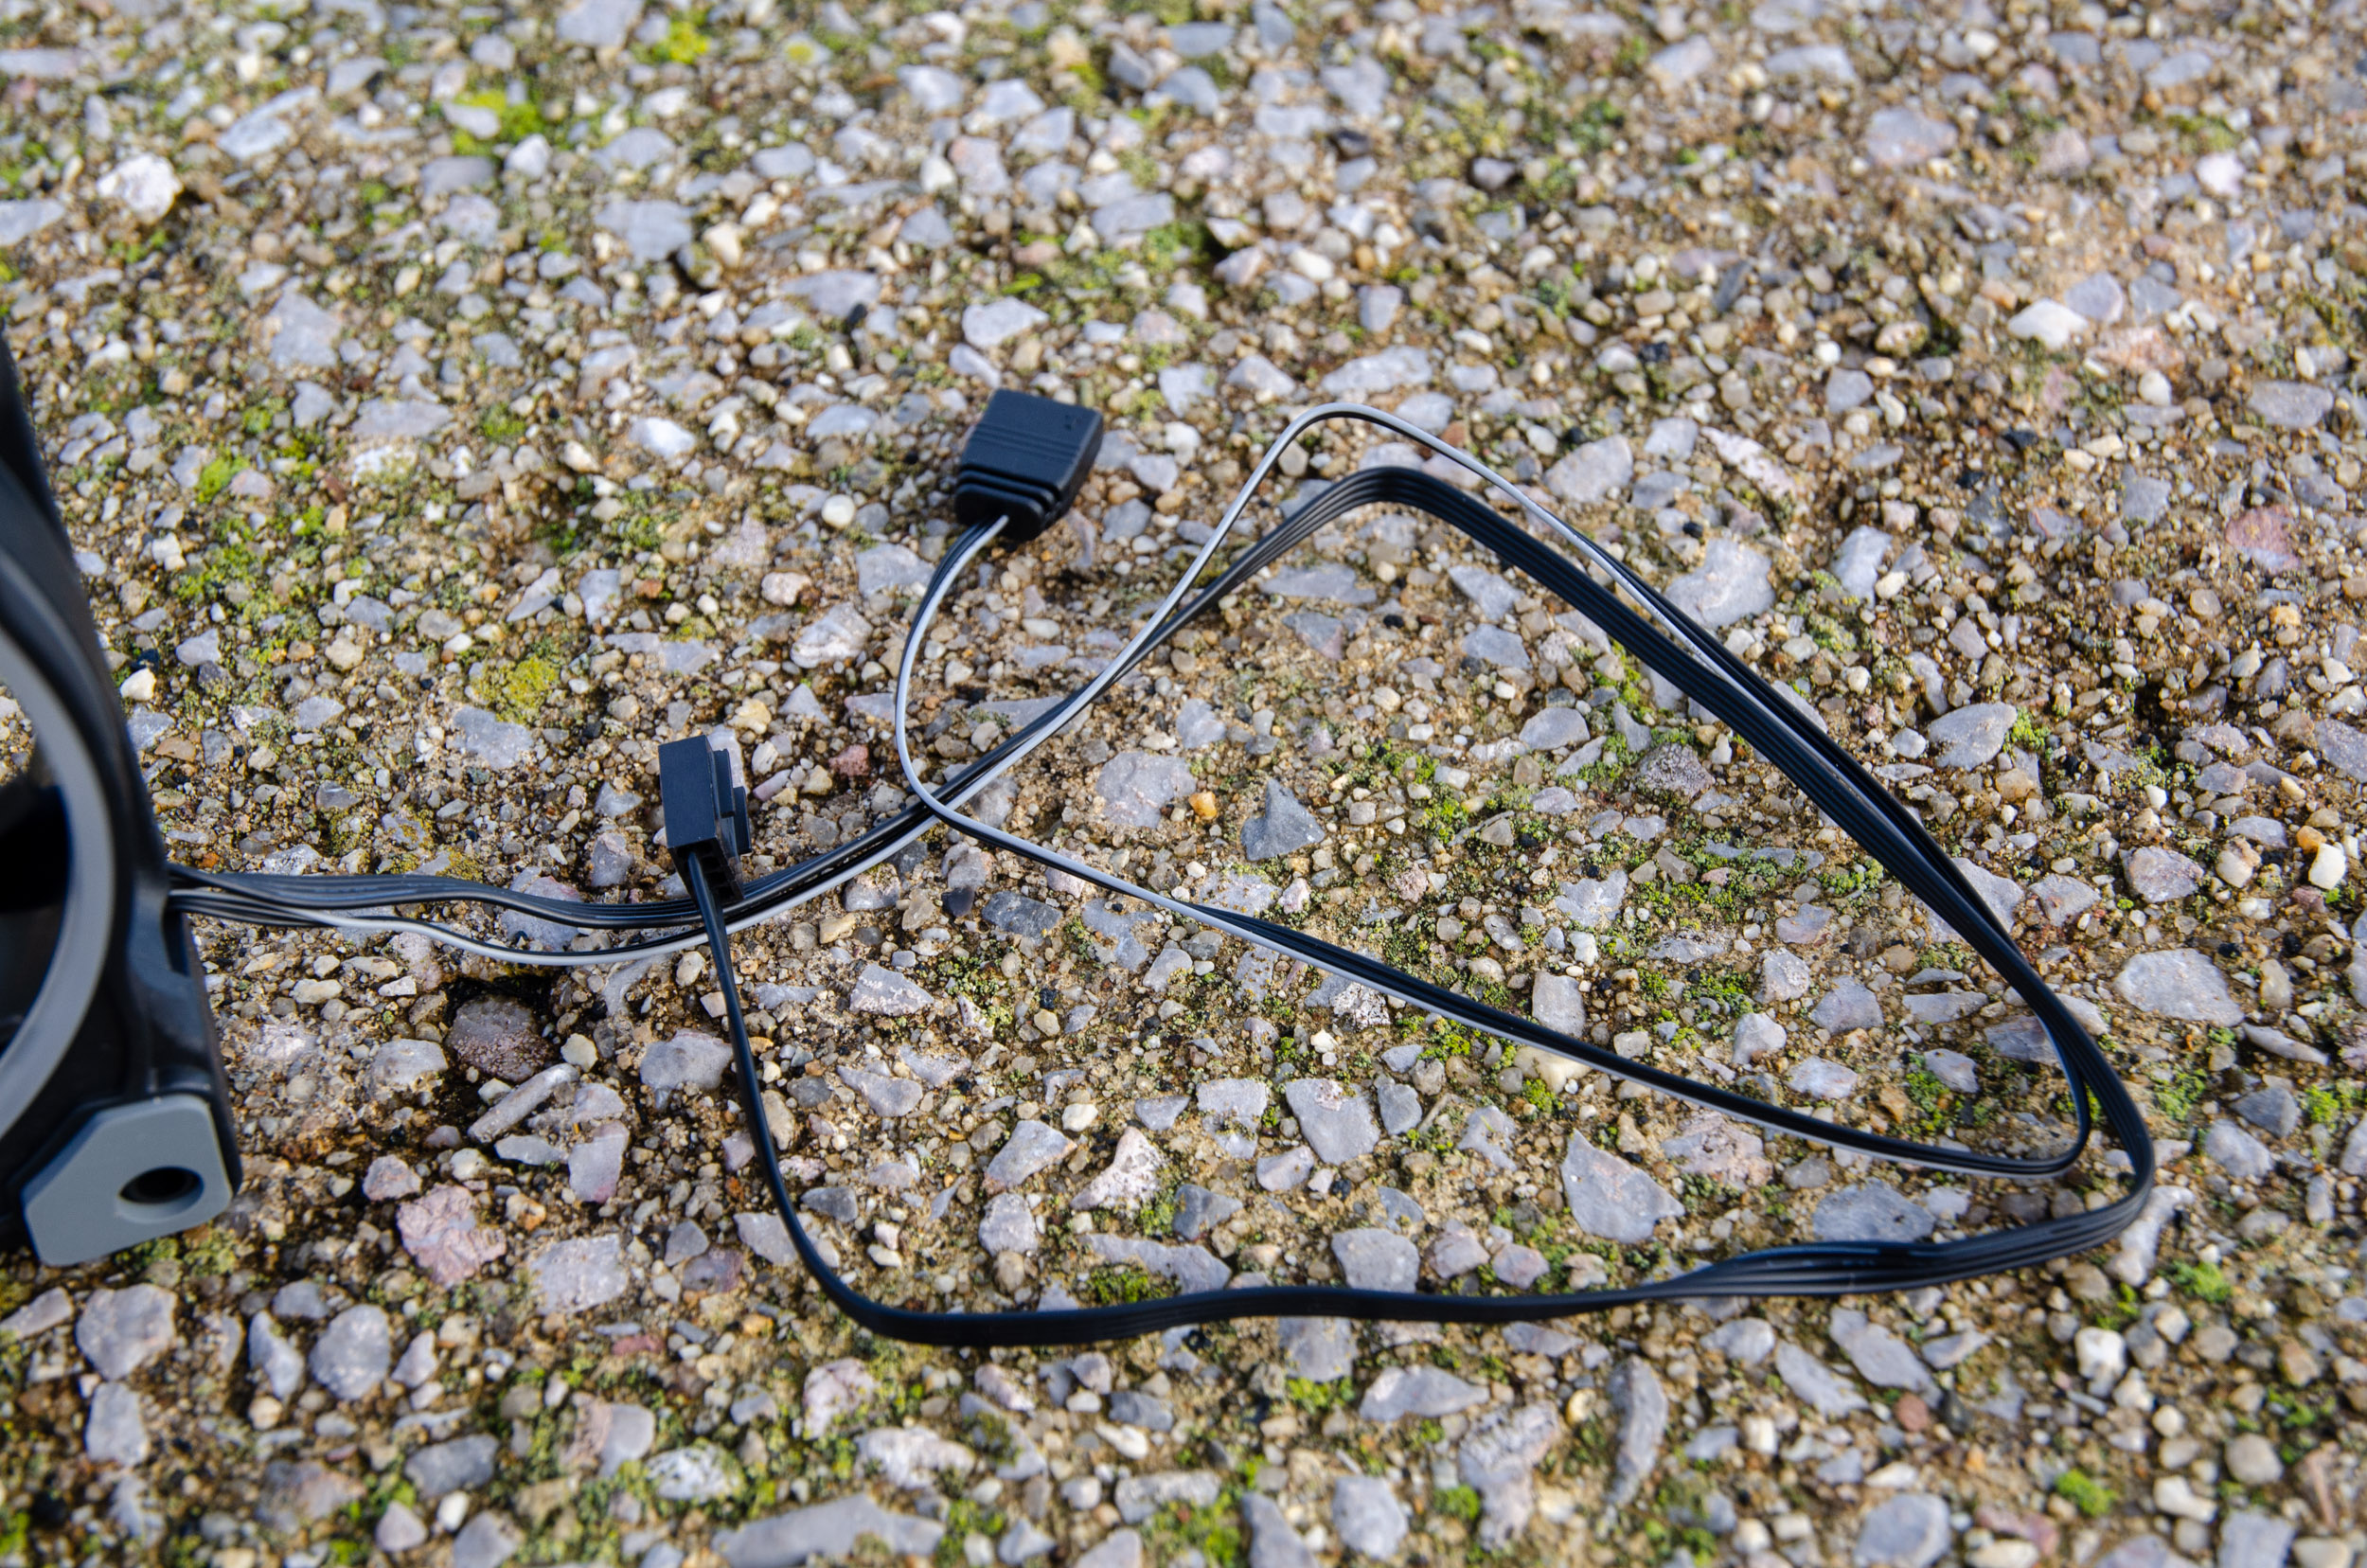
Regarding connectivity, the fans have two non-sleeved cables, one 4-pin PWM for power while the other is for 5v ARGB.
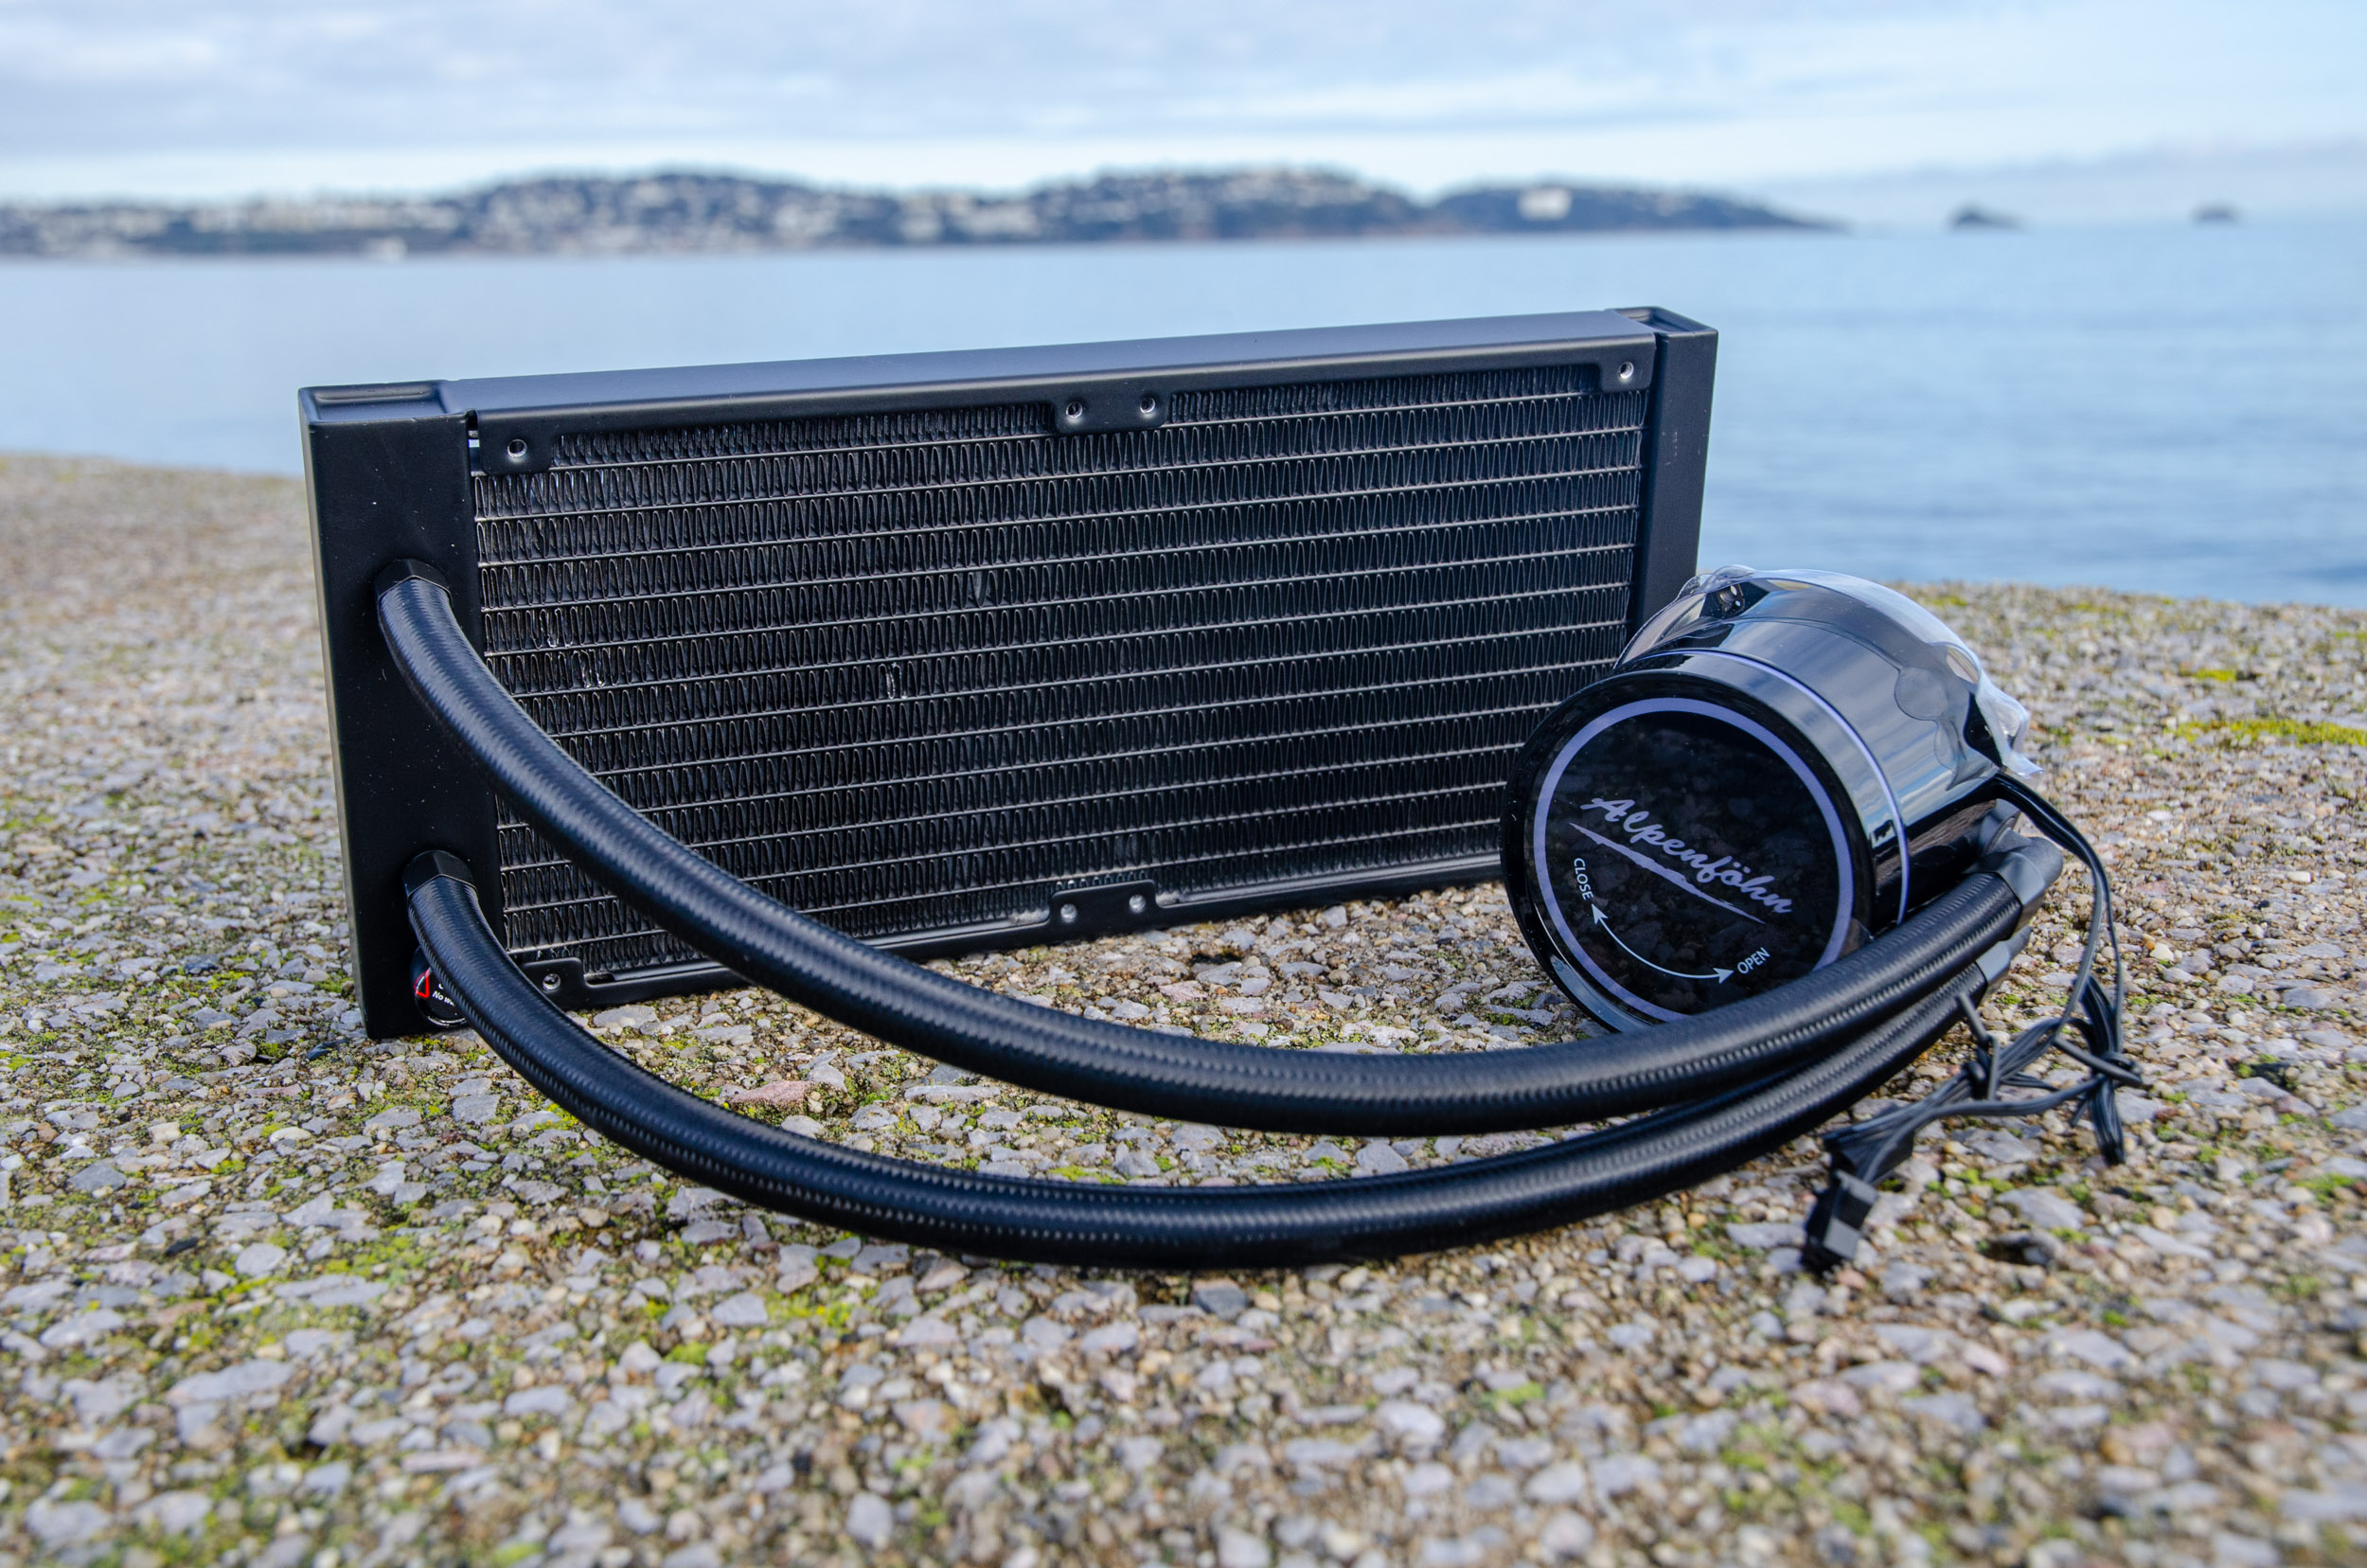
Here is the radiator and pump assembly which has a sleek all black design. The exact dimensions for the radiator are 282 x 120 x 27 (L x W x D) and it’s made from aluminium.

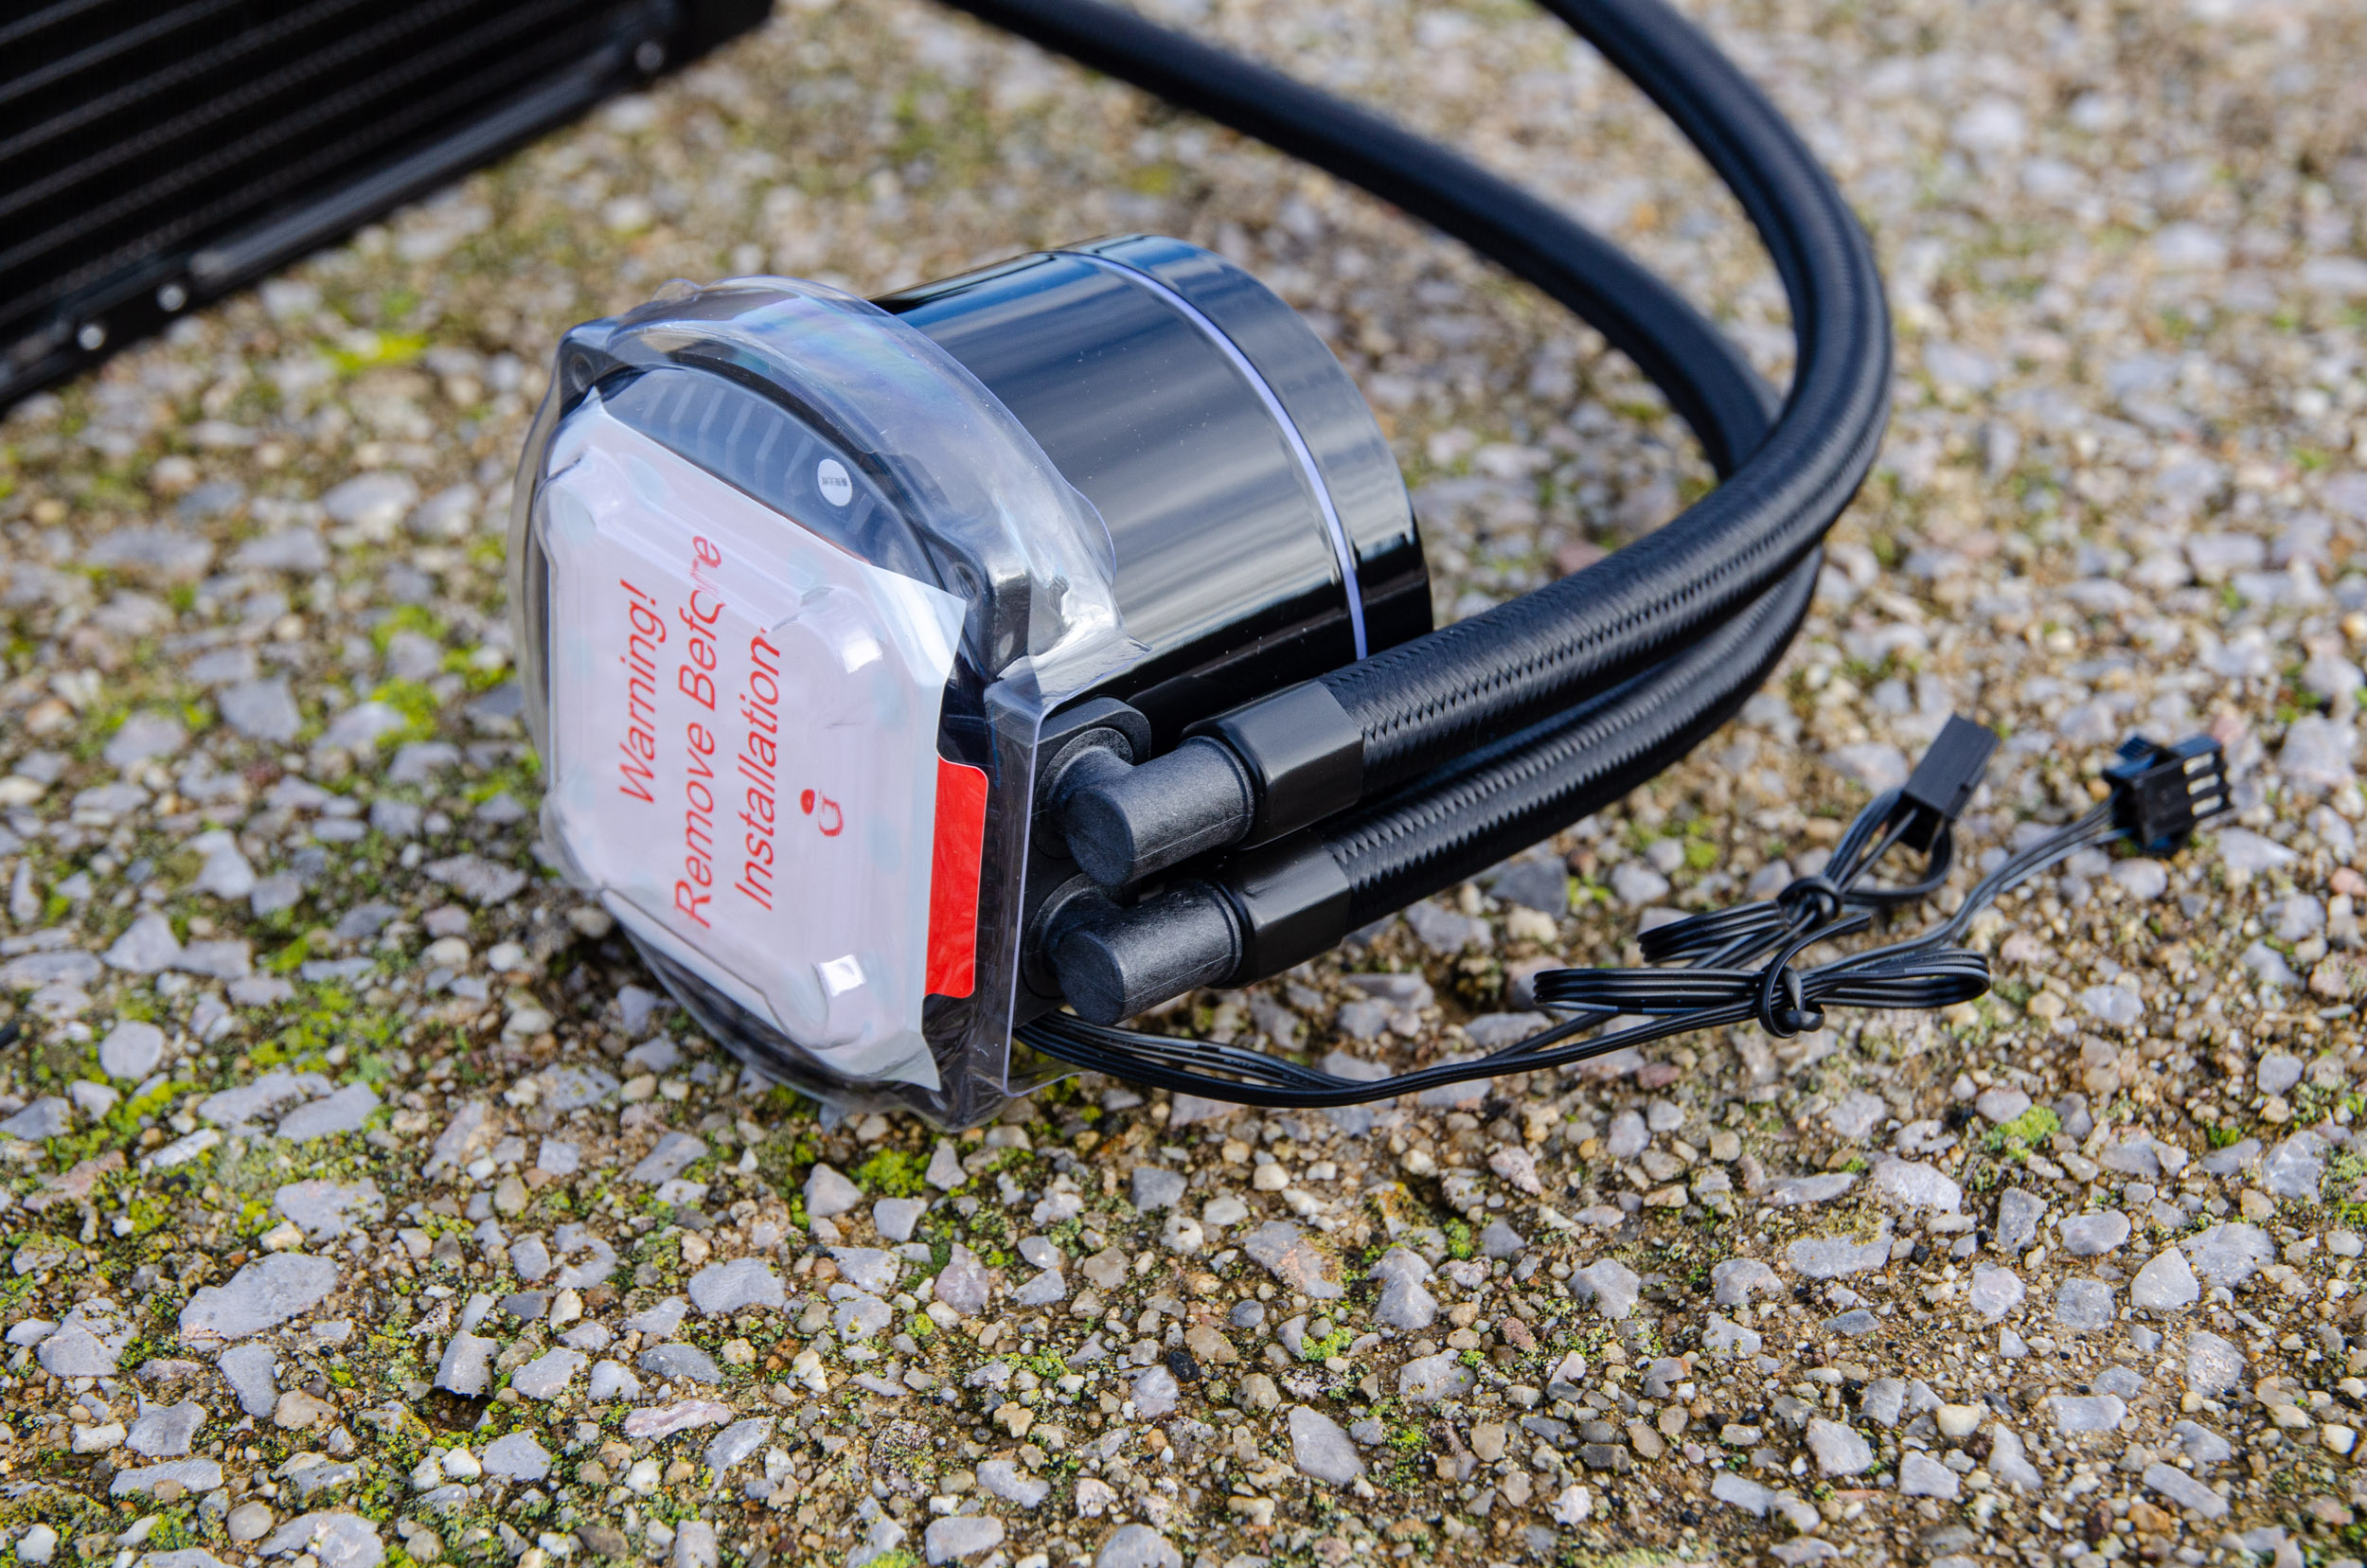
Both the refill and drain ports have warranty stickers on them so they are not intended to be accessed regularly.

The 380 mm long tubes are perfectly sleeved and should have plenty of reach/flexibility for most builds.

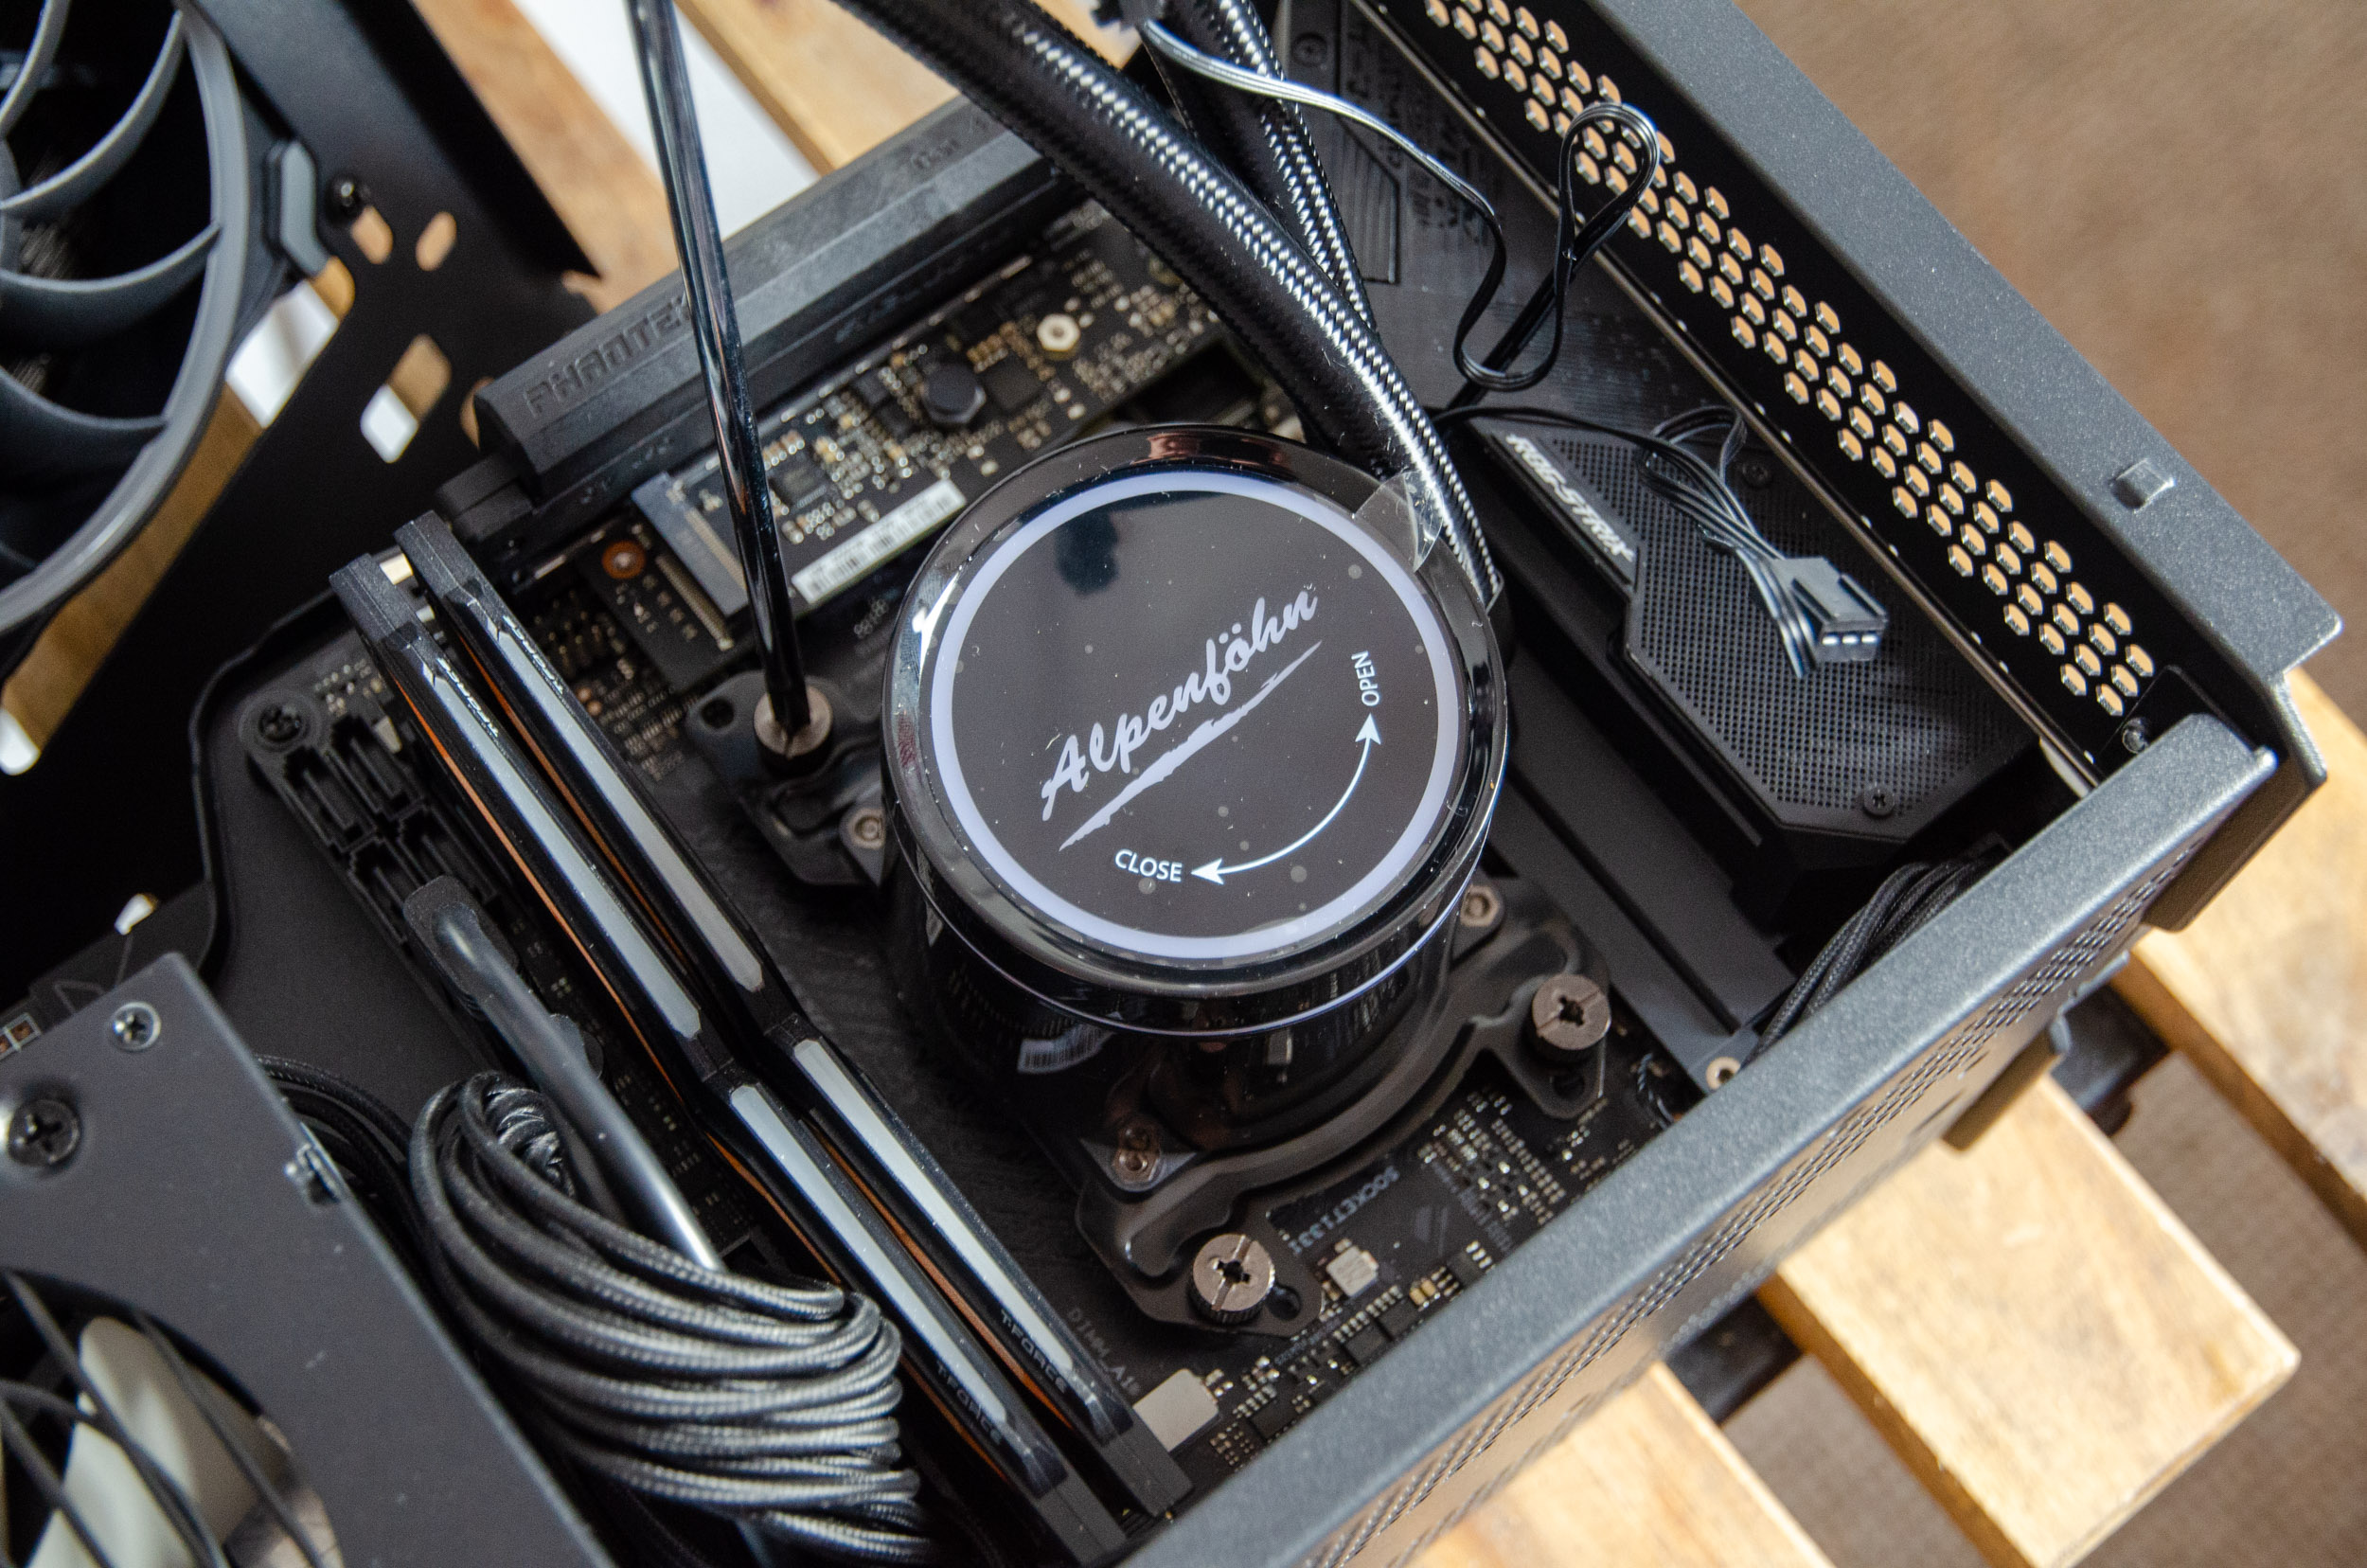
On the other end of the tubes, we have the pump/heatsink assembly which has this sleek cylindrical build. The pump is rated between 1200 and 2550 RPM and it’s powered via a 3 pin plug (the other plug is for the ARGB).


Now this is the stock lid with the Alpenföhn logo. The top film protector shows how to replace it by just rotating the top ring cap.

There is plenty of swivel angle and the connectors have a tight fit.
The copper base plate of the pump possesses a large area of micro-channels to dissipate the waste heat of the CPU into the cooling circuit quickly and efficiently. Also the finishing is very smooth and you can barely see the circular machining marks.


Installation
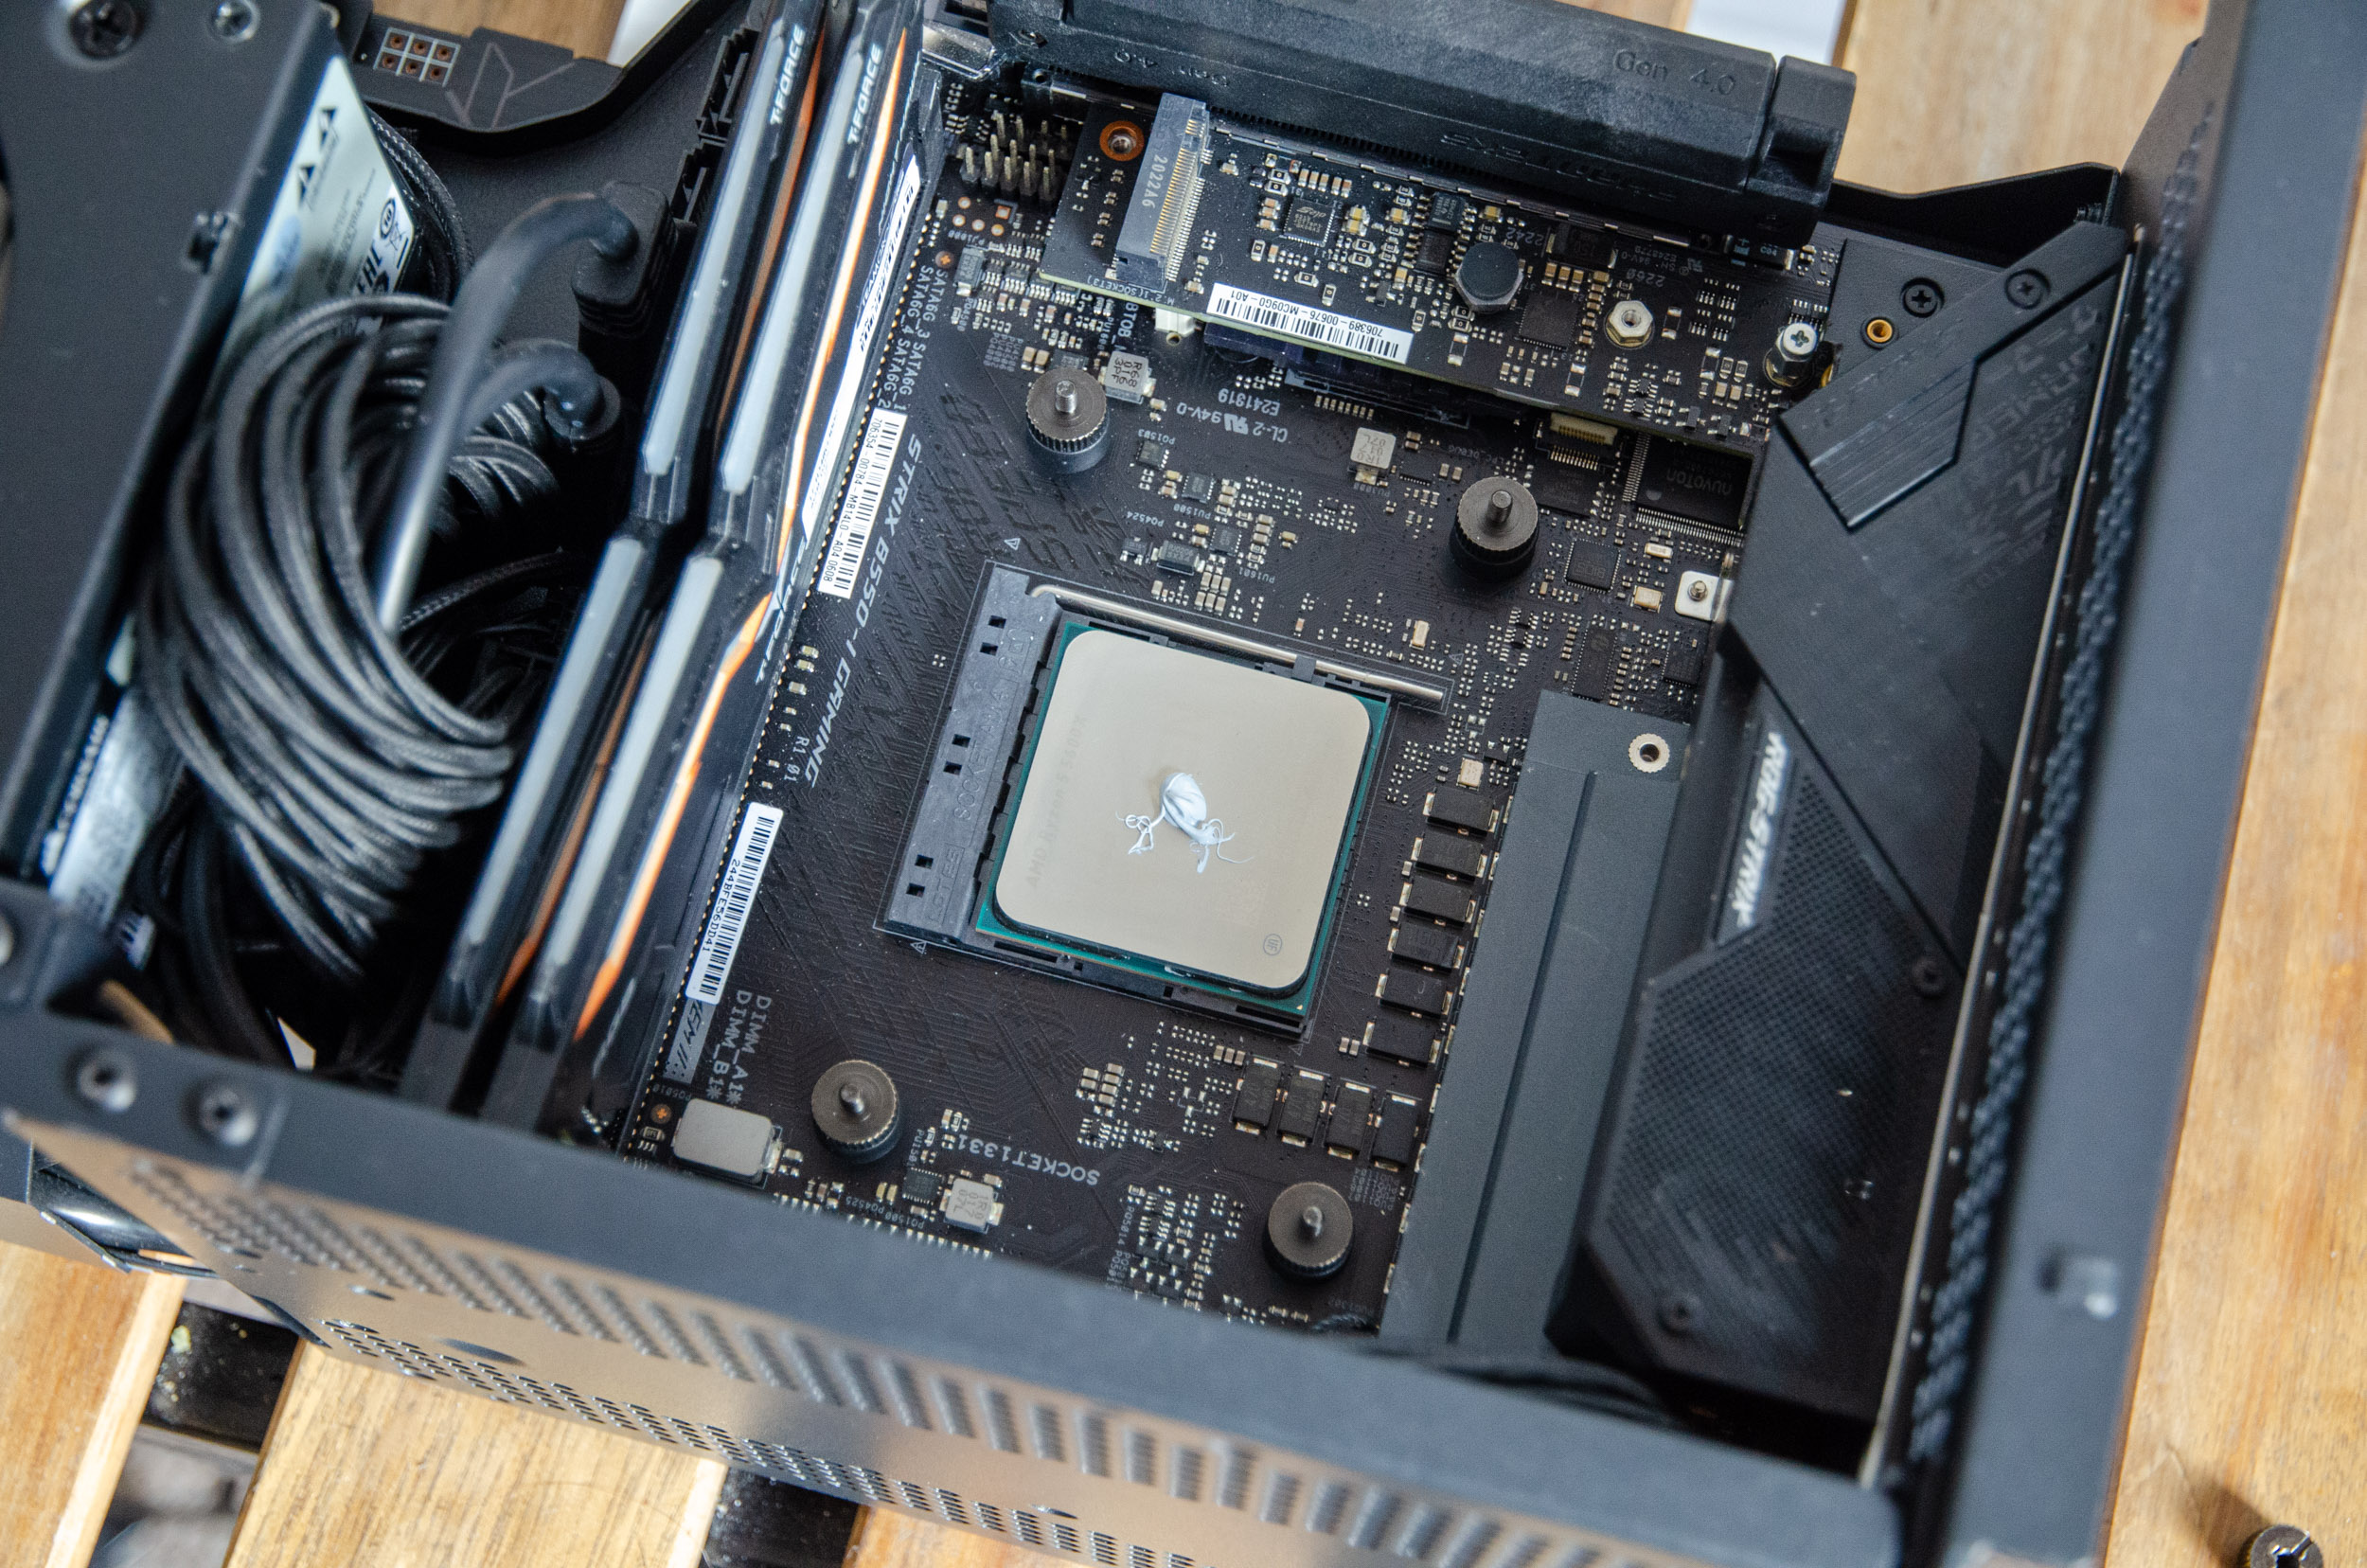
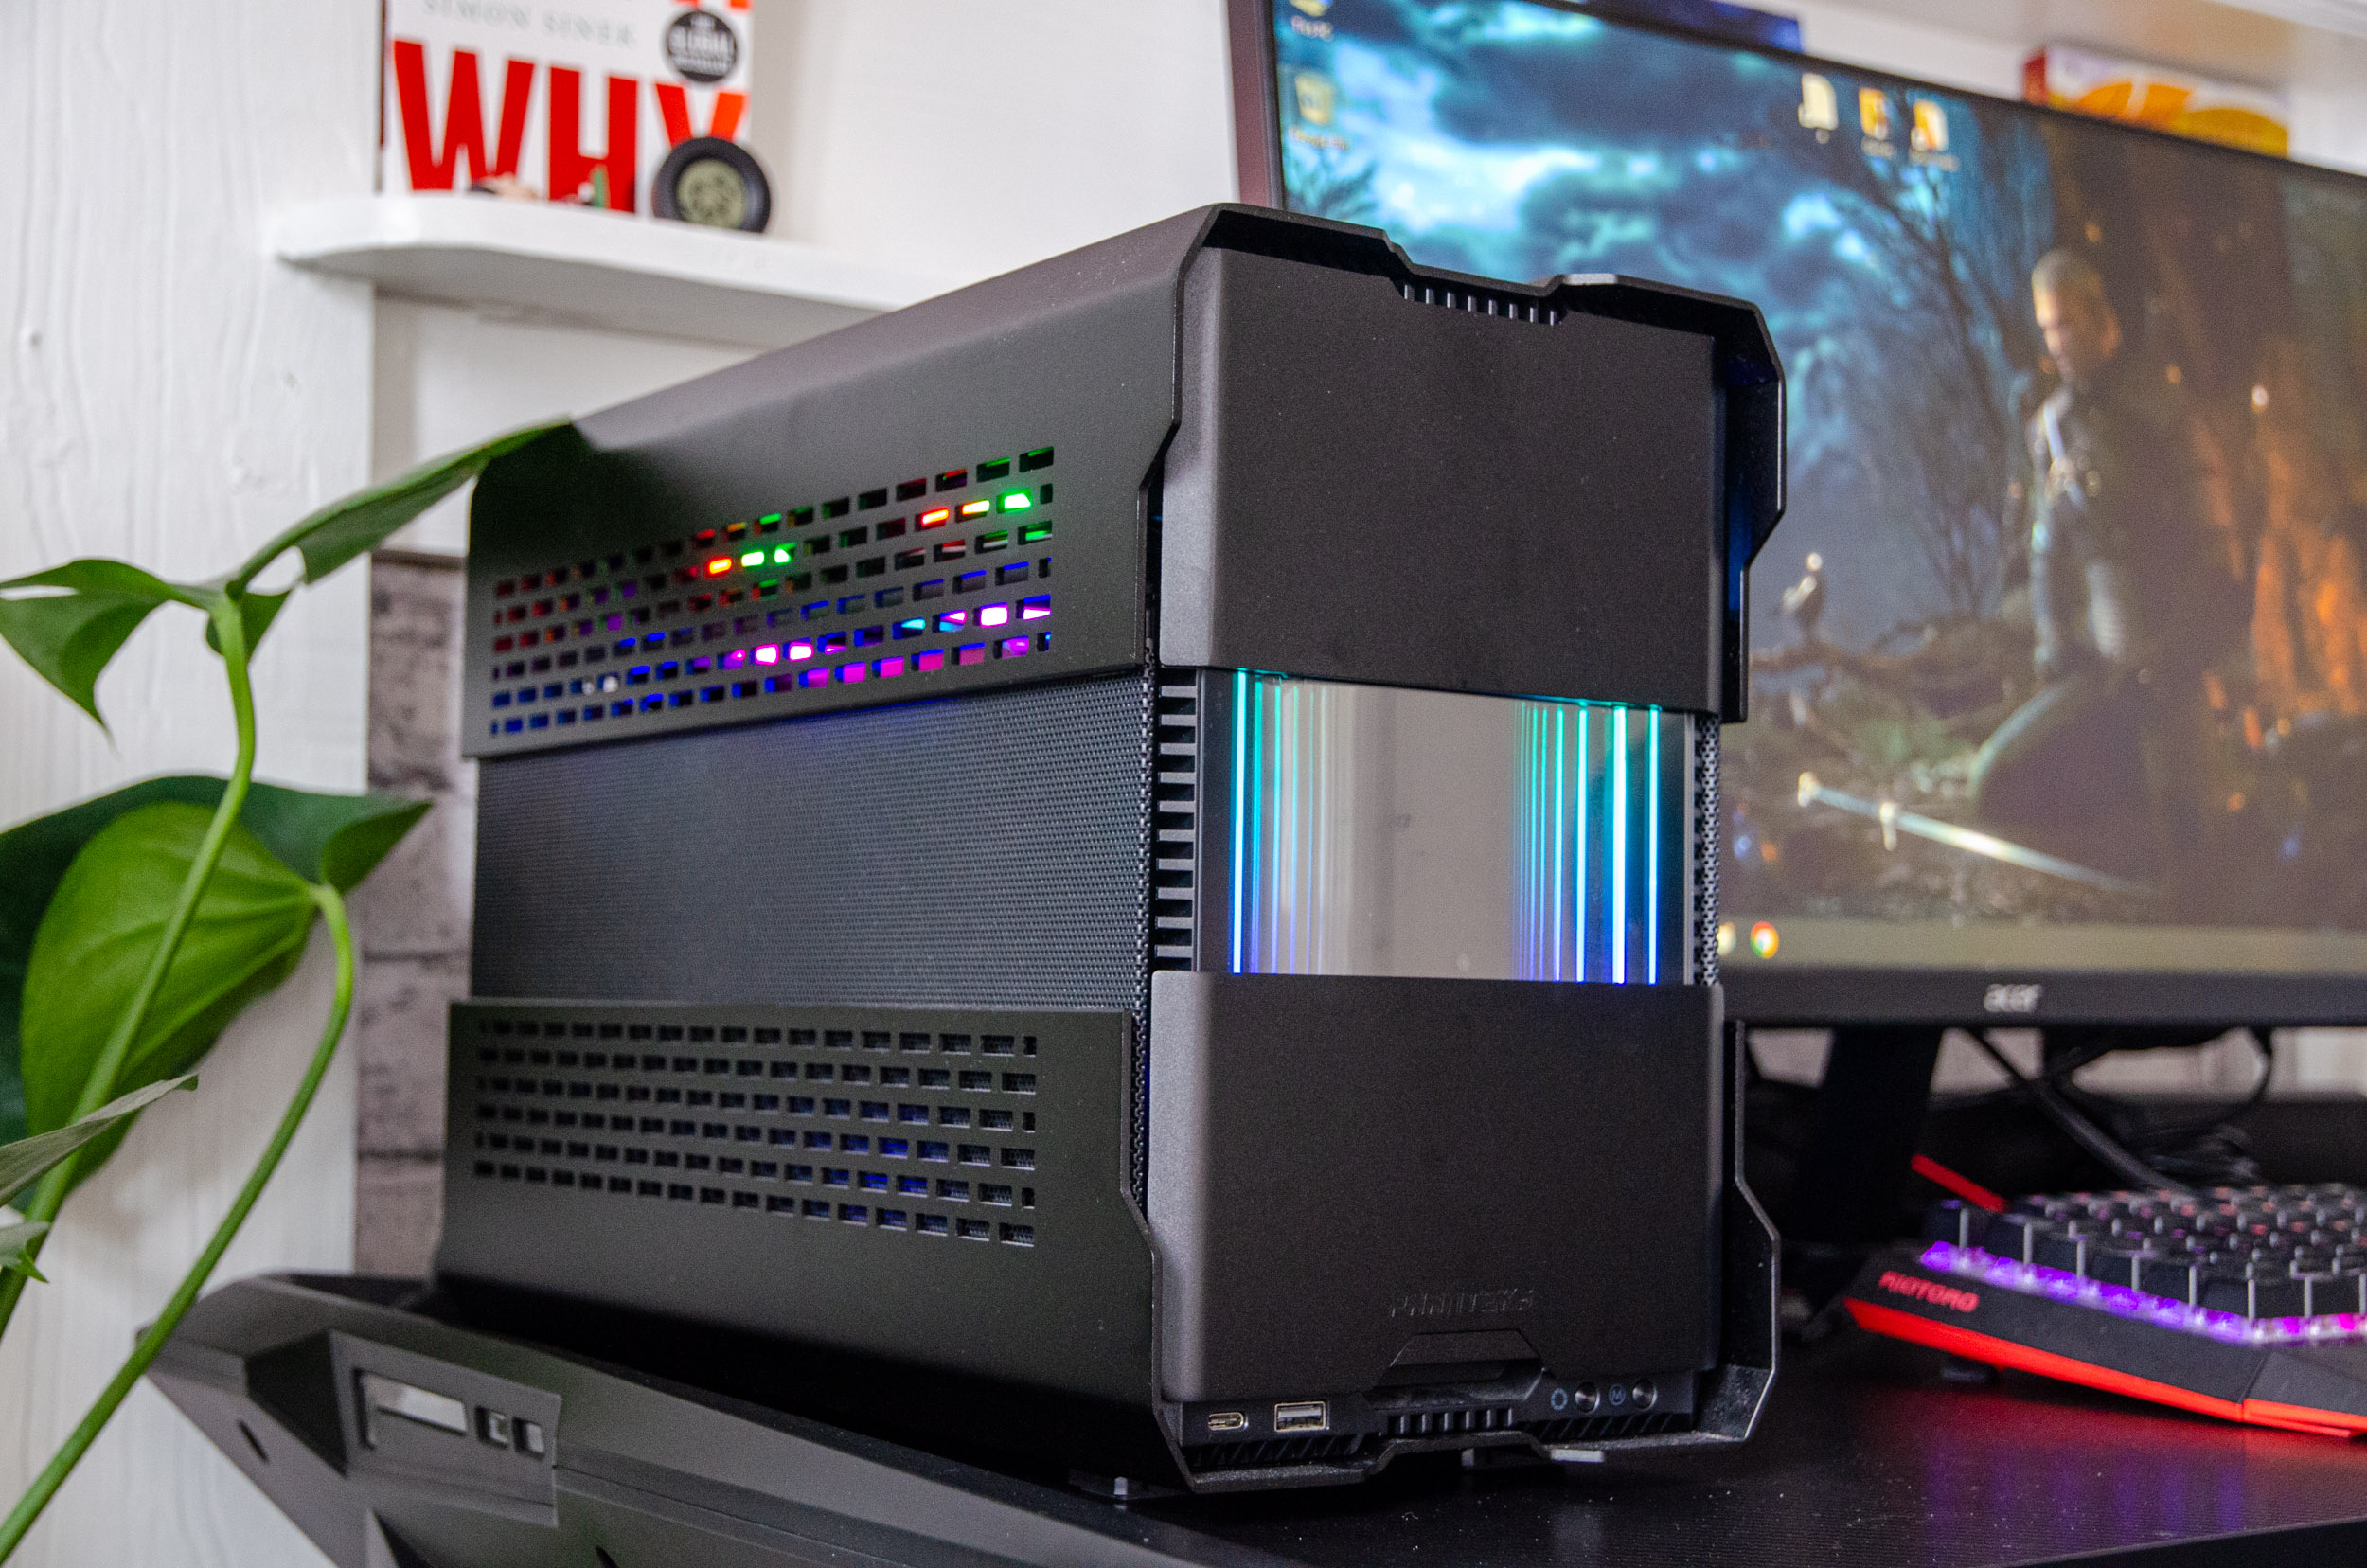
Since we switched over to the highly capable Phanteks Shift Evolv XT ITX enclosure, quick swapping parts in an SFF enclosure, has never been so easy; especially on the AM4 socket where you reuse the stock motherboard backplate.
Regarding the new AM5 socket, as a general rule of thumb, if a cooling system previously used the stock AMD motherboard backplate on the AM4, then it will be compatible on the AM5 as well. So the Alpenföhn AIOs are fully compatible with the new AMD series.

With these out of the way, the first step is to install the custom screws with integrated spacers into the backplate.

Then attach the metal pump brackets in the correct orientation: their screw grooves need to face you.

Apply the thermal paste and then screw down in an X pattern the securing bolts.
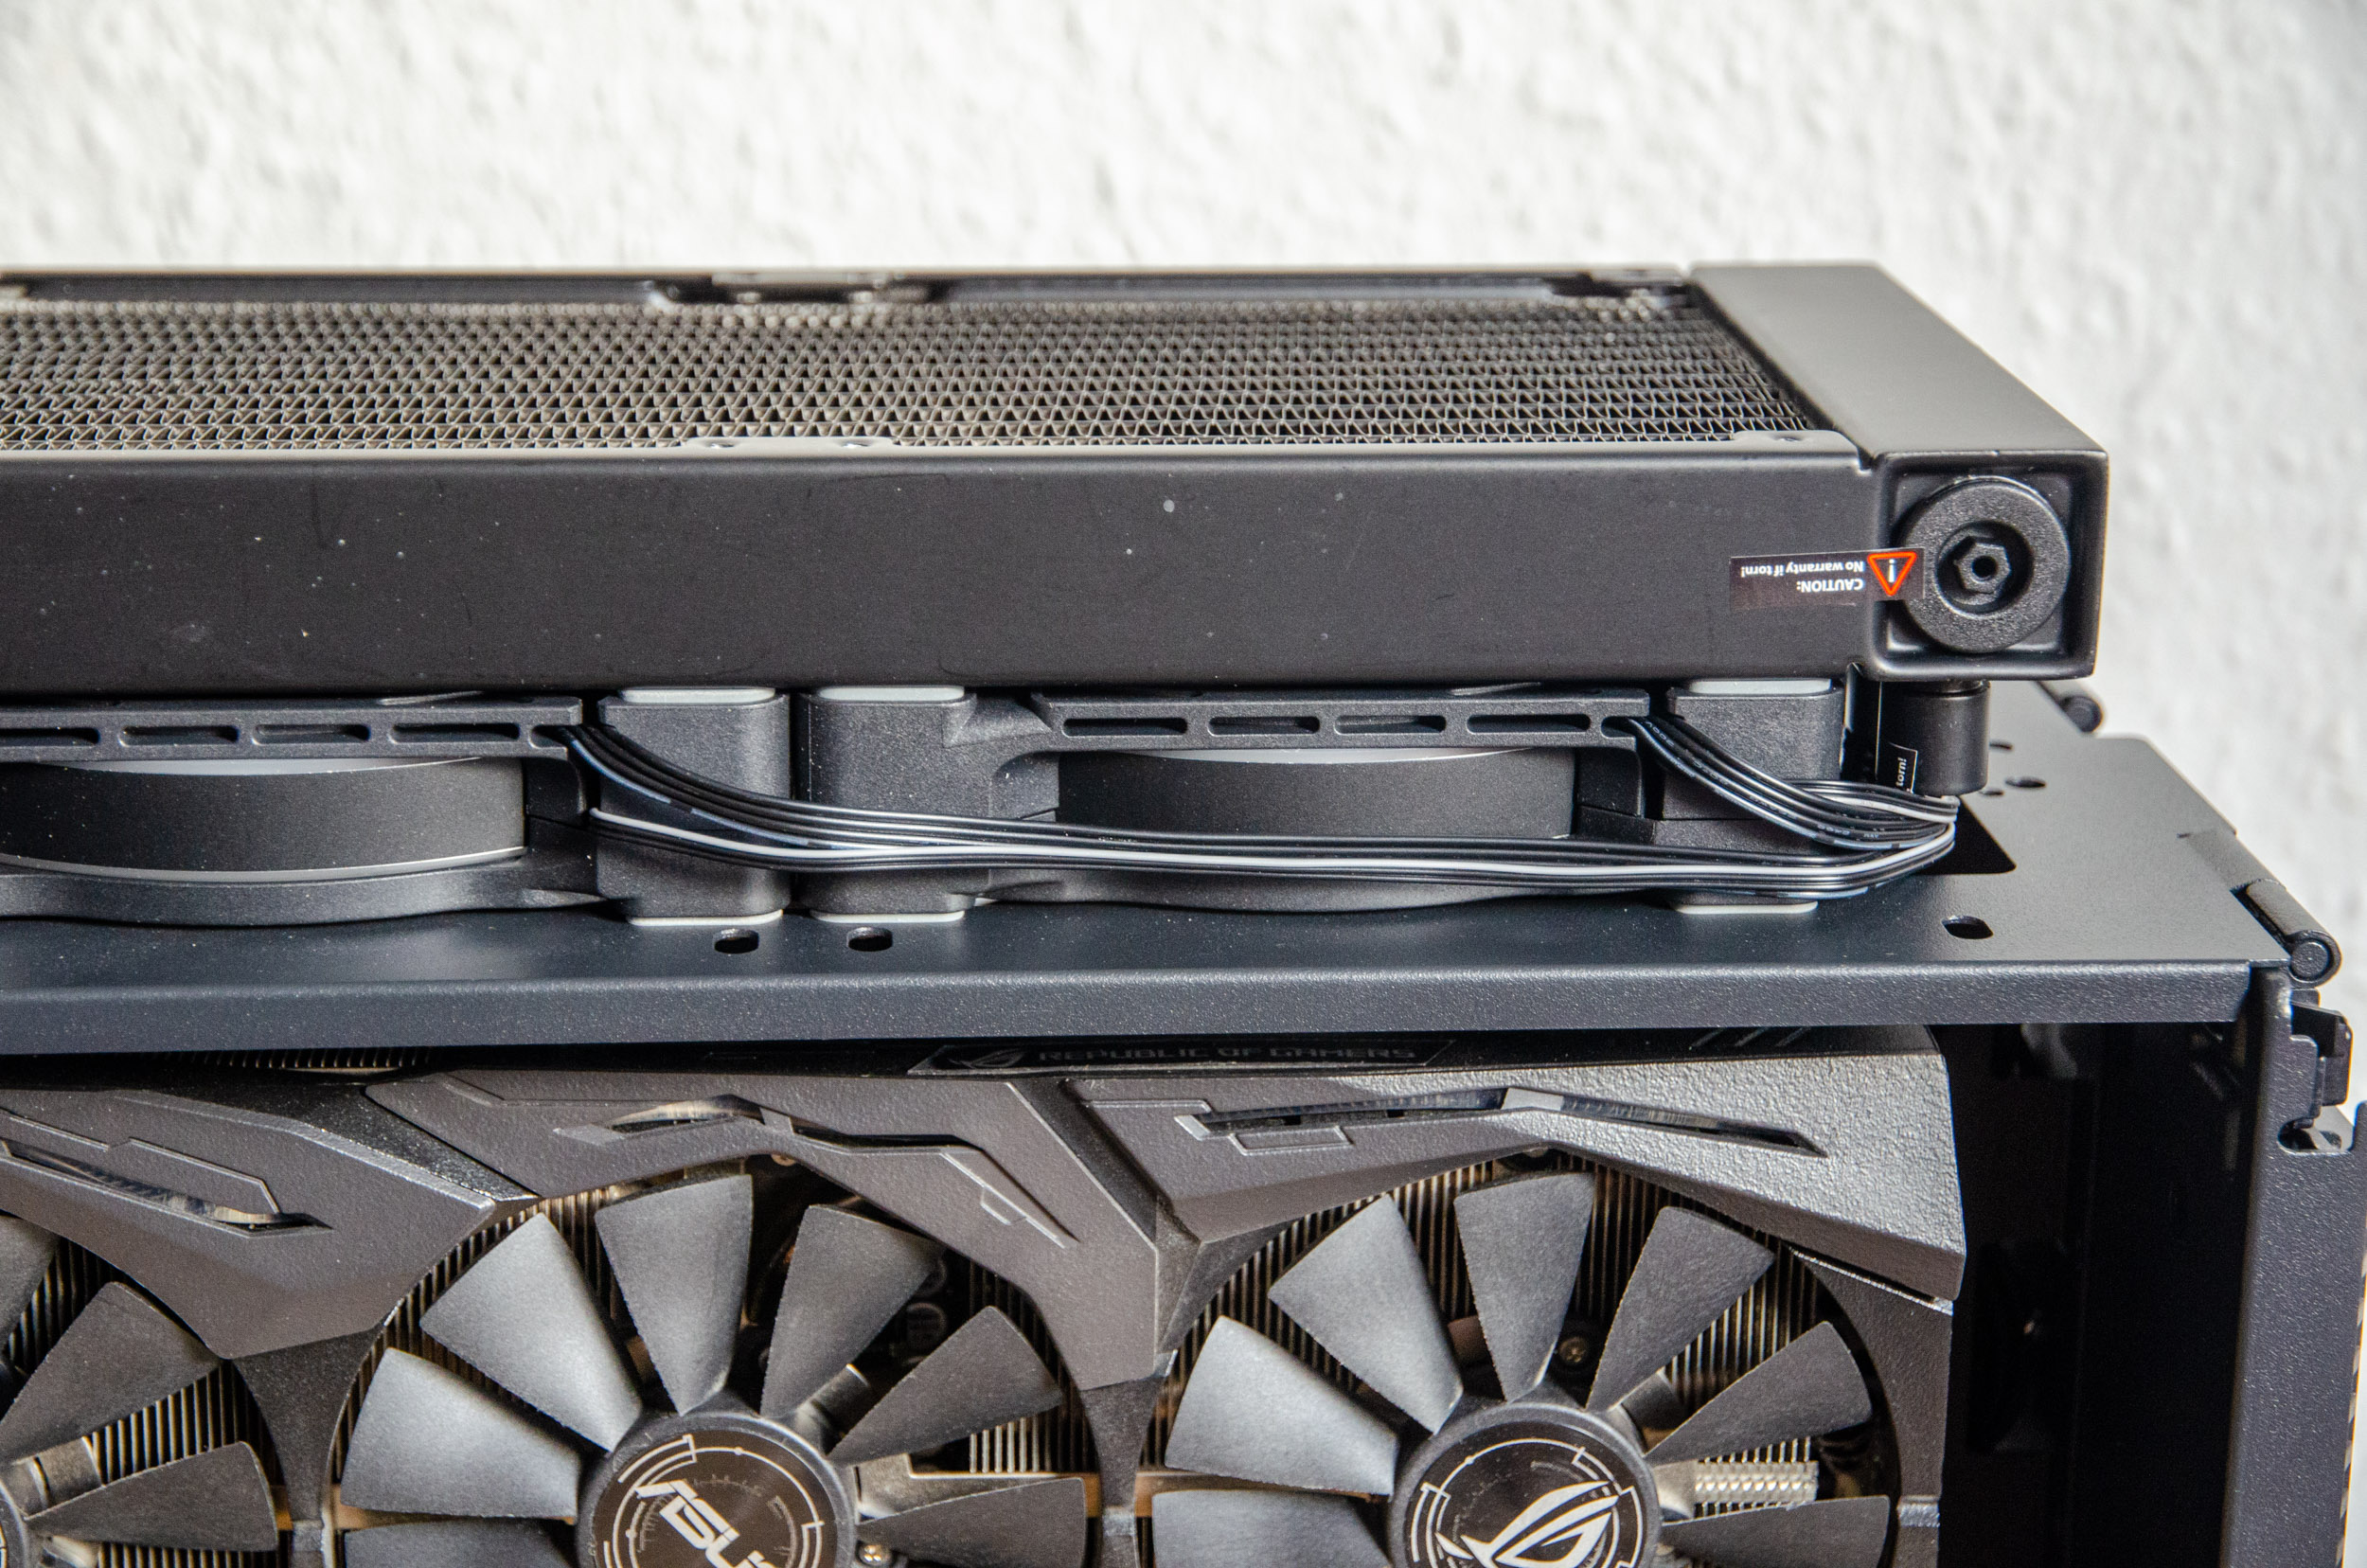
Now it’s time to attach the fans to the radiator but specific to our case, we need to install them on the modular AIO tray. Luckily the fans bolts are long enough to accommodate said tray.

The AIO tubes are flexible enough to clear even this tight scenario.

No explanation is needed.

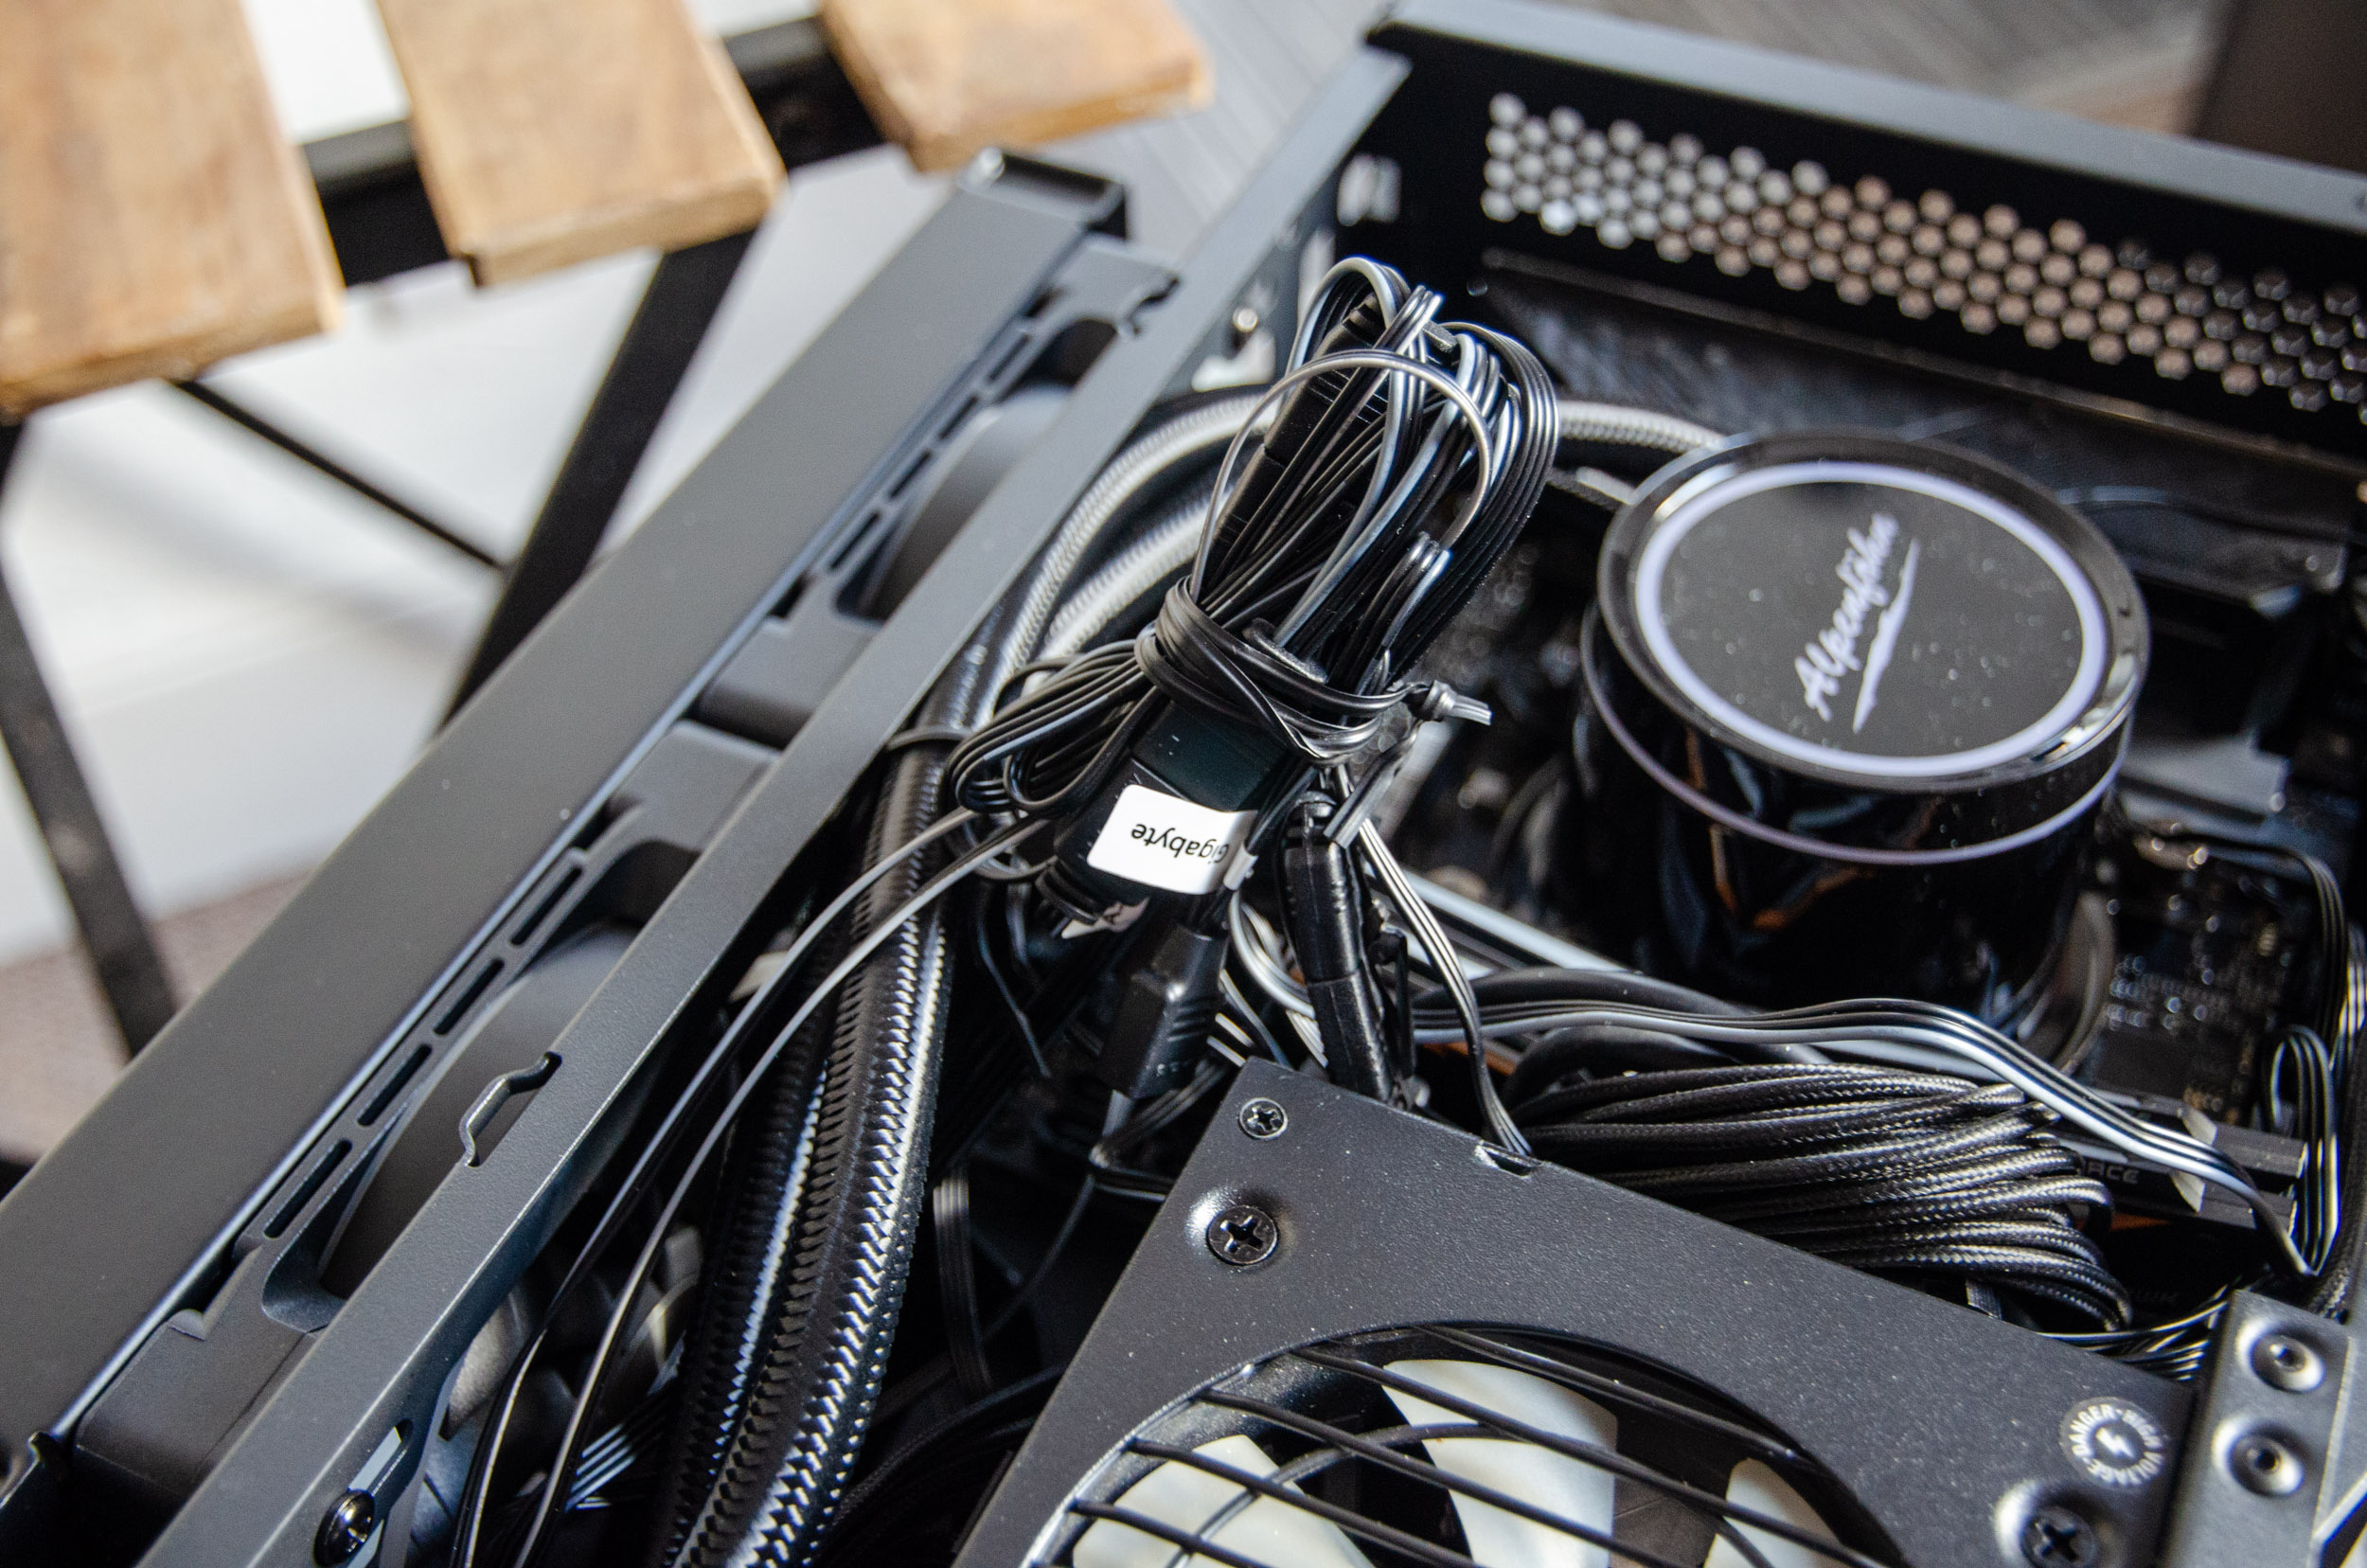
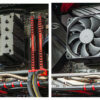
The next challenge will revolve around the wire-management since you have a lot of wires and plugs to organise.
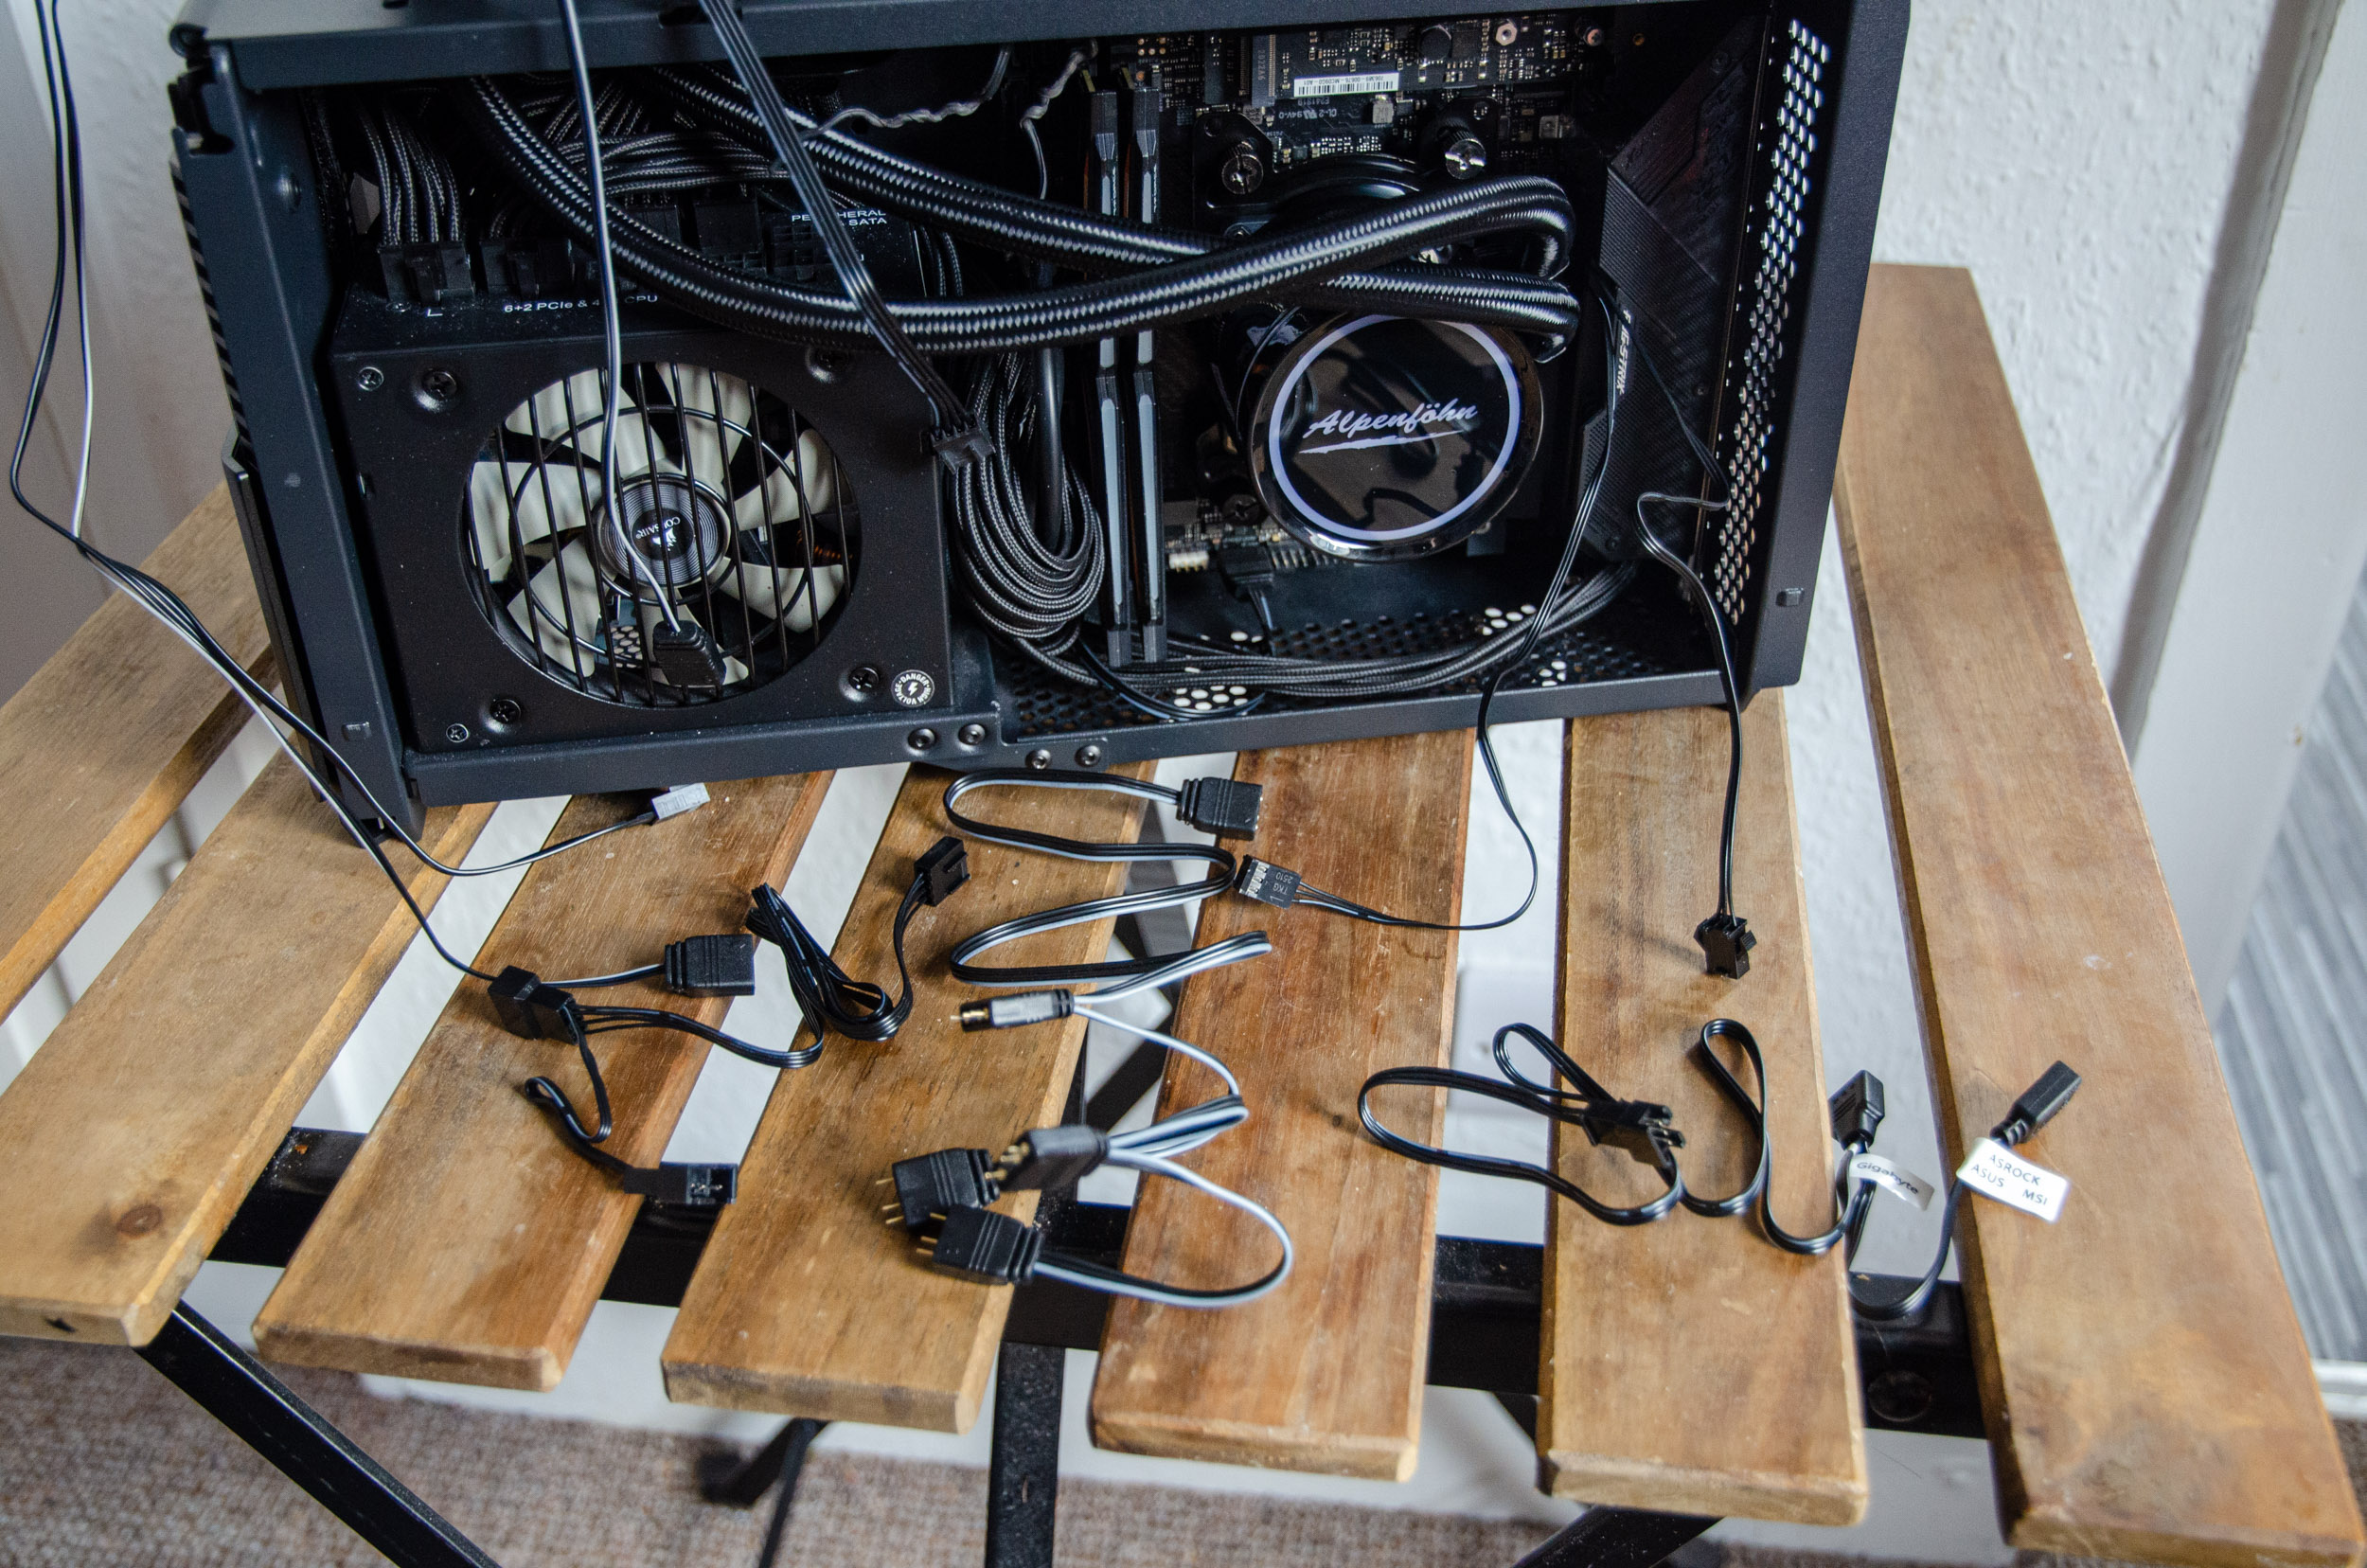
Basically, the fans have a 2-way splitter for the 4-pin PWM ports while the pump will connect to the motherboard via the 3-pin plug. That takes care of power delivery whereas the ARGB takes a bit more to sort out.

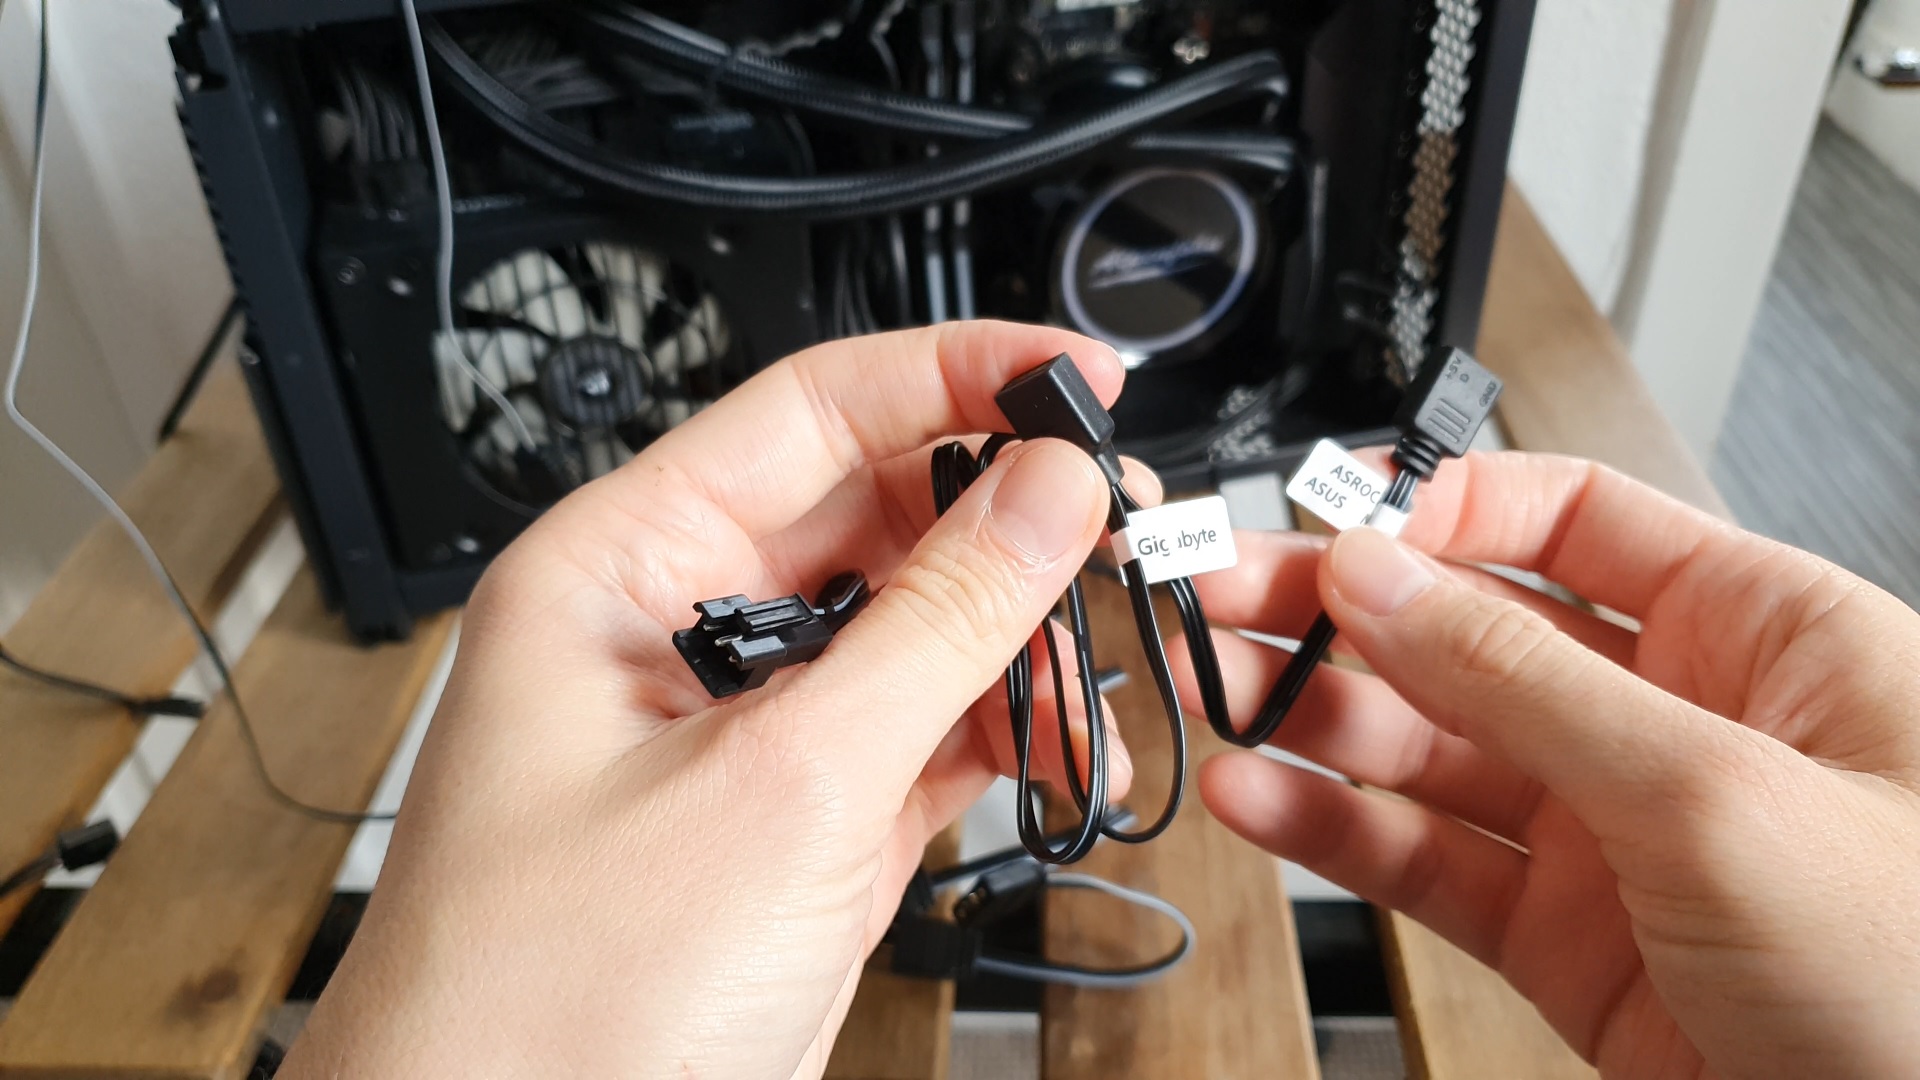
The RGB for the AIO uses a special plug that connects into this separate adapter that, as you can see, offers the 5v RGB standard connector (used by ASUS, MSI, ASRock) or the Gigabyte proprietary one.
Then the fans, since they use a regular 5v 3-pin adapter, they will daisy-chain straight to the included adapter that offers you 4 ports: 3 for the whole Alpenföhn system and one extra free one if you have an RGB LED trip or like in our case, a front illuminated case panel.

All of this cable spaghetti can be secured out of the away since the cables have plenty of length even for a bigger format build.
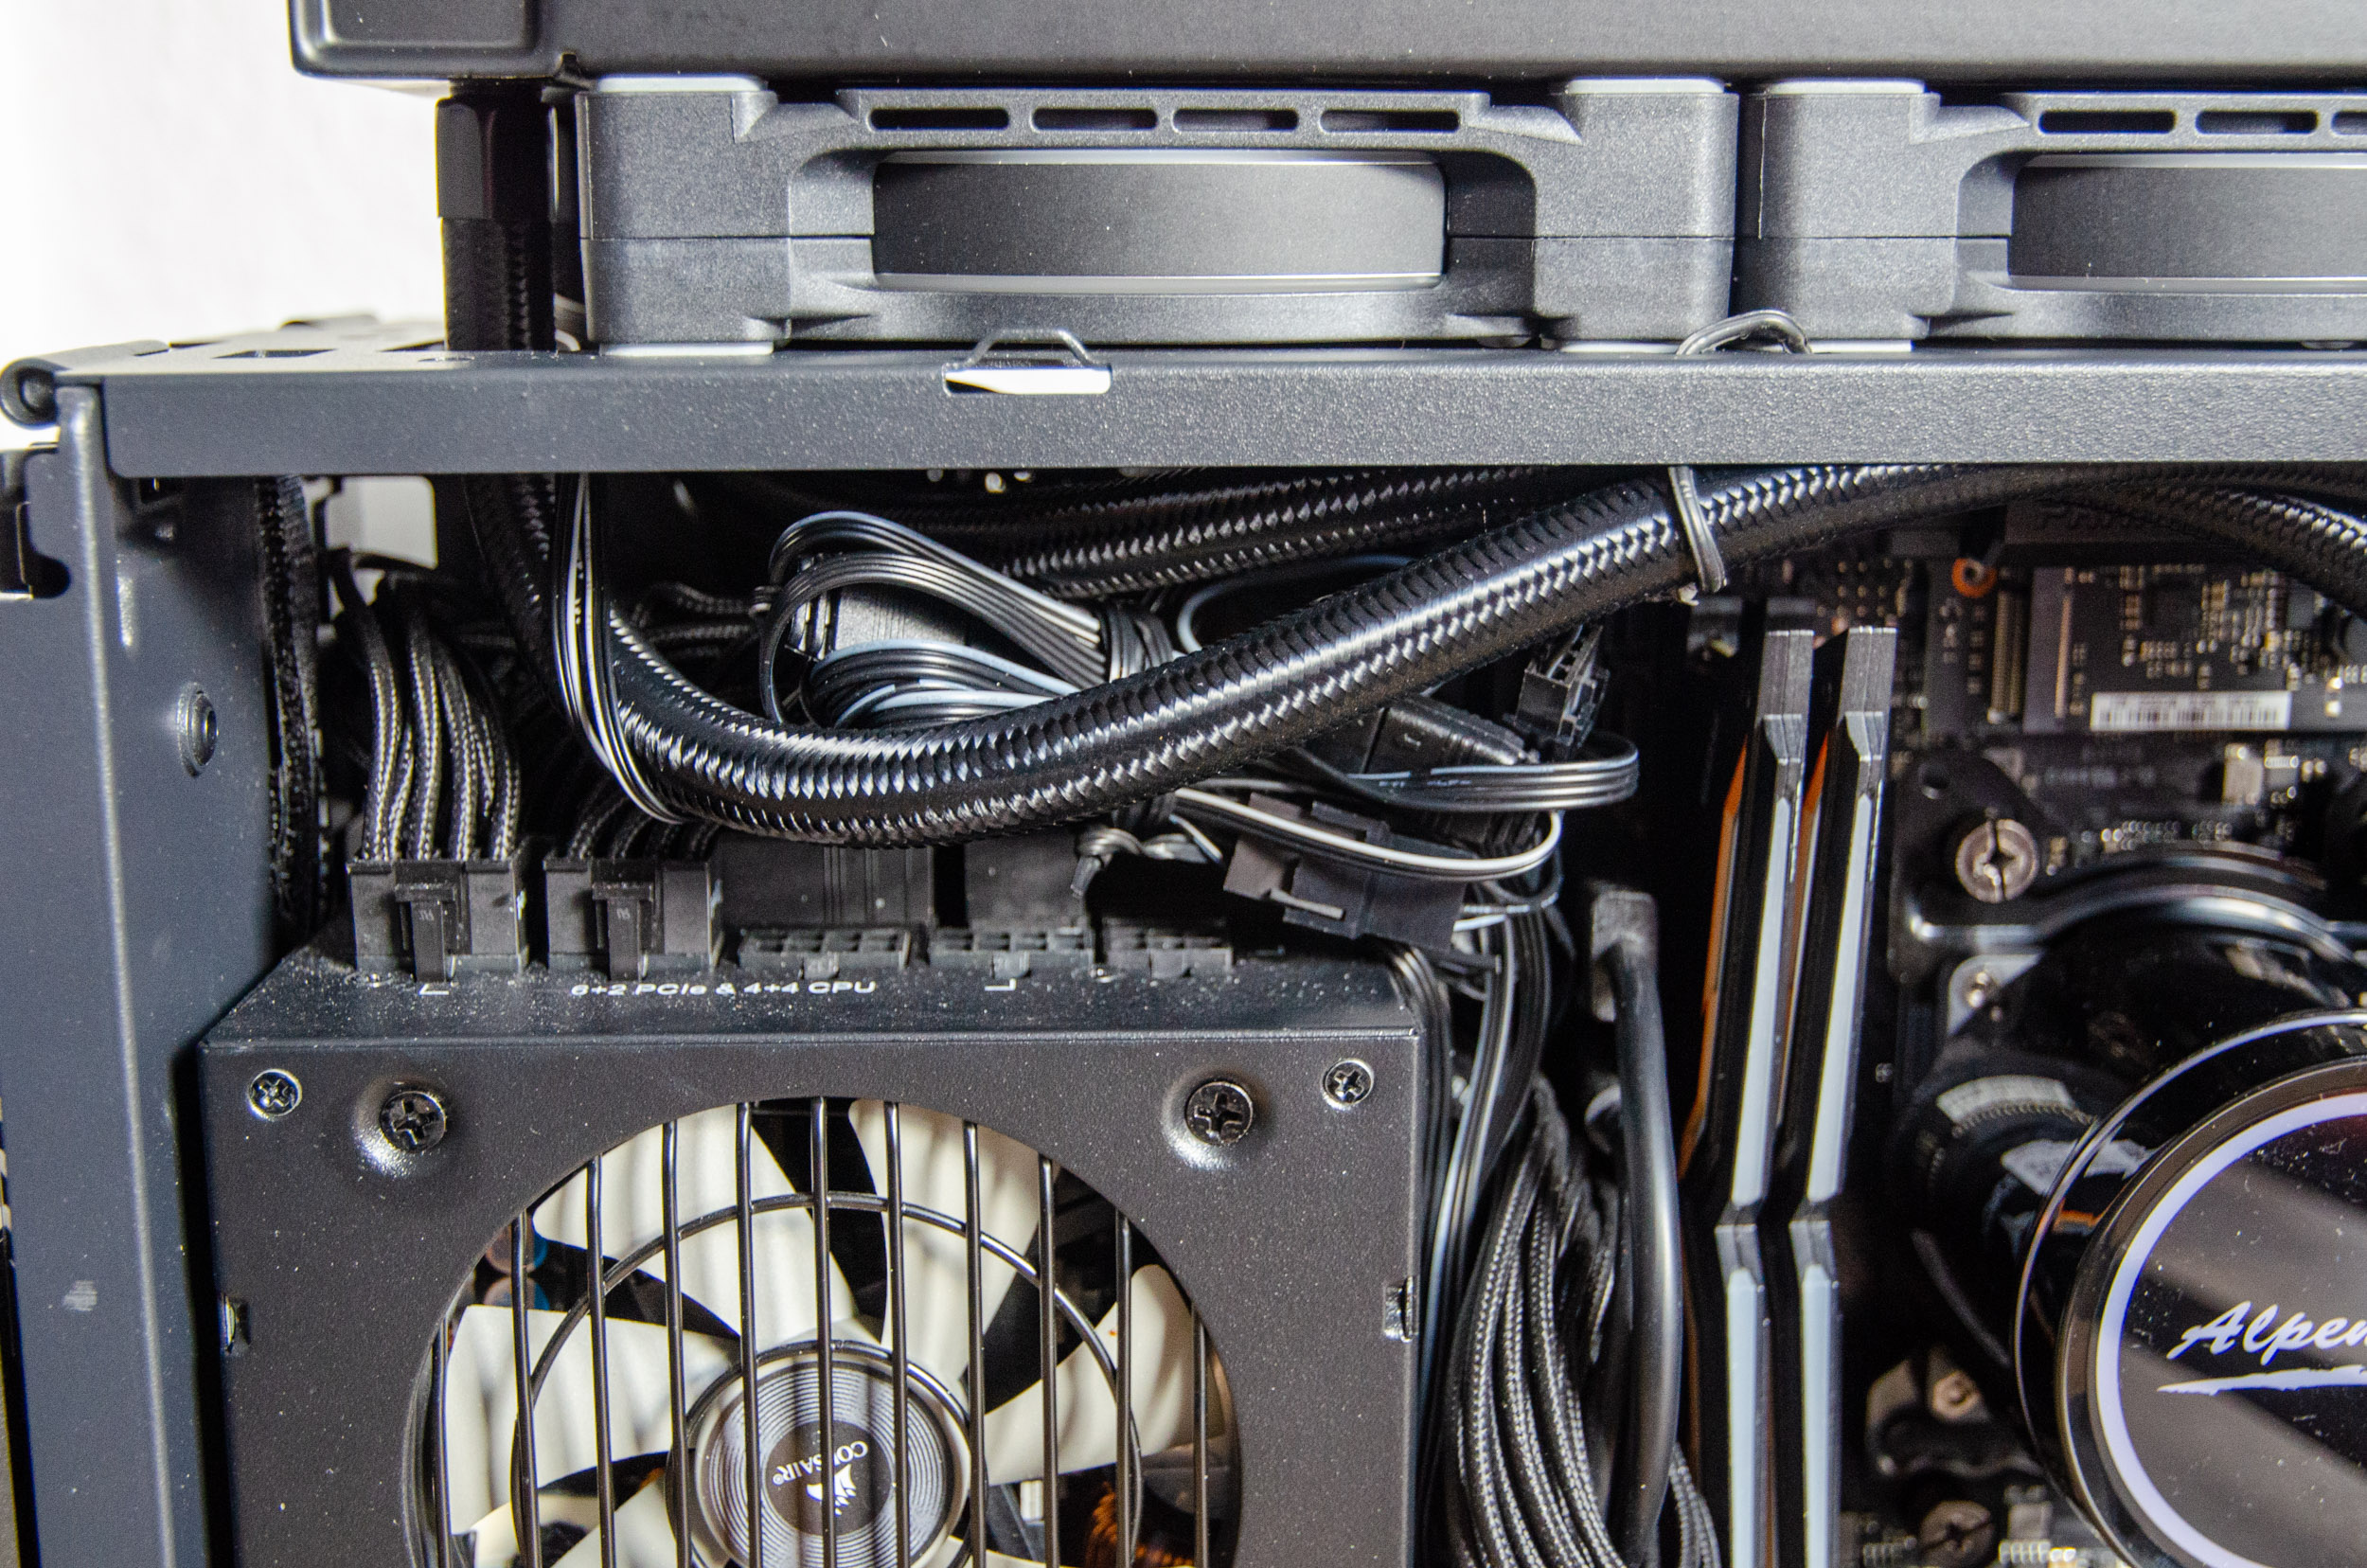

Here is the final check. Clearance wise, the pump and its bracket fit perfectly in the socket area with no issues whatsoever from any direction.

Up top, the fans and radiator also align perfectly.

One of the best parts of any build, is to fire it up and to see that everything is working. The cherry on top is the RGB eye candy that complements this enclosure perfectly!

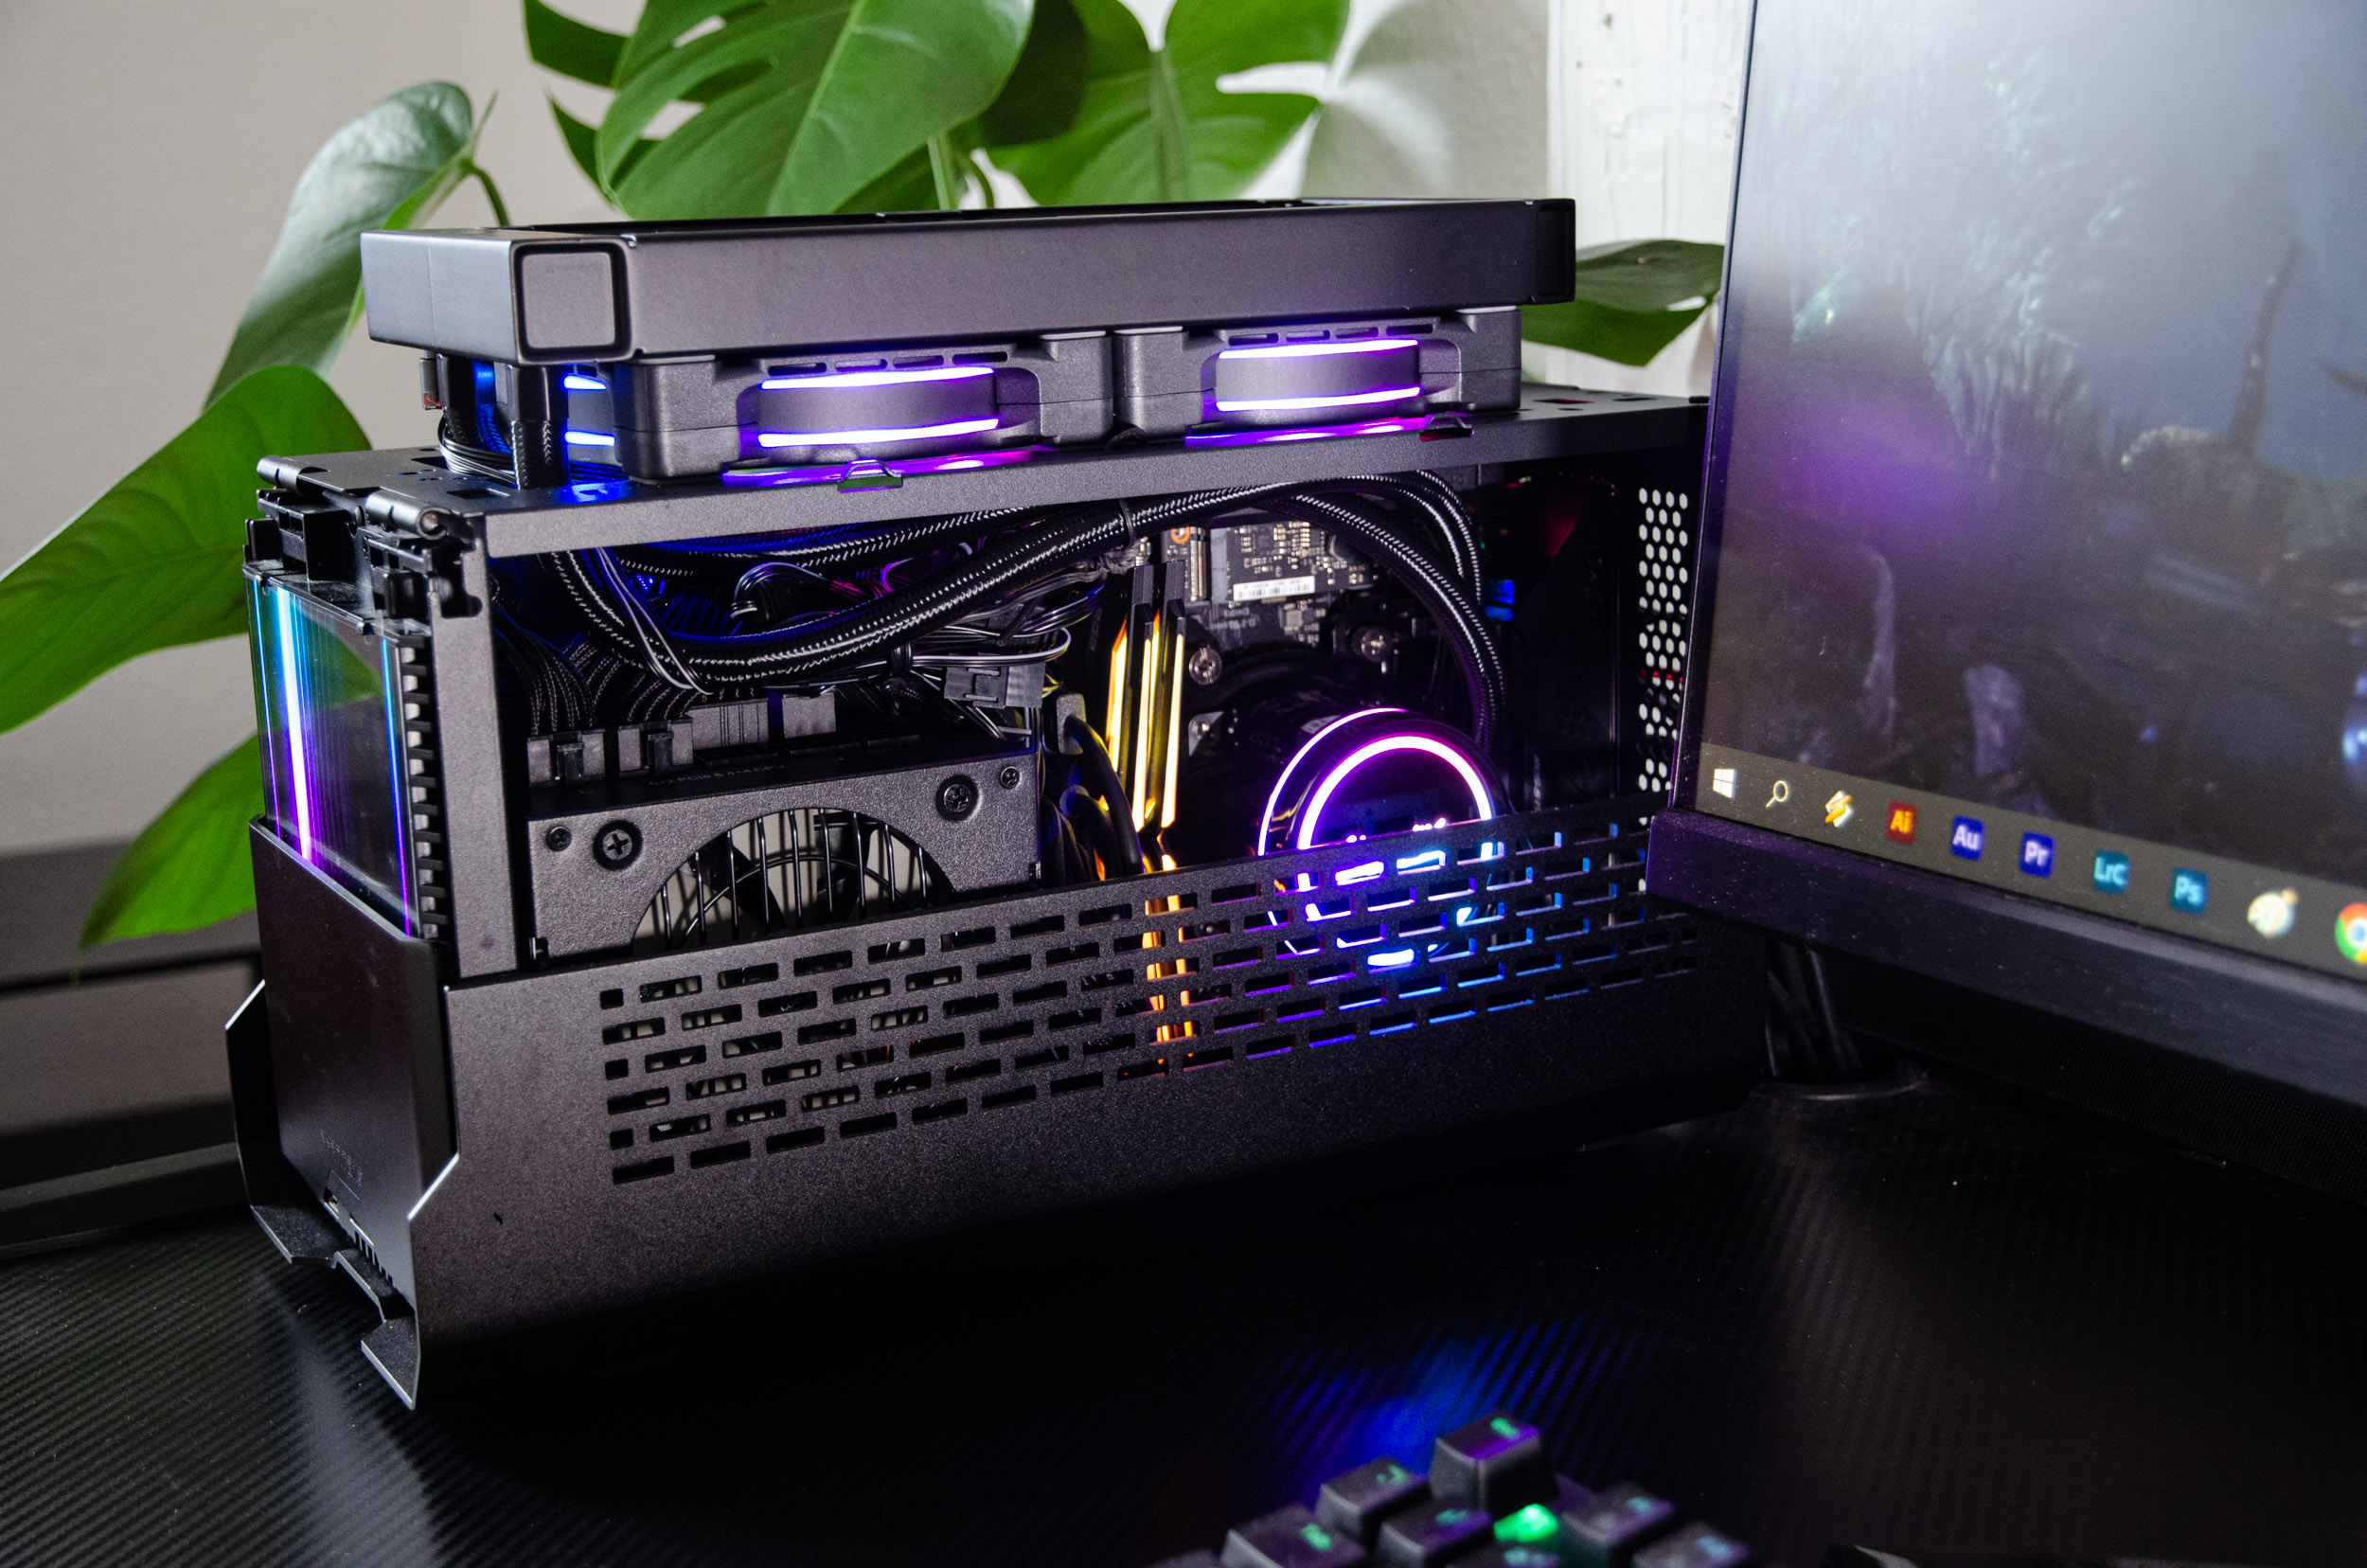

Since the Wing Boost 3 ARGB fans emit light from the sides of the frame as well, they line up with the cut-outs from the cooling vents in this particular case, creating this symbiosis regarding the light show.

Don’t forget that you can swap out the pump’s top plates.


Testing methodology
- The CPU AIO cooler will be tested in 3 different scenarios as follows: the AMD Ryzen 5 5600x CPU at stock settings, then at 4.0 GHz for 1.05v (as the main baseline to remove any inconsistencies in stock form where the BIOS will pump extra voltage for shorter periods) and finally an overclocked scenario of 4.7 GHz for 1.275v
- The Alpenföhn will be tested against a regular 240mm AIO
- As the main torture test, we will employ a 2 minute run in AIDA64
- Room temperature was recorded at ~18°C
- For the noise testing, we used our Pyle PSPL01 placed 30 cm away from the setup - all other fans will will be off or set at minimum RPM and a lav mic was places at the same distance for the audio sample
- Thermal paste used Noctua NH-H2
- All of the side panels will be attached and the Alpenföhn’s fans will be left on auto % RPM to simulate real life usage or manually adjusted and pointed out accordingly
- Any results over 90°C in any condition are considered a fail
Hardware used:
- CPU: AMD Ryzen 5 5600x
- RAM: 16GB Team Group T-Force Night Hawk RGB 3000 MHz CL16
- Motherboard: ASUS ROG STRIX B550-i Gaming mITX @ BIOS 2803
- Boot SSD: Samung 970 PRO 1TB M.2 Gen3x4 MLC PCIe NVMe 1.3
- Video card: ASUS GTX 1080 STRIX A8G
- PSU: Corsair SF750 SFX Platinum
- Case: Phanteks Evolv Shift XT ARGB mITX
Software:
- OS: Windows 10 Pro x64 Version 22H2
- NVIDIA Drivers - 527.37
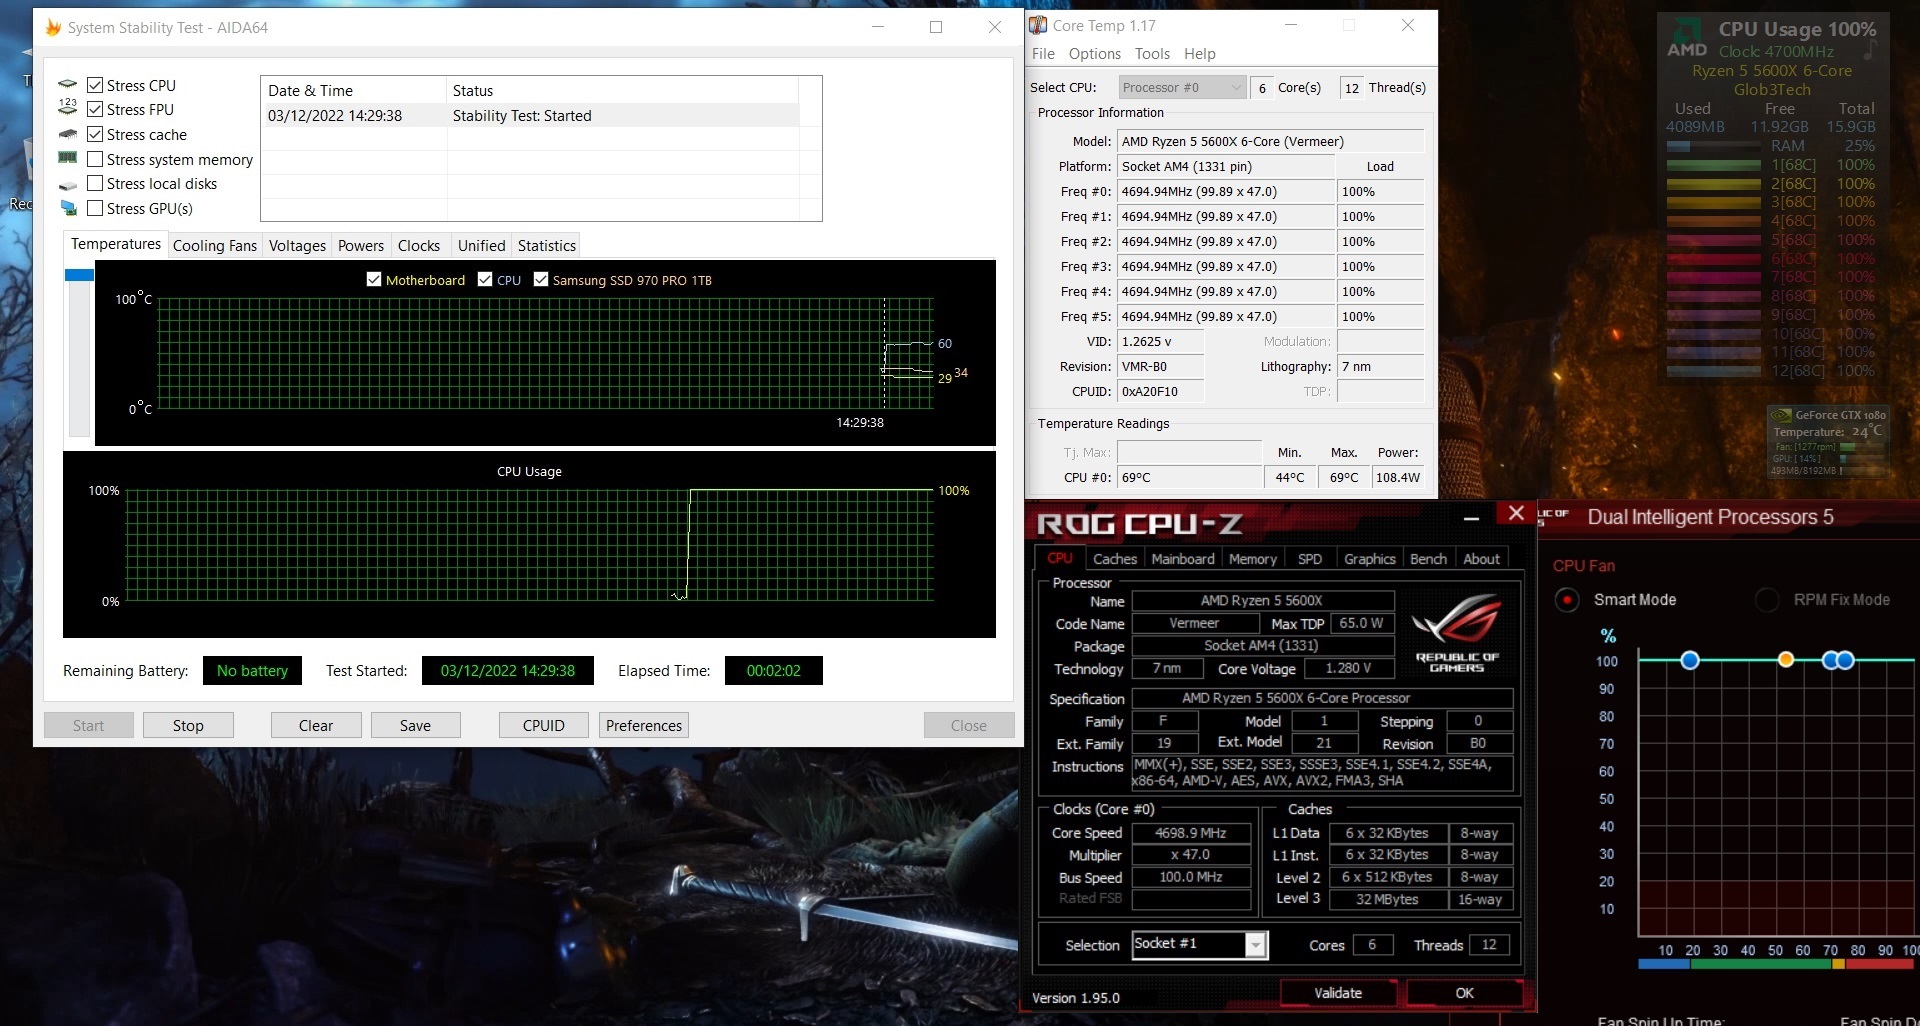
- CPU-Z v1.95 - To verify the CPU’s and RAM’s statistics
- Core Temp v1.17 - To see the temperatures in real time
- AIDA64 Extreme v6.60 - Memory analysis and Benchmark suite
- MSI Afterburner v4.62 - To record the FPS and load/temperatures
- Cinebench R23 - Great overall CPU benchmark tool
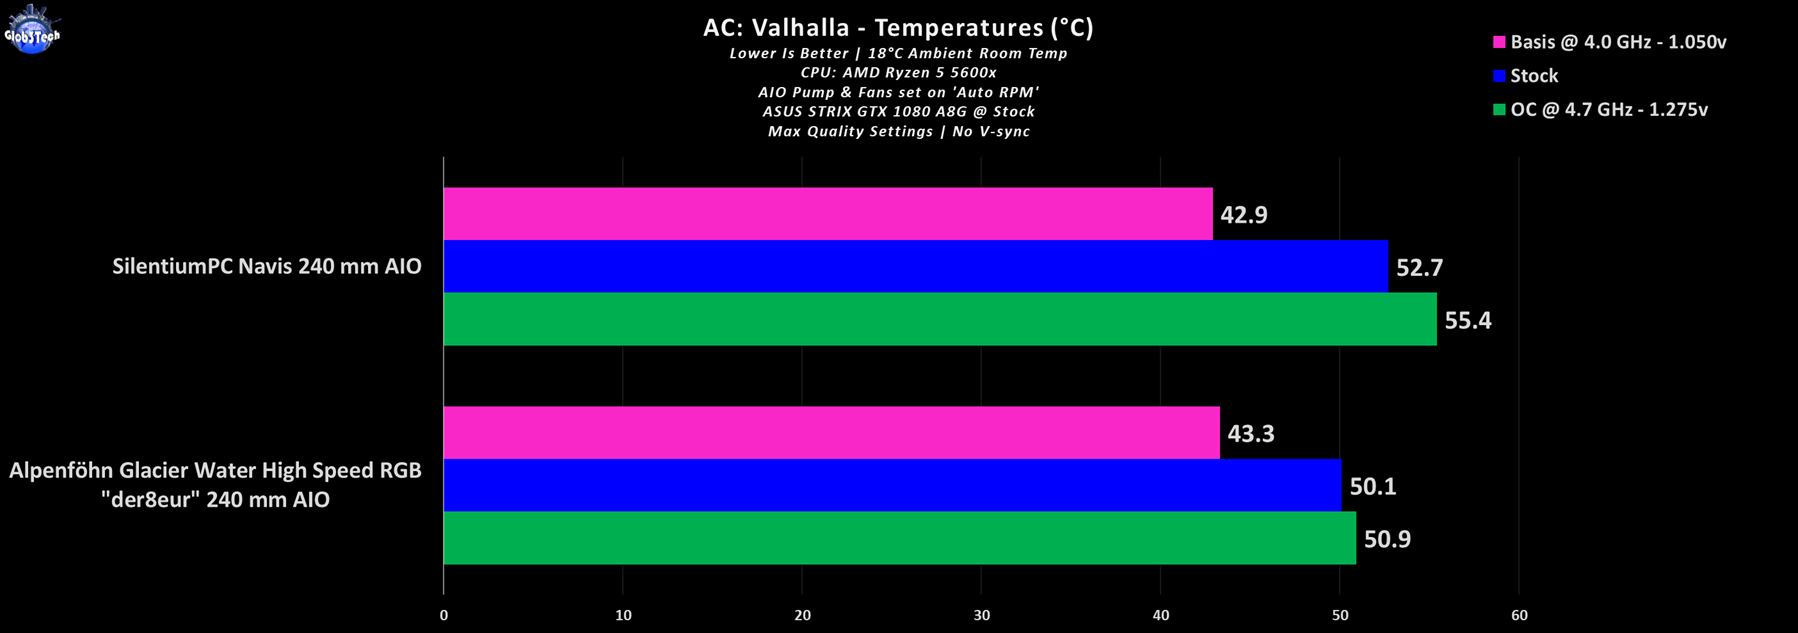
- 3D/Game(s) - Assassin’s Creed Valhalla with latest update, set at 1080p, ultra quality settings, no V-Sync
Testing, Results and Analysis
The first series of tests come from Cinebench R23 which will put a serious load on the CPU while it renders a specific frame. Thus from left to right we have the basis (4.0 GHz @ 1.05v), stock and OC (4.7 GHz @ 1.275v) scenarios. We get some interesting results since the Glacier Water AIO excels in the higher RPM range when compared to the other test subject, which despite its lower max RPM threshold, performs better in its medium RPM curve.


The 2 minute long AIDA64 stress test should impose the maximum workload just for the CPU, therefore we should get the highest stress scenario. The results are mirrored here from the R23 test.

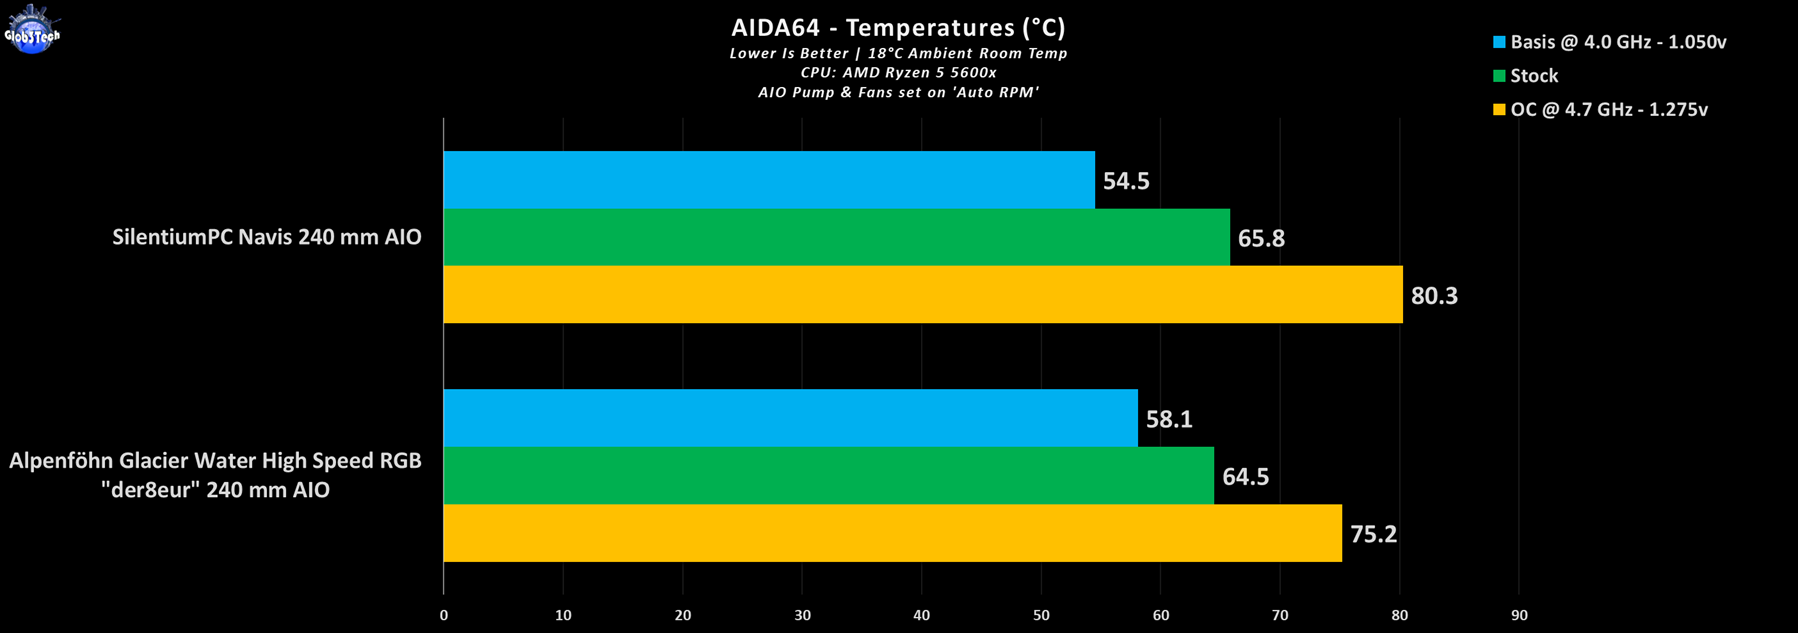
Since this particular variant carries the ‘High Speed’ designation, here it is cranked all the way to 100% RPM, which is 2200 RPM. The delta variation is impressive (5-6°C!) but comes with the ‘jet’ engine noise output drawback.
If a CPU cooler manages to survive the torture tests, then a benchmark run in a gaming scenario, should be a walk in the park. Games are not as stressful as a synthetic torture tests but are a great indicator of real life usage.
The noise output test is an important challenge for any CPU cooler because if you can’t live with the noise, this negates any of the other advantages. The first part of the clip tackles the pump which is pretty much silent even at 100% RPM. However, regarding the fans, above the 60% RPM point, the High Speed Wing Boost 3 ARGB fans start to get really audible, so make sure to keep them below this threshold if you plan to have a silent build.

Conclusion
This ‘High Speed’ flavour of Alpenföhn’s Gletscherwasser 240mm AIO is without a doubt a high performing piece of kit regarding its main purpose, which is cooling. It excels in all areas that you would expect from an all-in-one solution, sans the noise output in the higher RPM range. This is understandable from the get-go with any product that is rated as a high(er) speed product when compared to its standard variant. The build quality is there and it’s top notch, the RGB implementation is complete (because you have full manual control via a remote if your motherboard lacks a 5v RGB port) and the AIO, overall, makes a long lasting impression. Such a good one that, that it’s currently our main AIO in our Phanteks Evolv Shift XT mITX case, since together they create such a complementary look. All of the other treats, from the modular top plate design, the ‘der8auer’ blessing to the impressive socket compatibility list and the included Thermal Grizzly Kryonaut thermal paste, make this Alpenföhn Glacier Water AIO an inevitable purchase.
The good:
+ Excellent cooling performance
+ Full ARGB for the pump and fans
+ Impressive socket compatibility list
+ Flawless build quality
+ Modular top plate design for the pump
+ Manual control for the RGB including a remote
+ Straightforward installation process
+ The RGB is really eye catching
The bad:
- Loud after even 60% RPM but it’s expected from a ‘high speed’ rated product
- The ample options for the RGB comes with the drawback of too much cabling
- Lacks the premium packaging padding as we saw in the 280mm variant
Glob3trotters “High Performance” Award - 4.5 out of 5

Many thanks to Alpenföhn for supplying us with this epic AIO!


