

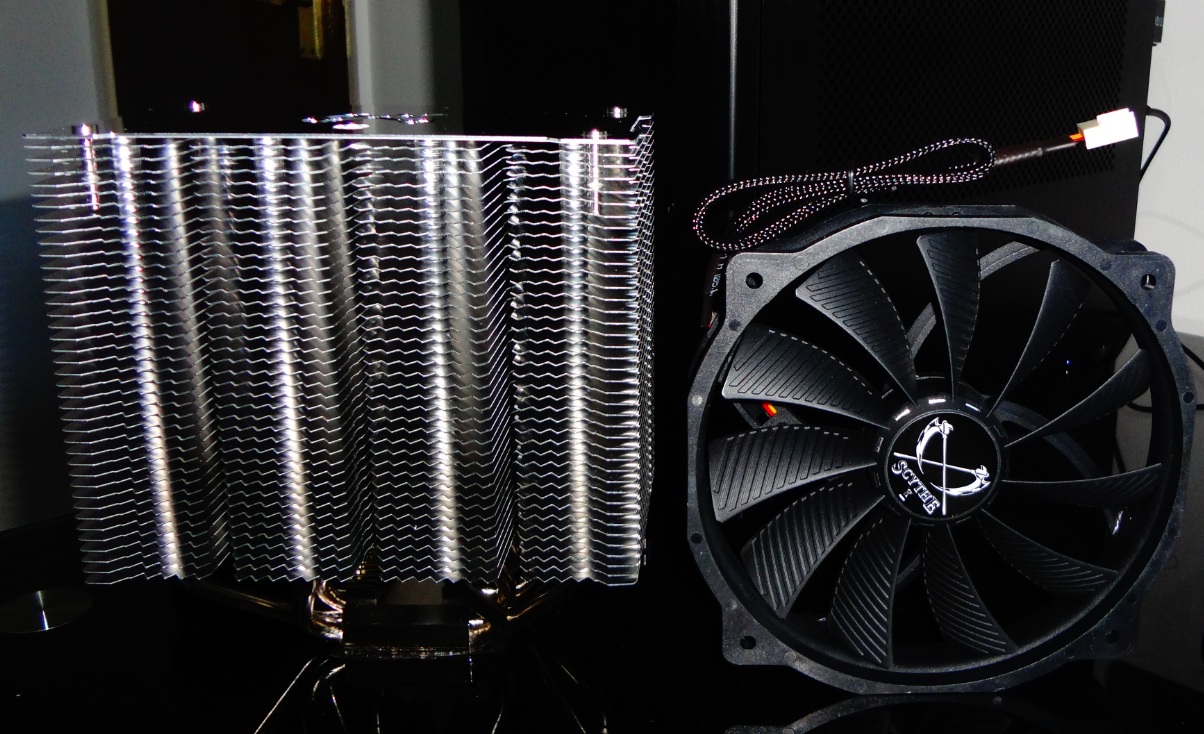
In for reviewing today we have Scythe’s Mugen MAX big tower CPU coolers and an additional Scythe Glide Stream 140 PWM fan (the same as the Mugen Max supplied one) so we can do a dual setup test as well.
The fan will be covered also, separately, in a future review.
First about Scythe:
![]()
Scythe Co., LTD originated in the Akihabara Electric Town of Tokyo Japan in 2002 and has since started to offer services all over the world in places like Germany, Taiwan, China and even the United States.
Started off as a distributor and manufacturer of passive and low-noise PC components.
Since then they have opened up R&D facilities in Taiwan and China to monitor production and quality control while their offices in Los Angeles, USA and Hamburg, Germany are for customer care and sales support.
Scythe now offer a nice range of products including CPU coolers, fans, PC Accessories, input devices, HDD enclosures and even some audio accessories.
Price when reviewed: £ 45.51 – via Amazon.co.uk
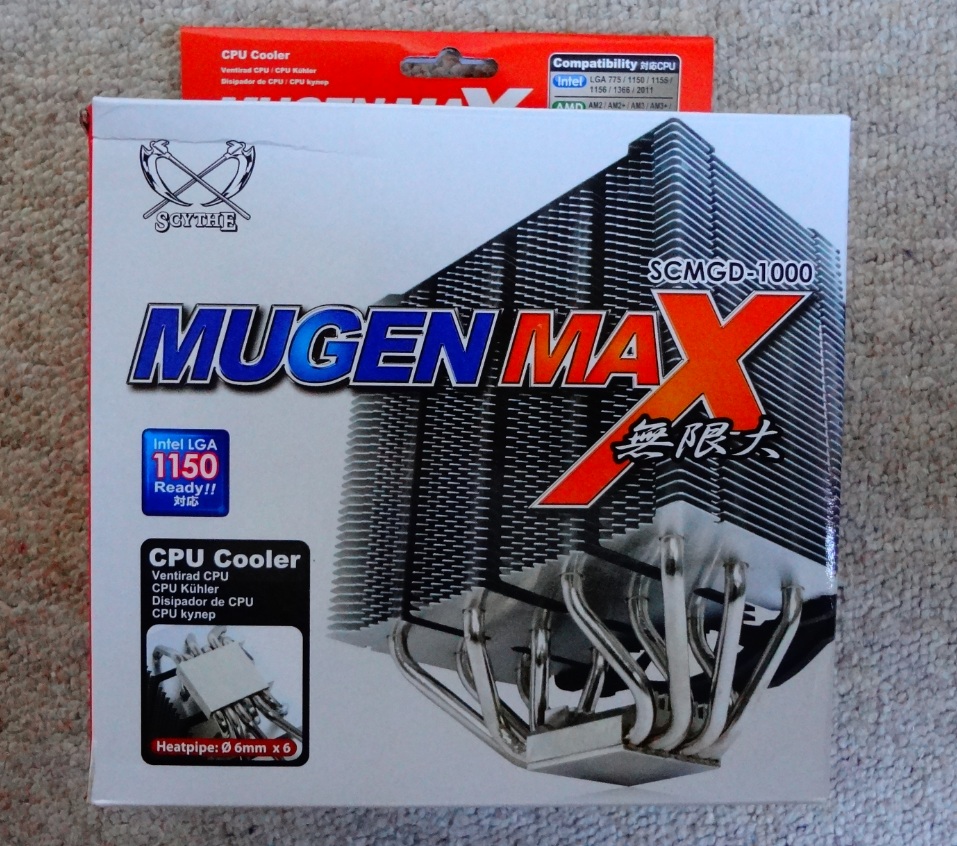
Scythe SCMGD-1000 – Mugen SCMGD-1000 MAX CPU Cooler – 140mm
Presentation
What Scythe have to say about the Mugen Max:
For enthusiasts and fans Scythe Mugen Mugen MAX sends to the another challenger to the market of the “big” CPU tower cooler. Looks great, but also the performance is impressive, ensures how the Mugen 4 also at MAX GlideStream a PWM fan, but one size larger – the GlideStream 140mm PWM.
It promotes the warm air reliably by the already known from Mugen 4 TM.APS (Three-dimensional Multiple Airflow Pass-through Structure). The proven mounting system has also been adopted, and adapted to the new “big brother”.
To underline the high quality workmanship of the heat sink, all 6 heat pipes were also plated.
Main Features:
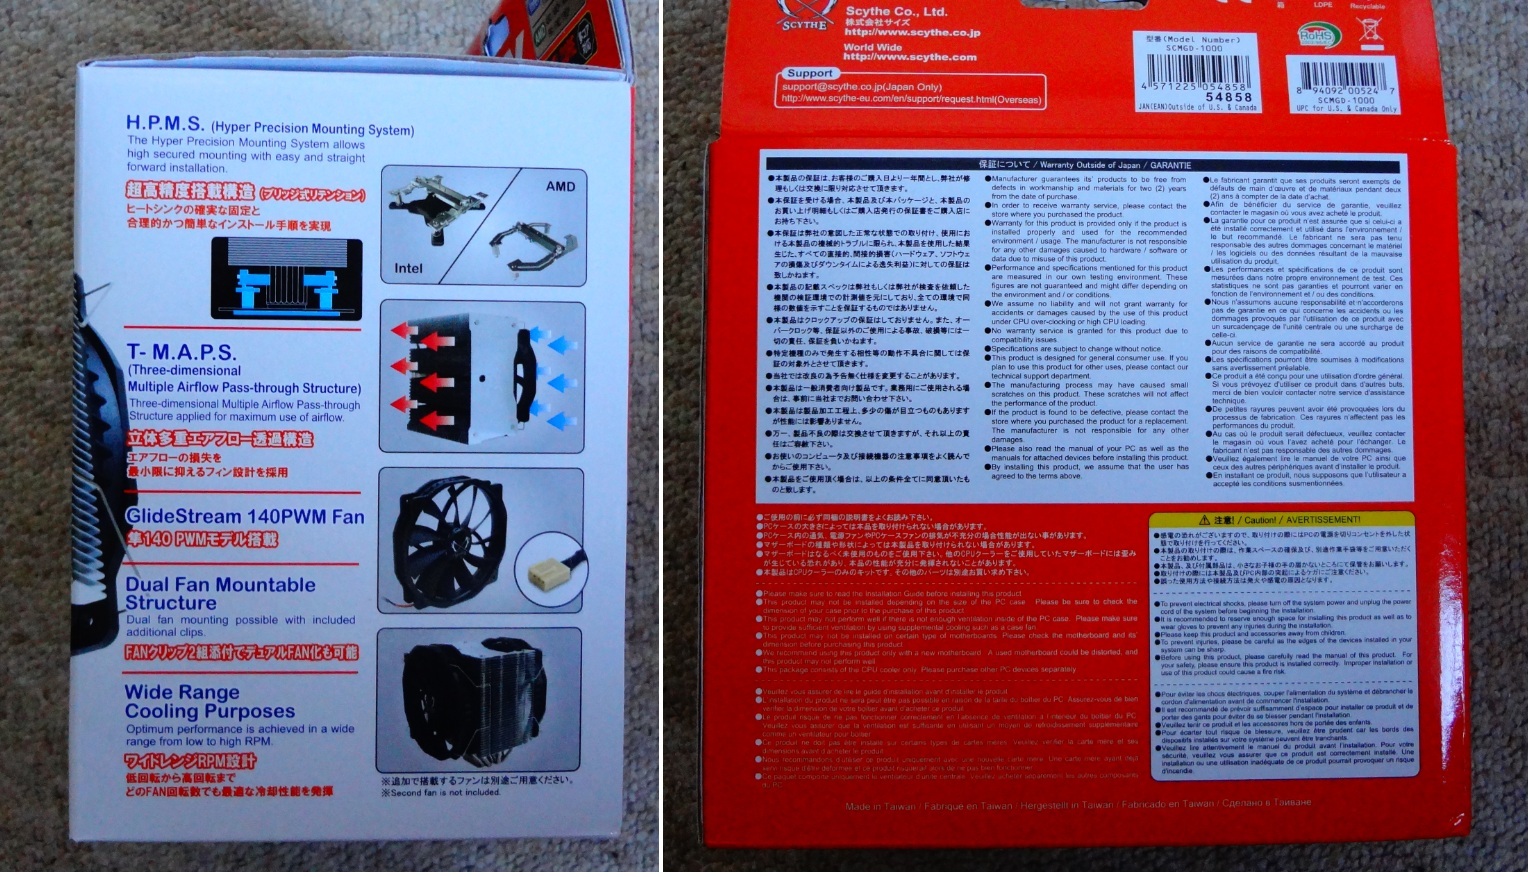
T-M.A.P.S. (Three-dimensional Multiple Airflow Pass- through Structure)
The huge appearing heatsink with increased heatfin spacing to 2.6 mm of the Mugen MAX offers reduced windage and optimized performance in the lower speedrange of the supplied 140mm PWM fan.
User-friendly Installation
The mounting system already seen in the Mugen 4 can be found again here – the proven H.P.M.S (Hyper Precision Mounting System) makes easy mounting possible – requiring less work steps on the way. This briliant concept allows fitting the Mugen MAX without having to demount the motherboard.
Maximum Compatibility
The asymmetrical assembly of the base plate results in a comfortable clearance to the memory banks* of the mainboard after mounting the heatsink. Putting to use memory modules fitted with extremely high hetasinks and replacing them is possible with neither having to remove the fan nor the heatsink. (*Depending on the layout, not applicable to all eight memory banks for LGA 2011 mainboards)
Multi Fan Mount Structure
Inheriting the concept of the Mugen 4, the design of the MAX also allows variable fan placement to optimize a targeted airflow.To furthermore enhance cooling performance, a second fan can be mounted with the supplied pair of fan clips.
140 mm GildeStream Fan
Accompanying the Mugen MAX is a fan from the popular GlideStream family, known for impressive results from other Scythe products. Compared to a 120 mm, higher efficiency at identical rpms result in similar air discharge while creating much less noise.
Specification (courtesy of their well detailed site)
» Model Name – MUGEN MAX
» Model Number – SCMGD-1000
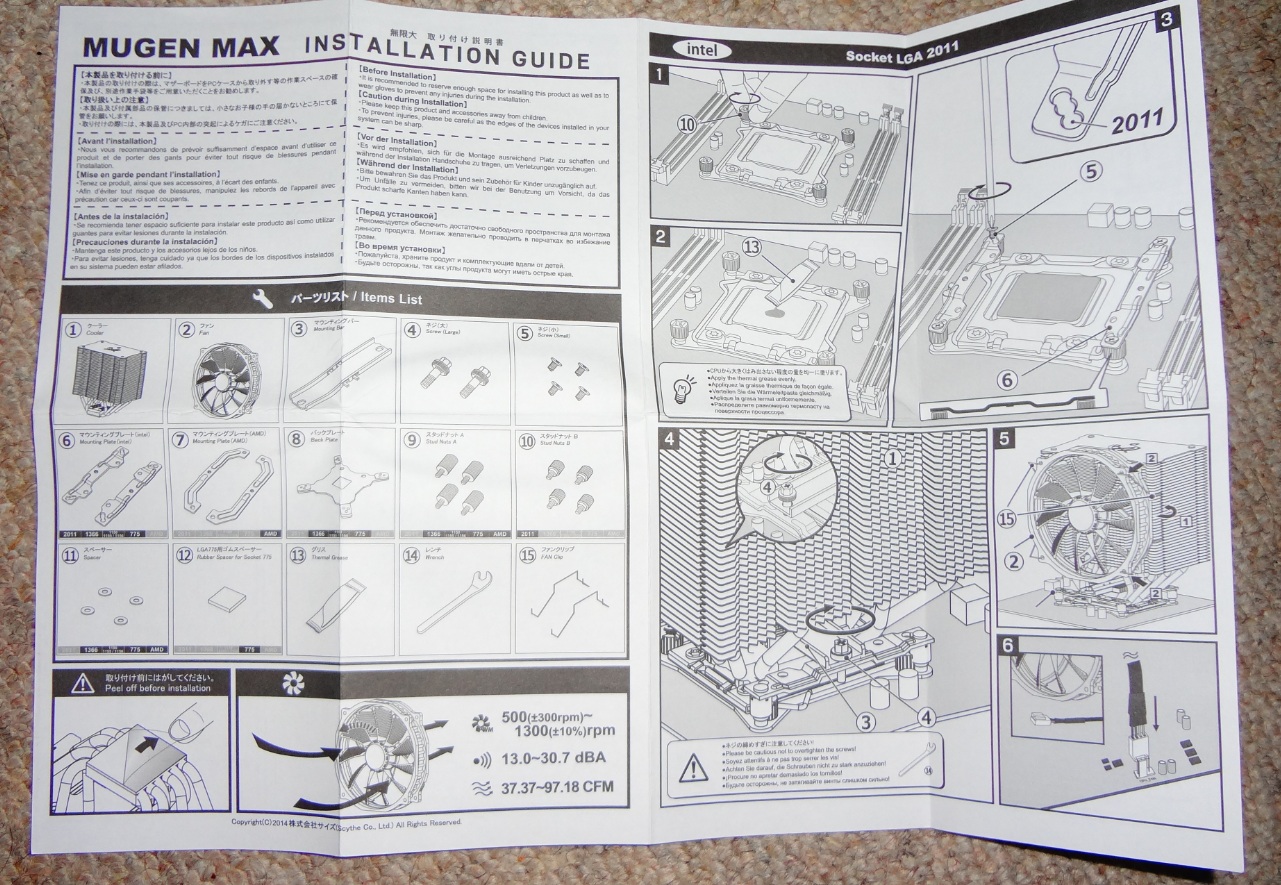
» Intel® Compatibility
Socket LGA 775 , Socket LGA 1150 , Socket LGA 1155 , Socket LGA 1156 , Socket LGA 1366 , Socket LGA 2011 (Square ILM)
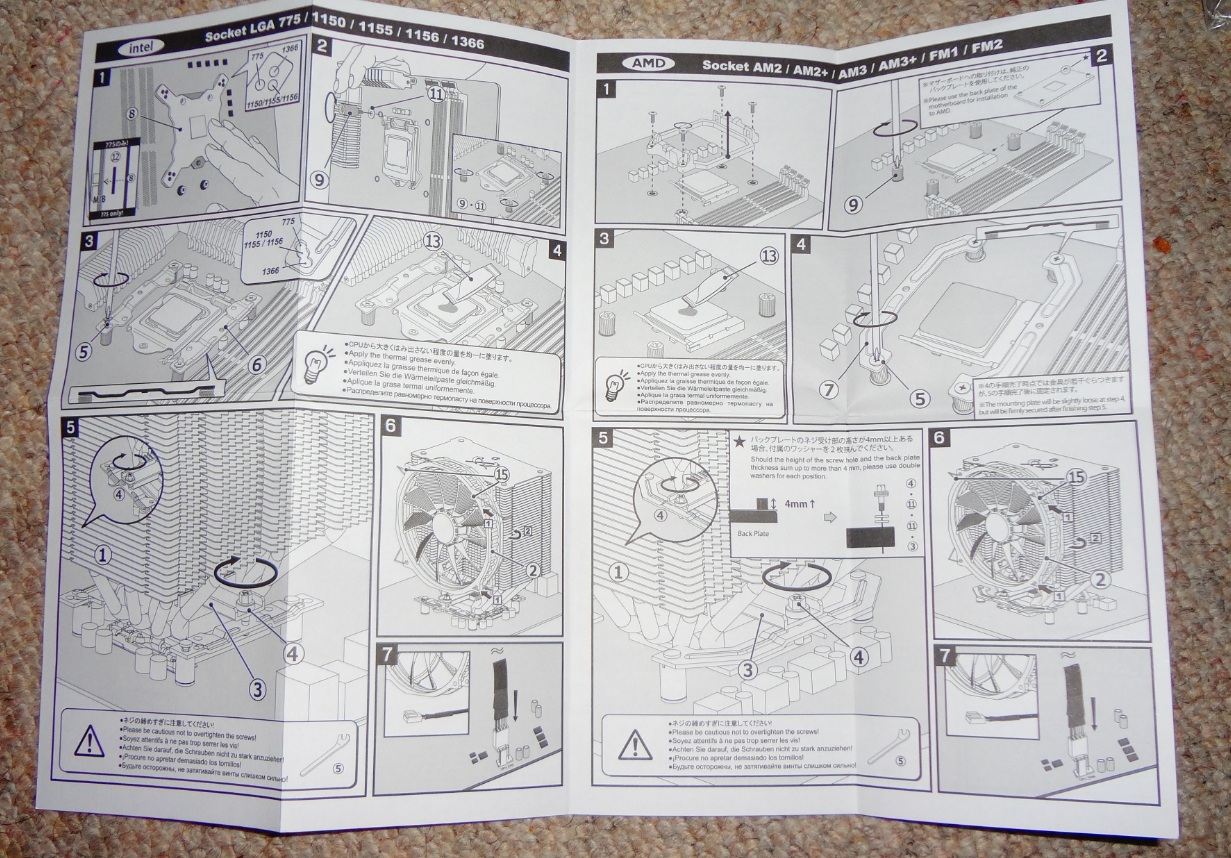
» AMD® Compatibility
Socket AM2 , Socket AM2+ , Socket AM3 , Socket AM3+ , Socket FM1 , Socket FM2 , Socket FM2+ (NOTE: Please note that for mounting on motherboards with the AMD-Socket, the original back plate of the motherboard will be necessary. Please check prior to your purchase.
» Overall Dimensions – 145 x 86 x 161 mm / 5.71 x 3.39 x 6.34 in (w/o fan)
» Weight – 720 g / 25.40 oz (heatsink only)
» Baseplate Material – Nickel-plated copper
» Fan Model Name – GlideStream 140 PWM
» Fan Model Number – SY1425HB12M-P
» Fan Size – 140 x 140 x 25 mm / 5.51 x 5.51 x 0.98 in
» Noise Level – 13 ~ 30.7 dBA
» Air Flow – 63.5 ~ 165m³/h / 37.37 ~ 97.18 CFM
» Fan Speed – 500 rpm (± 300) ~ 1,300 rpm (±10%) (PWM-regulated)
» Static Pressure – 0.15 ~ 1.02 mmH2O / 1.47 ~ 10.0 Pa
» Bearing Type – Sleeve Bearing
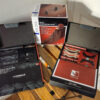
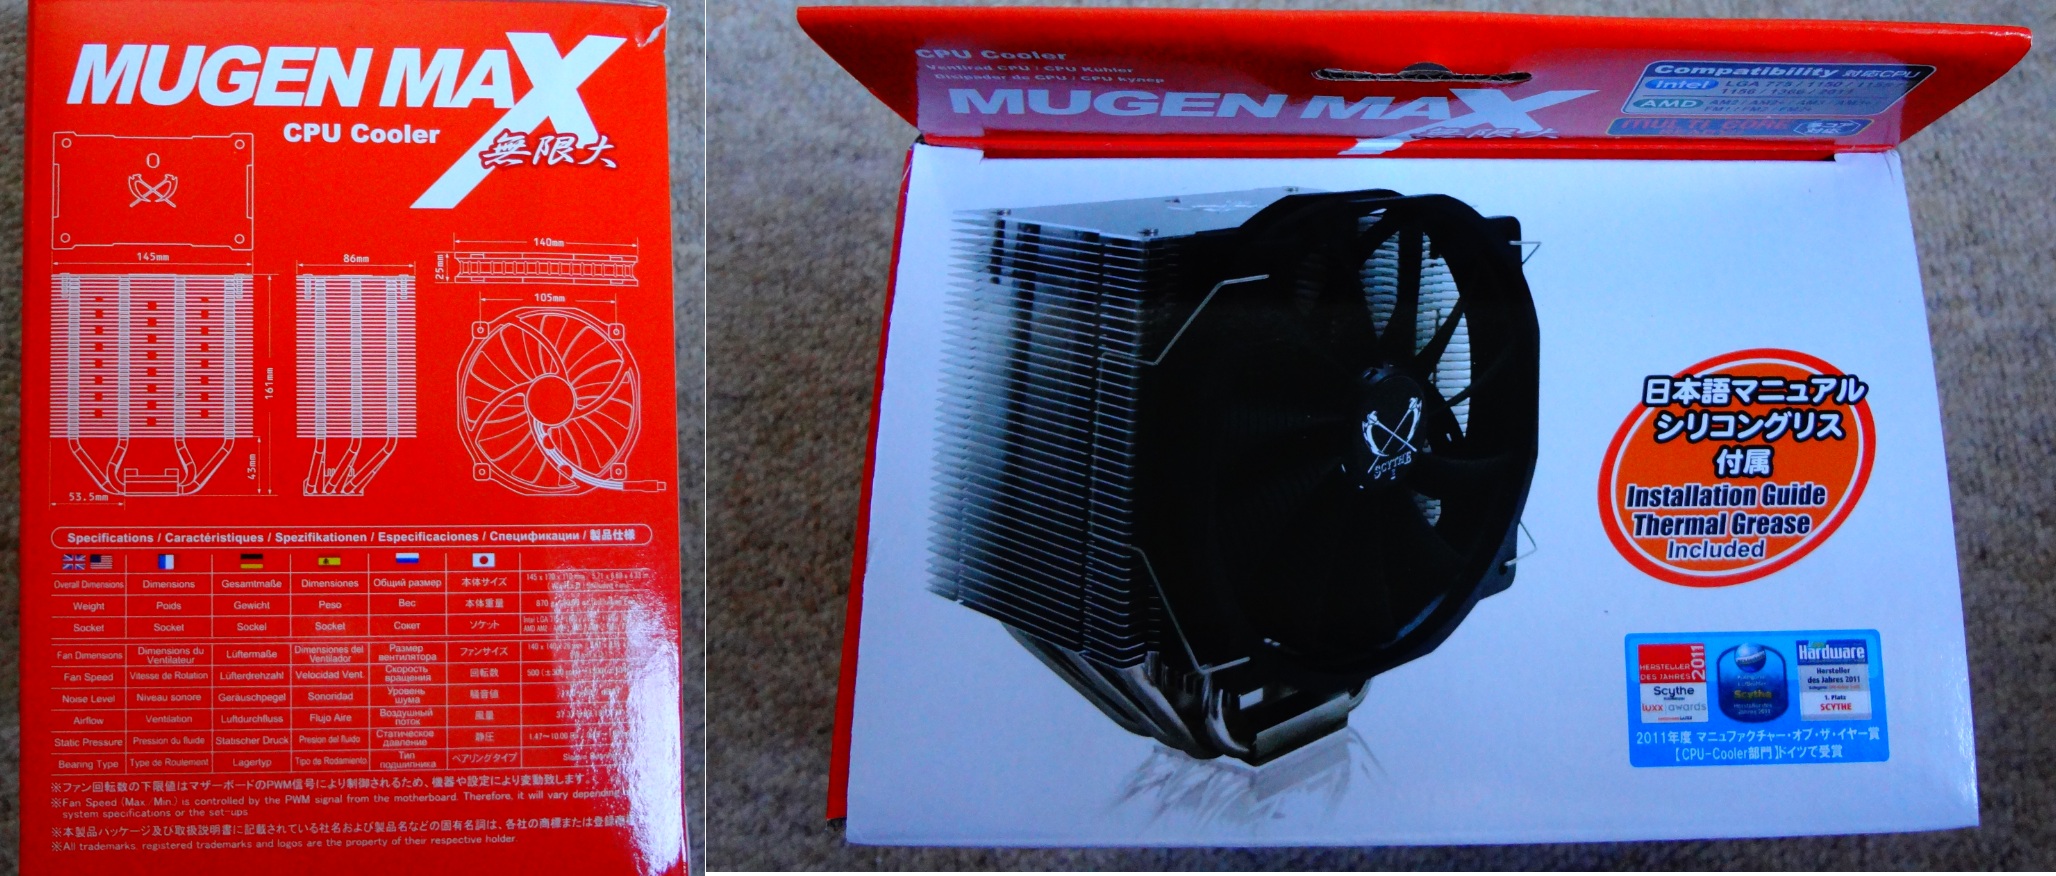
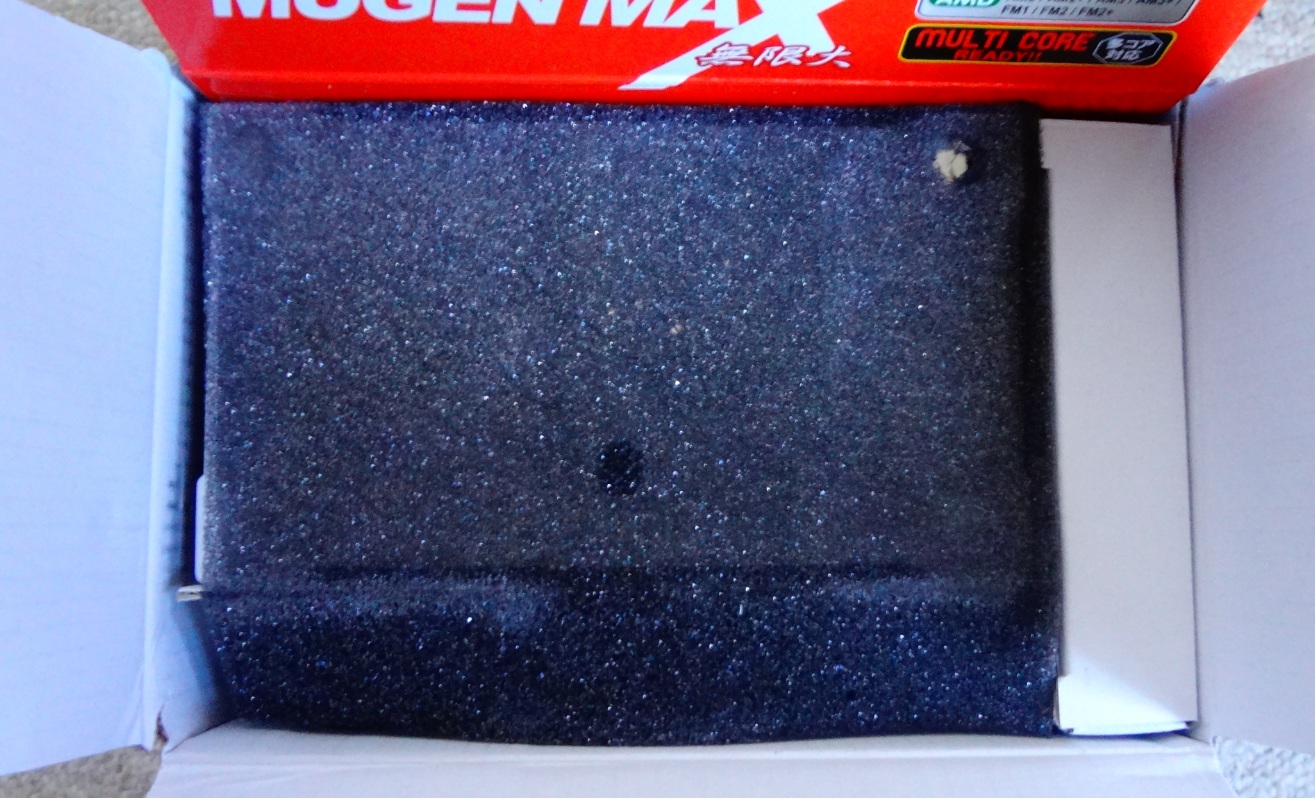
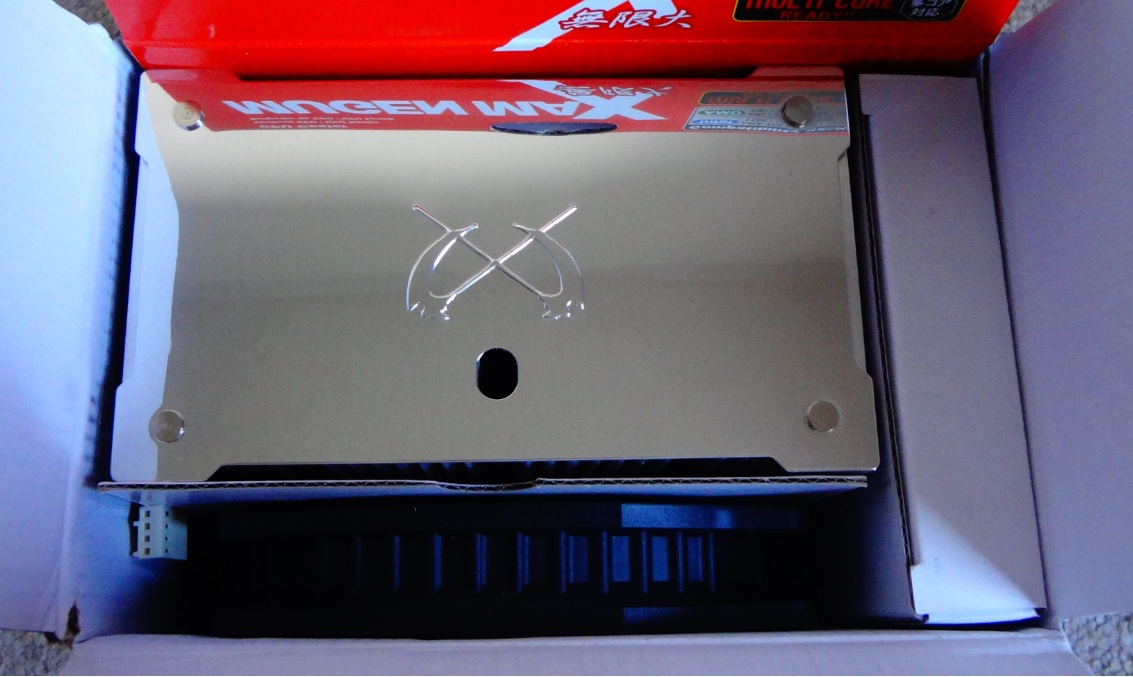
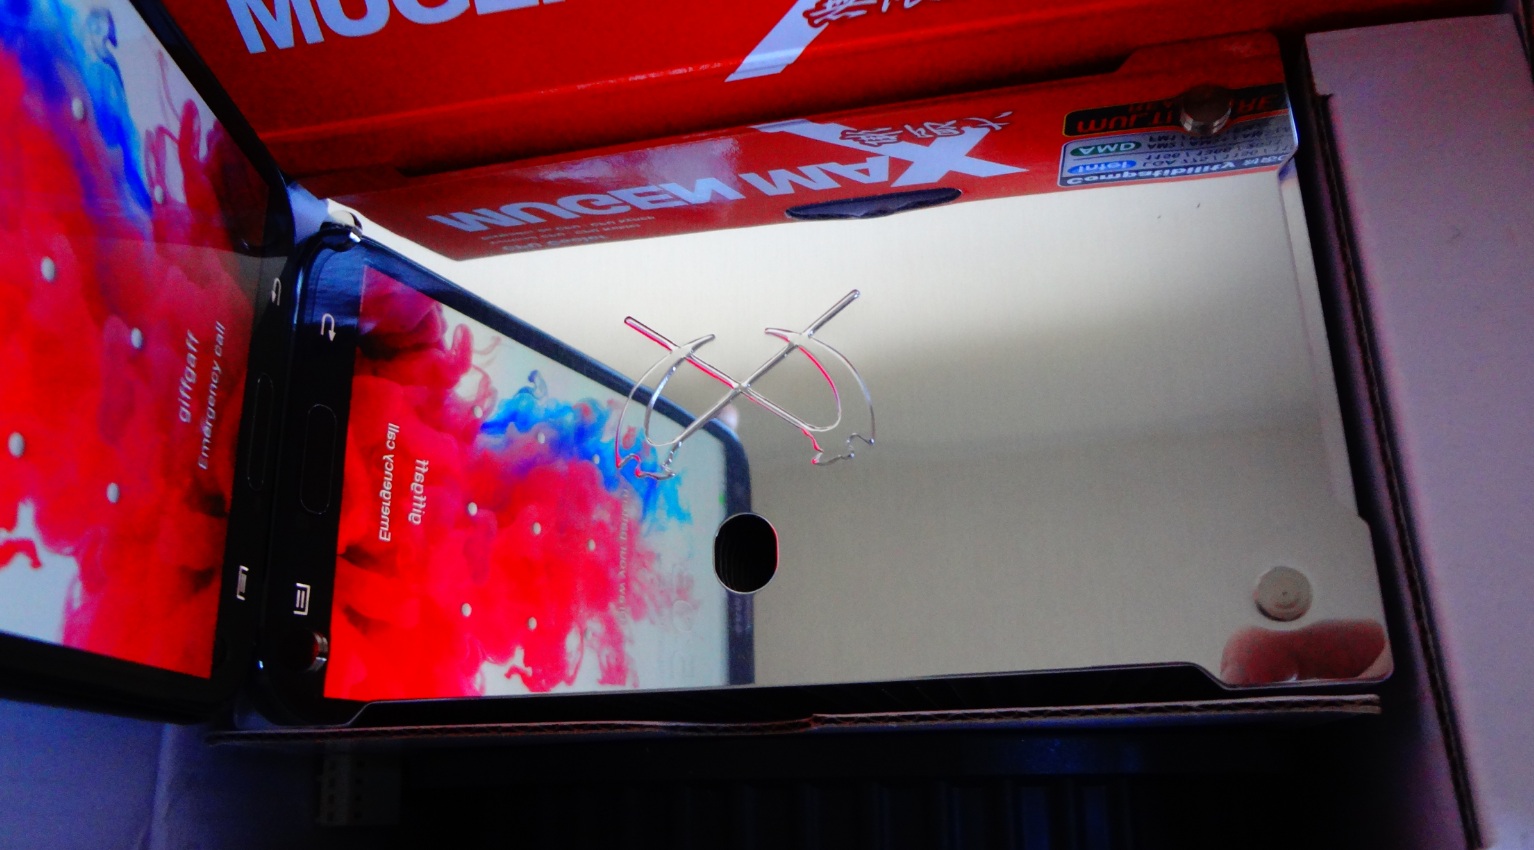
Packaging and content
Comes in a nice box with everything explained and detailed on almost every side.
Inside, behind a small foam protection we are greeted with a very shinny mirror !
Take them out, the heatsink and the 140 mm PWM Glide Stream fan.
The instruction manual.
And the box of accessories.
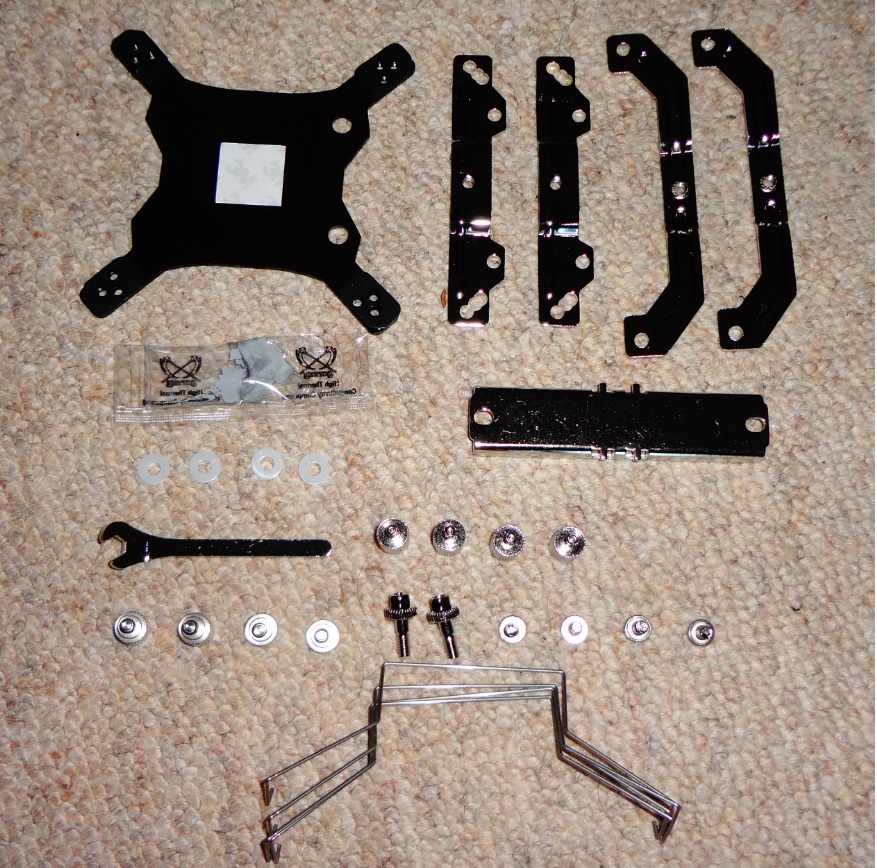
And these are:
– 2x mounting plate (Intel)
– 2x mounting plate (AMD)
– 1x mounting bar
– 4x screw for mounting plates
– 8x stud nuts
– 2x mounting screws
– 1x spacer (socket 775)
– 4x spacer
– 1x wrench
– 4x fan clips
– back plate
– thermal grease
– installation manual
Visual examination
It’s a big size tower cooler, measuring 161mm in height, 145mm in width and 81mm in length
Looks heavy but it is light by looking at the weight numbers with 720 g, than, for example the Thermalright 120 Extreme with 790g.
The top aluminium side is mirror polished to perfection and looks very nice with the company’s logo.
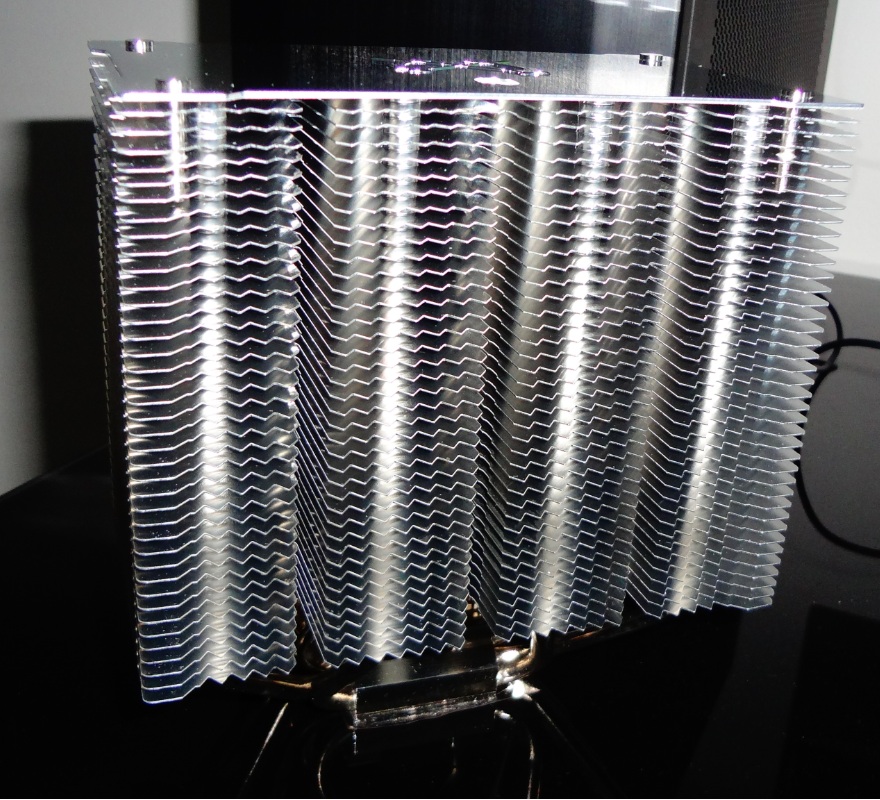
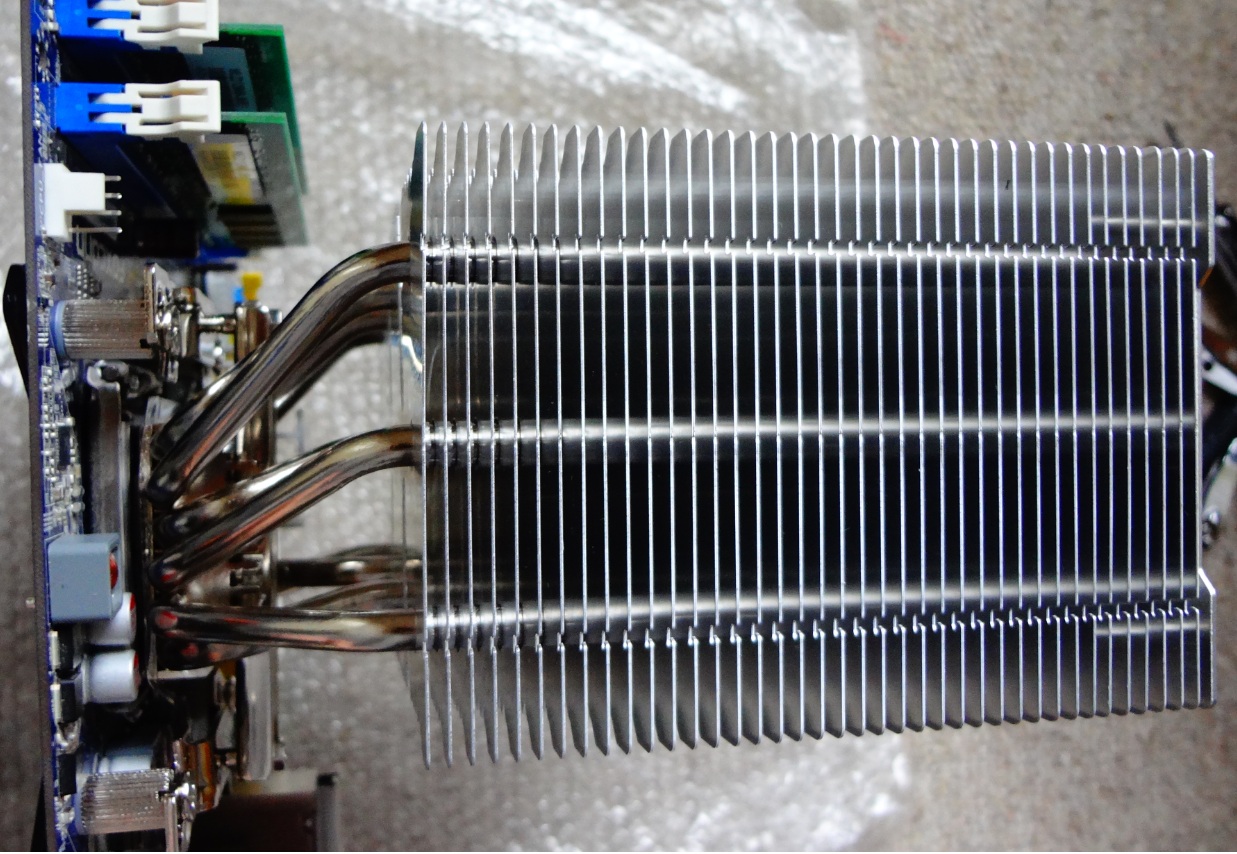
We counted 40 fins held in place via 12 heatpipes.
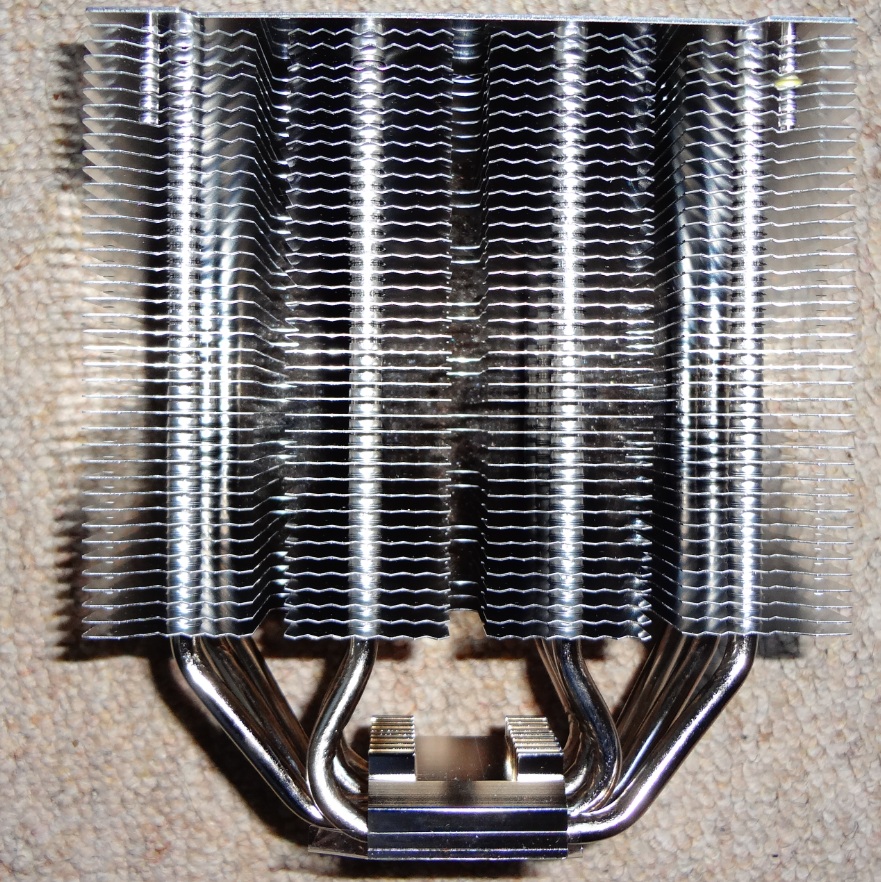
As a matter of perspective, from this side looks like 4 small heatsinks combined together.
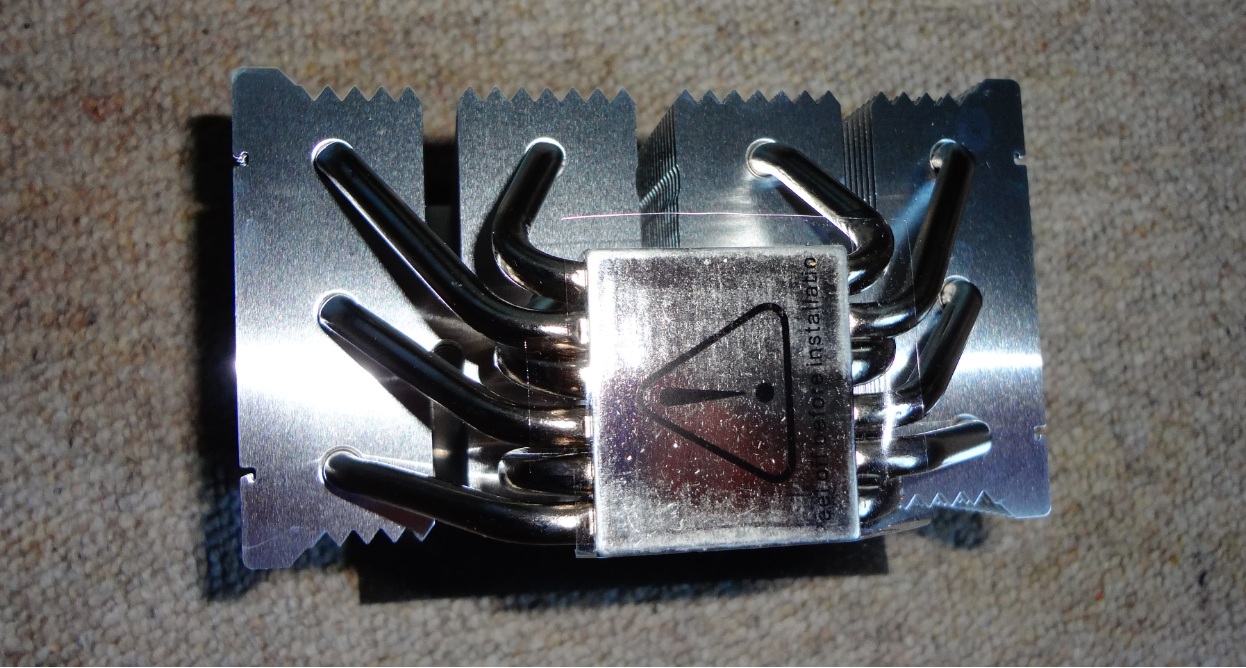
Again the finish is excellent including the nickel-plated all-copper base.
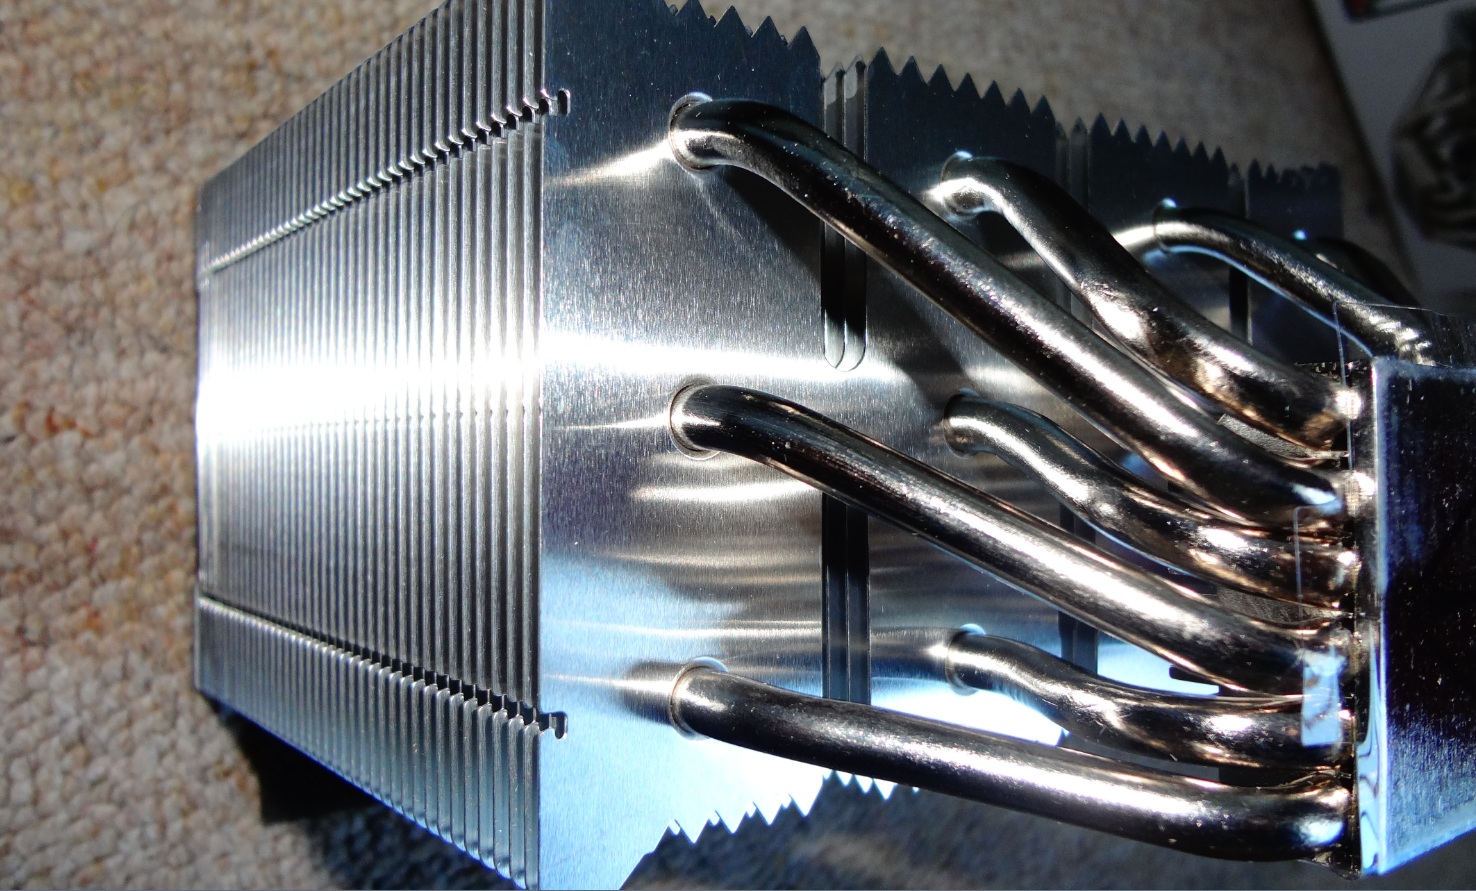
On the other side of the base we see these extra fins for extra cooling.

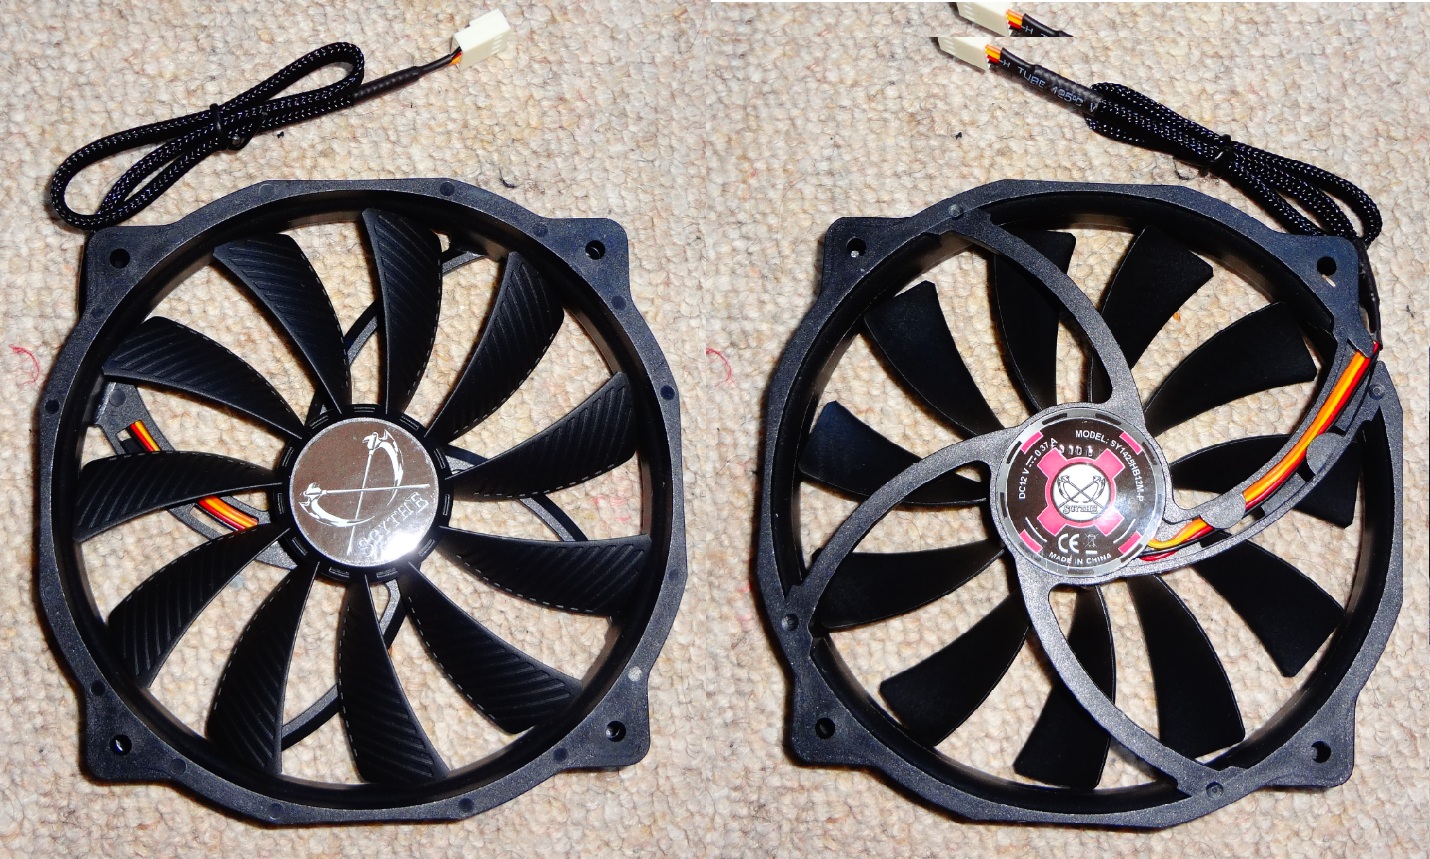
And the but not least the fan.
A sleeve-bearing Glide Stream 140 mm with PWM rated for 1300RPM (+-10%) that produced up to 97.18CFM with only 30.7dBA of noise.
The only difference between this fan and if you get the fan separate, is that the separate ones has rubber inserts in the screws locations.
With the fan installed the Mugen MAX is now 111mm in depth and weighs 850g.
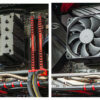
Installation
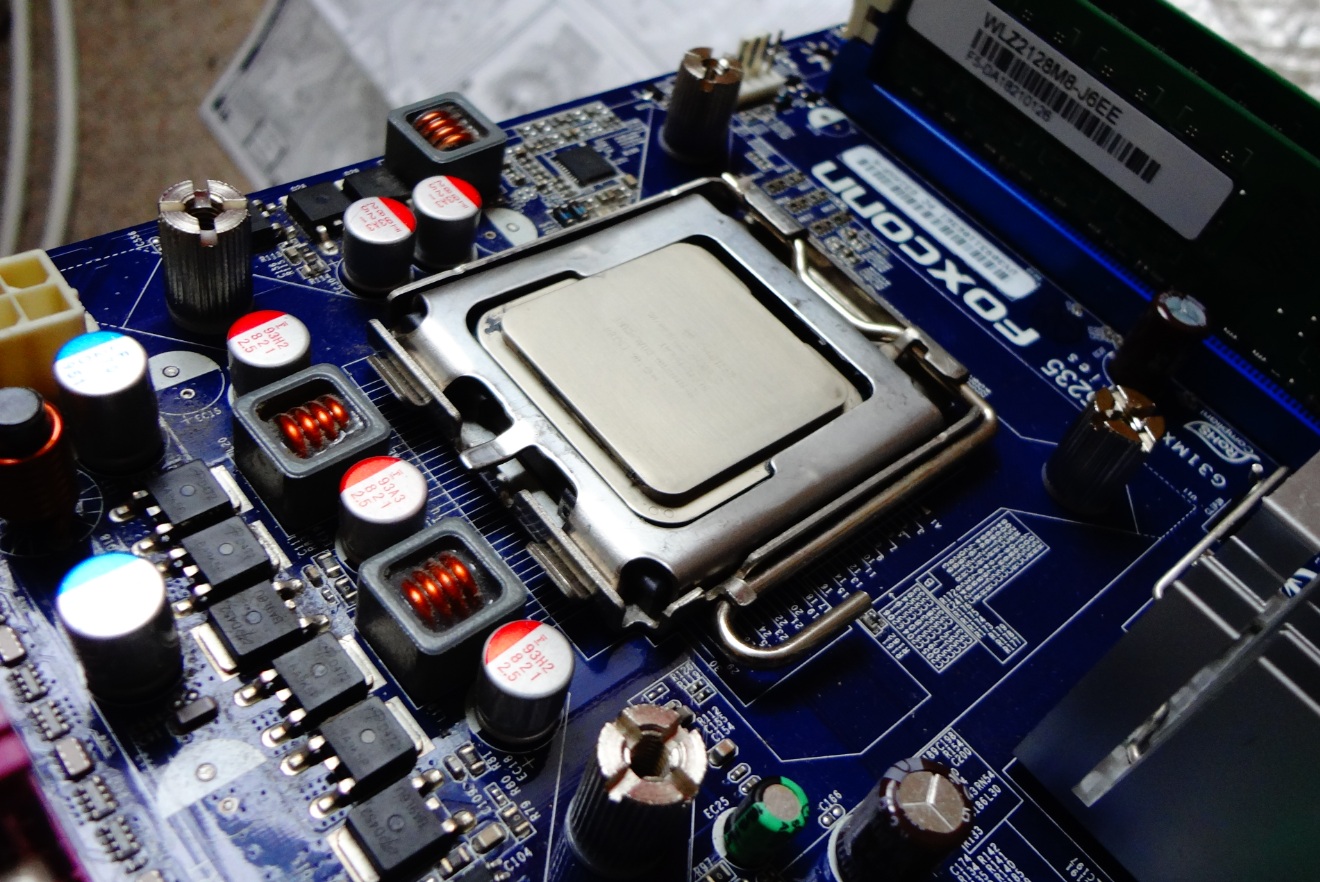
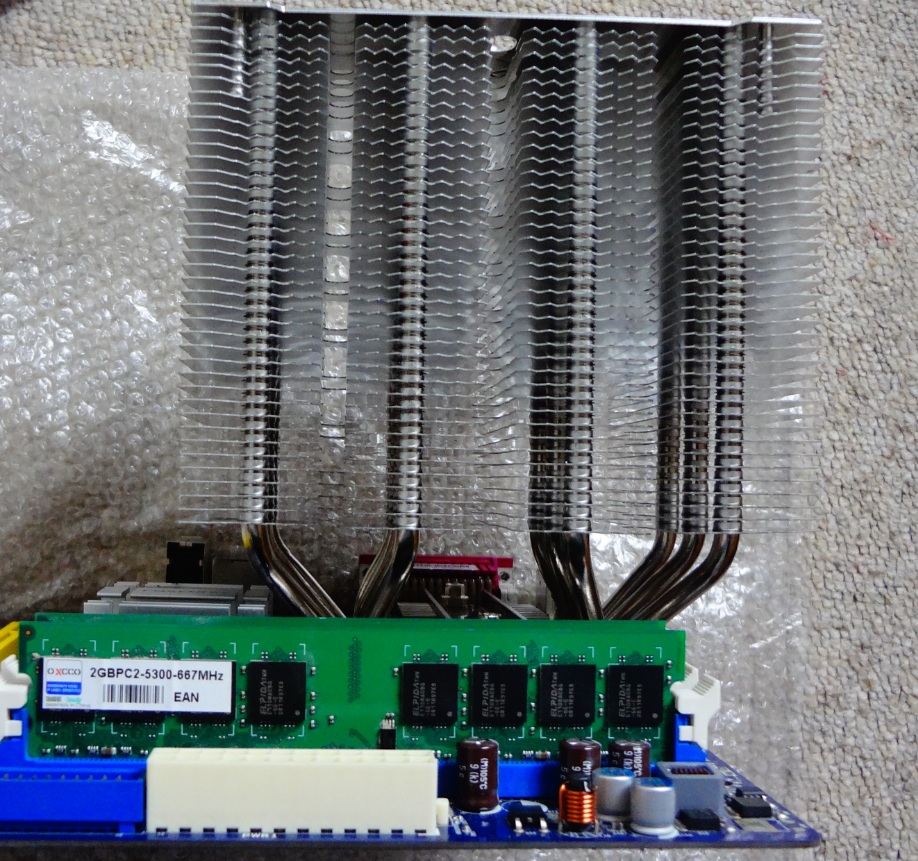
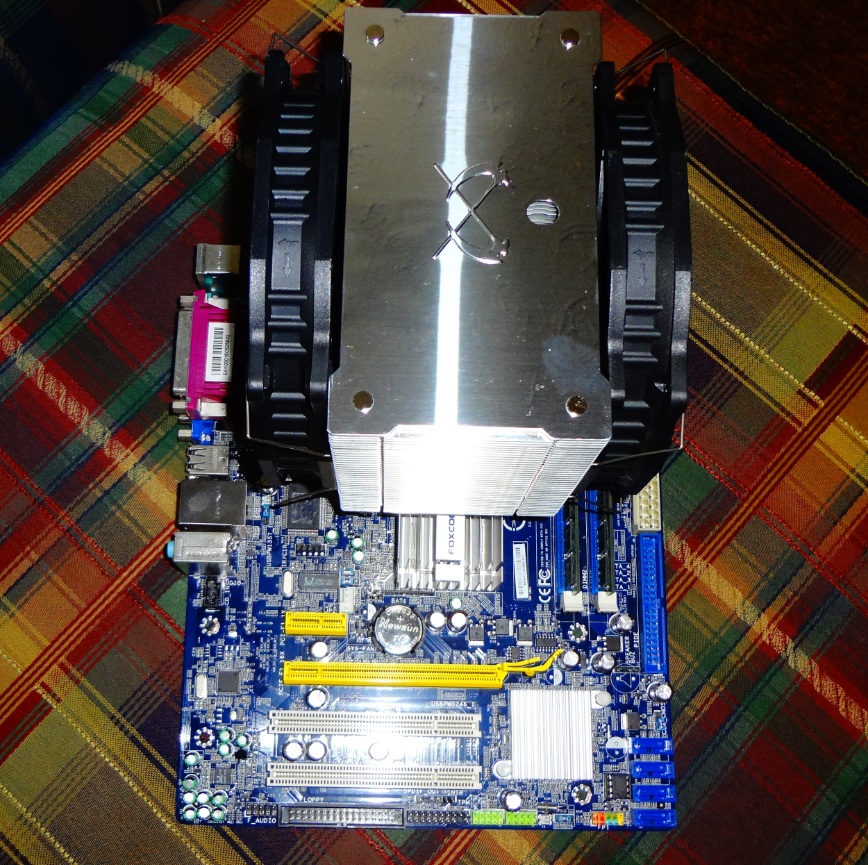
We used a mATX motherboard, (Foxconn G31 LGA 775) where, due to space constrictions everything is more packed together like memory modules placement so we can see if there are any clearance issues.
First step is to secure the backplate via thumb crews with washers.
No clearance problems so far.

Then you chose between Intel and AMD specific side plate/brackets which are secured also with screws.
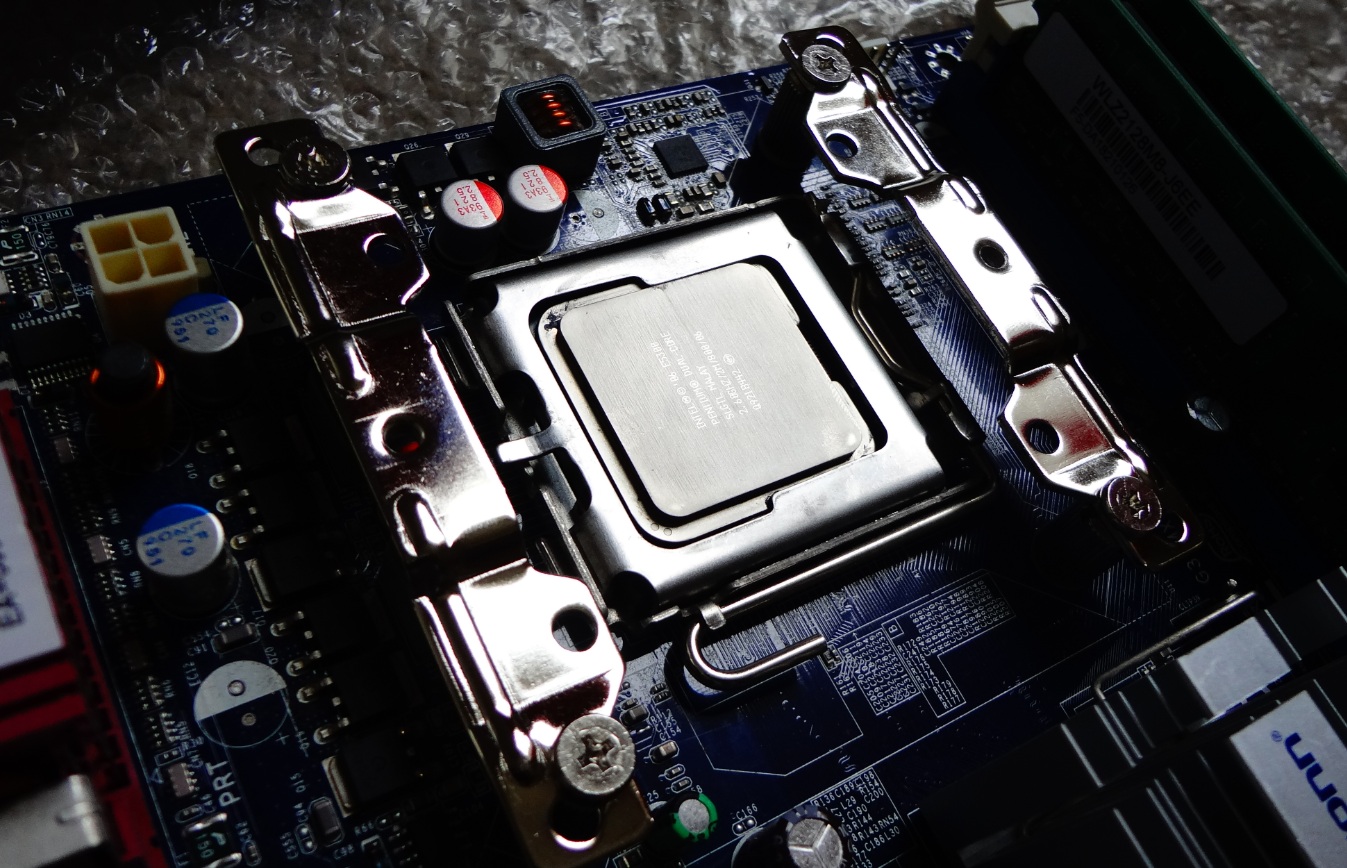
Don’t forget the thermal paste, choose your cooler orientation and secure it via this middle plate with 2 screws.
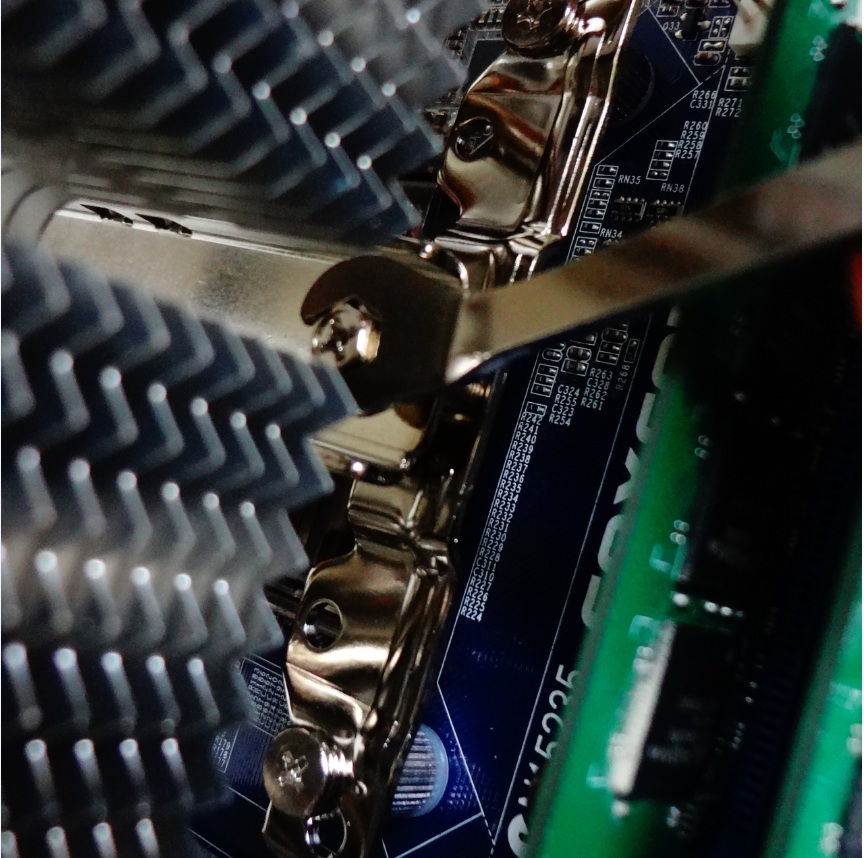
Scythe include this very handy angled wrench.
Made things easier to install because as you can see the heatsink has an offset (that eliminates the clearance problems with tall heatspreaders for memory modules.)
And the installed heatsink.
No problems at all.
After we mount the fan, this is what we were talking about.
Mind you, this is a 140 mm fan so if you have case limitation you can adjust where you want to position the fan.
If you want it as low as possible, you need memory modules without heat spreaders or very low profile rams.
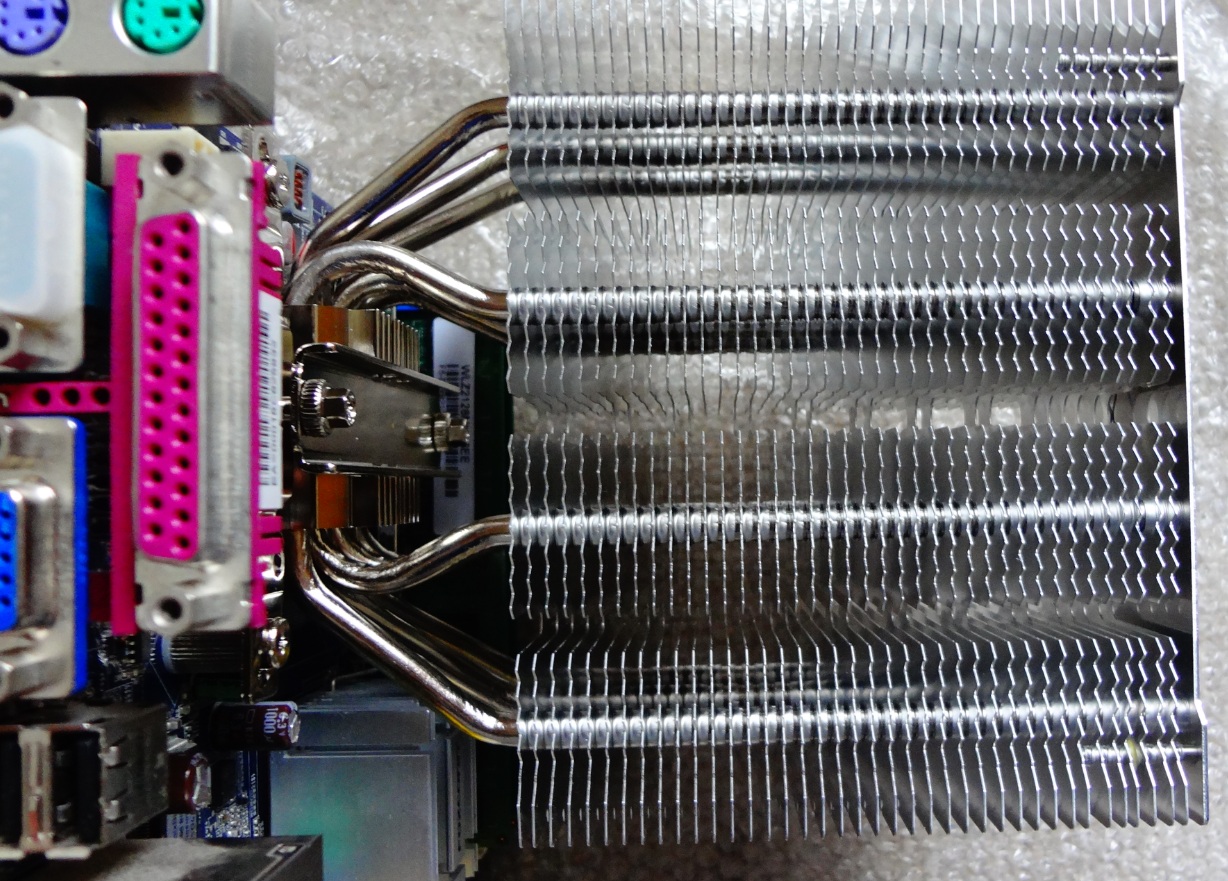
This was to test specifically the side without the offset, so see how it would clear everything, and it did.
So, use to offset if you don’t want to gamble.
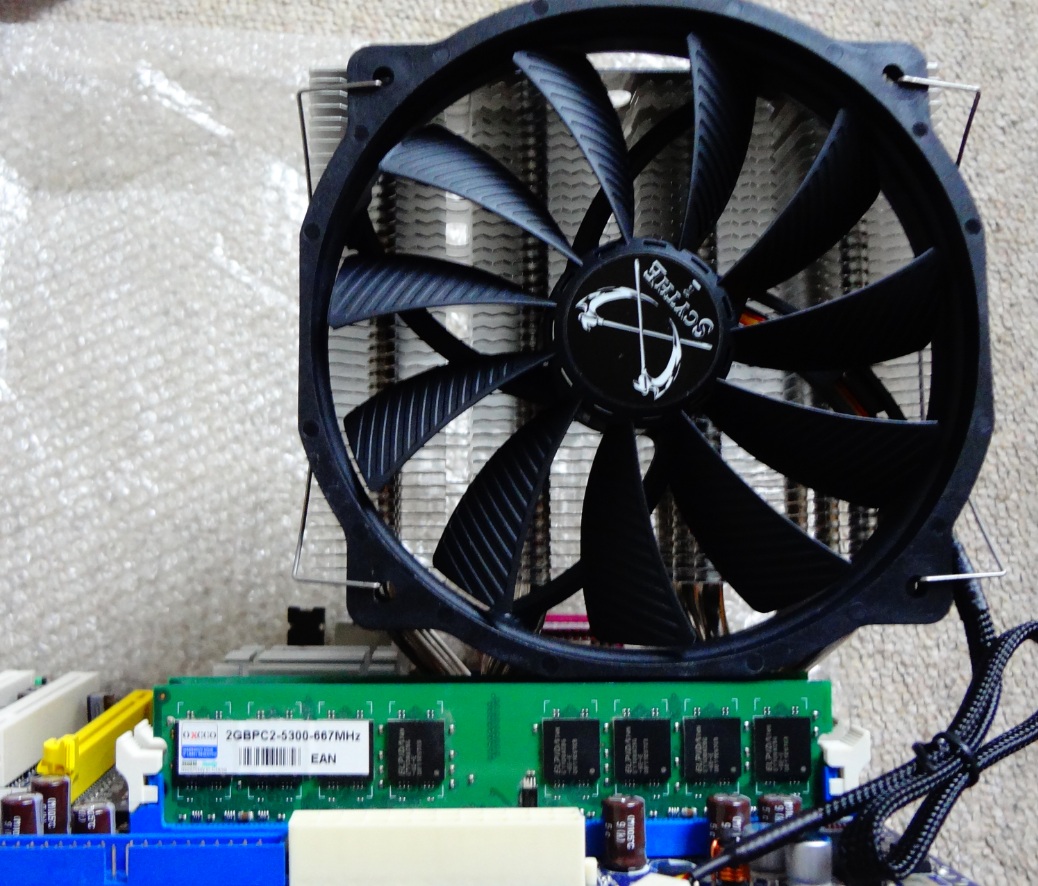
And with the second fan installed.


Testing methodology
First we did with one fan – as intended from factory and then we will do a dual fan setup.
The CPU will be tested in 2 main scenarios: at stock settings and then overclocked both with a Prime 95 test run.
We used Prime95 as the ‘torture test’ with the option “In place large FFT” so it will use 100 % of the CPU power including the hyper threading feature.
Let it ran for 30 minutes and the let the CPU 10 minutes to cool , after which we measured the idle temperature.
To control the fans we used the auto feature of MSI’s own control center program.
To read the temperatures we used the AIDA 64 and Core Temp.
For the noise we used our Pyle PSPL01 placed 30 cm away from the setup.
Our PSU has a semifanless option then we removed the video card and used the iGPU from the processor so more heat and to further eliminate any extra noise.
Thermal paste used was the supplied Scythe one in the content of the Mugen Max. It was enough for us for do all the tests.
We compared the results with other tower cooler and even a low profile one.
All of these we used the same fan the Noiseblocker eLOPP 120 MM PWM B-12P with CFM up to 78 at 2000 max RPM.
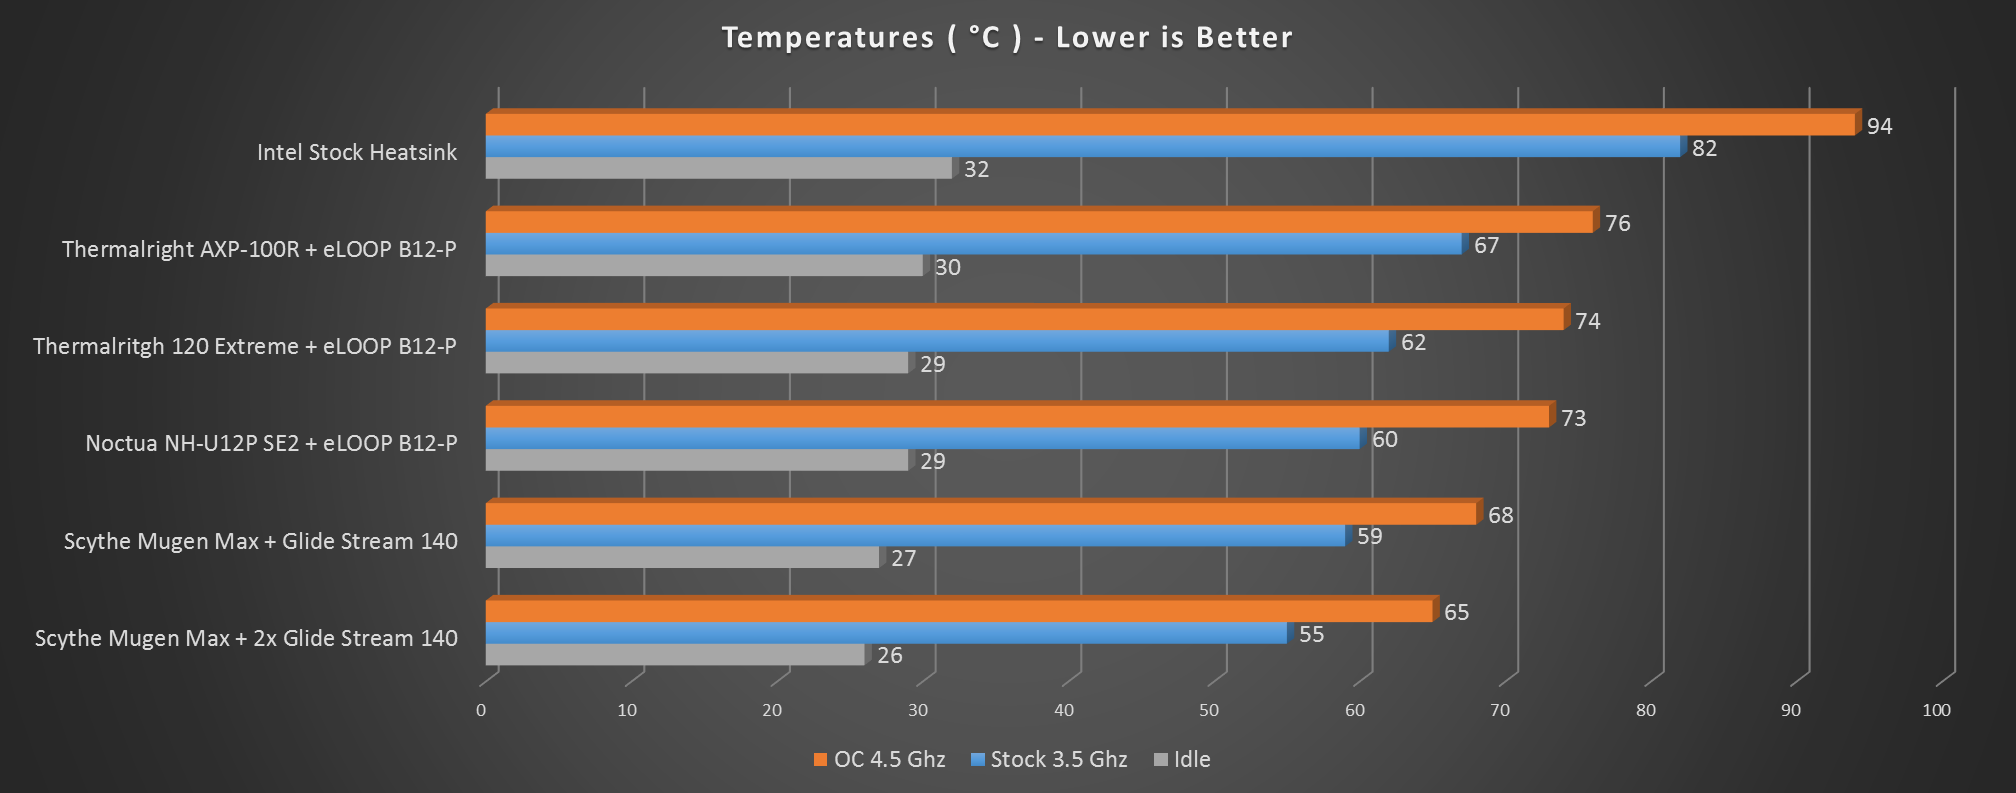
Any results over 80° C in any condition are considered a fail.
With something like the Mugen Max we expect at least in a worse case scenario even with OC under 70 degrees.
Let’s proceed.
Hardware used:
CPU: Intel i7 2700k TDP 95 W / then OC to 4.5 Ghz
Motherboard: Asus P8Z77-V Z77
Memory Modules: 2x 4 GB DDR3 Crucial Ballistix Tactical Tracers 1600 Mhz
PSU: SilverStone SX-600G
Storage: HGST 1 TB 7K1000 2.5″ HDD
Comparison with other tower coolers:
Thermalright 120 Extreme
Noctua NH-U12P
Thermalrigh AXP-100 R low profile cooler
Intel stock
Software:
Windows 7 Ultimate X64 SP1
Prime 95 v27.9
MSI Control Center v2.5.06
AIDA 64 Extreme Ed. V1.70
Core Temp v1.0 R6
Results
Analysis
So as you can see it came out the best performing CPU cooler we have tested so far, in all scenarios.
The Intel stock failed all load tests as expected with such a torture test and OC.
The dual fan setup helped a little.
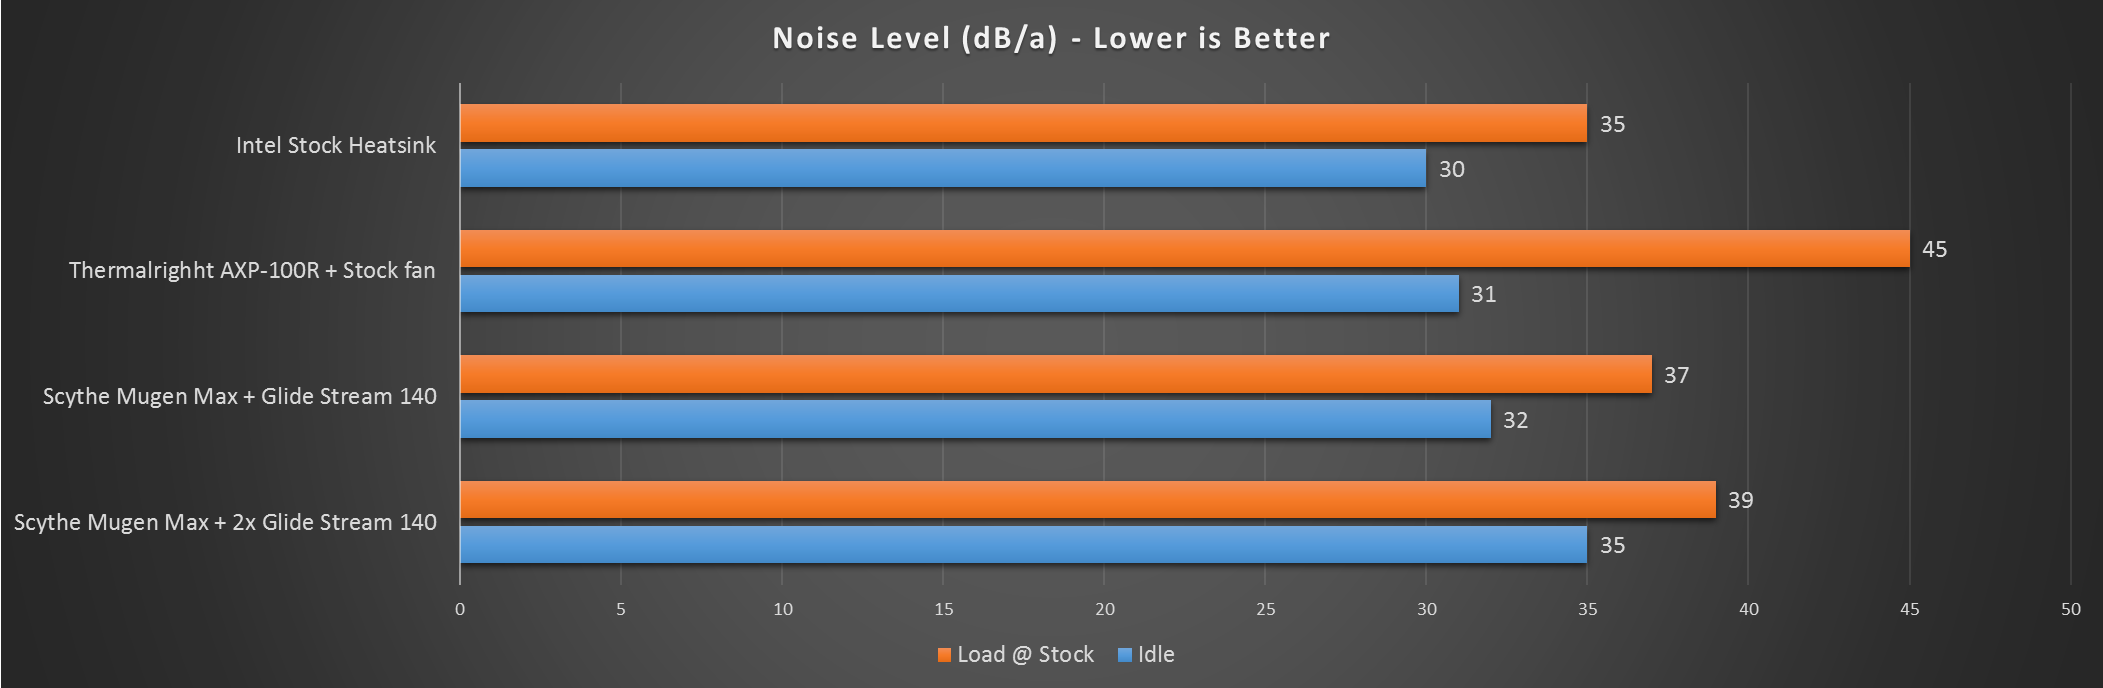
Regarding noise, the dual setup was the loudest but not by much.
All in all it is a fairly silent operation so Scythe did a good job here as well.
Conclusion
This is the fifth version of the Mugen tower cooler series so it had time and a lot of research behind it.
So today everything was excellent from it.
It performed very well and the upgrade to 140 mm fans also gave overall improvements.
The good:
– Excellent build quality, the top finishing you can use it as a mirror.
– Excellent performance
– Easy installation
– Zero clearance issues with the majority of motherboards.
– Offset side to eliminate any potential memory modules clearance issues
– Good noise levels
– Good price price
The bad:
– Some height clearance with high memory heat spreaders on small format motherboards (if you don’t use the offset side) but this can be overcome by adjusting the position of the fan – or – use the offset side and no more problems.
– Maybe size (height) for some but it is presumed that with something like this you will already have an adequate case.
Really impressed with this product overall and thus it gets our:
Glob3trotters “Excellence Award” – 4.5 out of 5

Many thanks for Scythe for supplying us this test sample !
![]()