
It was only a matter of time until we had ‘Gaming’ orientated desks as well. They are very welcomed for those who want to pursue this theme. Sandberg is presenting us their vision of such a setup – the Fighter Gaming Desk II and I am very excited to put it to the test !

Sandberg states that their brand stands for quality and user-friendliness.
Their ideology “IT is for everybody” is part of everything we do. A Danish firm that since its inception in 1985, private consumers, institutions and companies have benefited from this simple philosophy. Distributors and dealers appreciate the availability, range, simple procedures and the exceptionally low failure rate. Every year over half a million Sandberg products find their way to users in more than 65 countries.
Choosing Sandberg means choosing a safe and conscientious product that meets all applicable regulatory requirements. A product manufactured by subcontractors who are committed to following Sandberg’s Code of Conduct to ensure decent working conditions and reduce the environmental impact of the production and waste disposal.
Availability and Price
You can order from Sandberg’s website at around £240.99 and you have 2 color options, in red (link) and black (link).
Also Amazon.co.uk will have them soon in stock.
Check out the full video review as well !
Presentation and Specifications
Sandberg Fighter Gaming Desk 2 is the ultimate upgrade to your gaming setup. With a width of 1.20 metre, the table is perfectly measured to ensure enough space for your gaming equipment without giving up on your freedom to move around while playing games! At the same time, it is compact enough to fit into most rooms. The strong metal table legs and the massive table top in MDF wood form a solid underlay. The cable holes in the table top ensures discreet cabling to the underside of the table where you can hide cables and extensions in the built-in cable cover. Cool LED lights in both sides of the table top will put you in the right gaming mood!

As for the specs, we have:
* Material: Metal legs + MDF wood table top + cable holder / tray
* Size: 120 x 64 x 77 cm
* USB powered selectable LED lights
* Packing size: 119 x 66 x 18.5 cm
* Packing weight: 25 kg
* warranty: 5 years
Basically we have 120 cm usable table top with some interesting add-ons that should offer a better experience and interaction with our setup. The presence of LED lights should spice things up even further.
Packaging, Visual inspection and Assembly
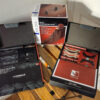
This is gonna be fun! Because the shipping package has 25 Kg, this thing will come on it own pallet. To give you an idea how big the box is, here it is next to a chair.
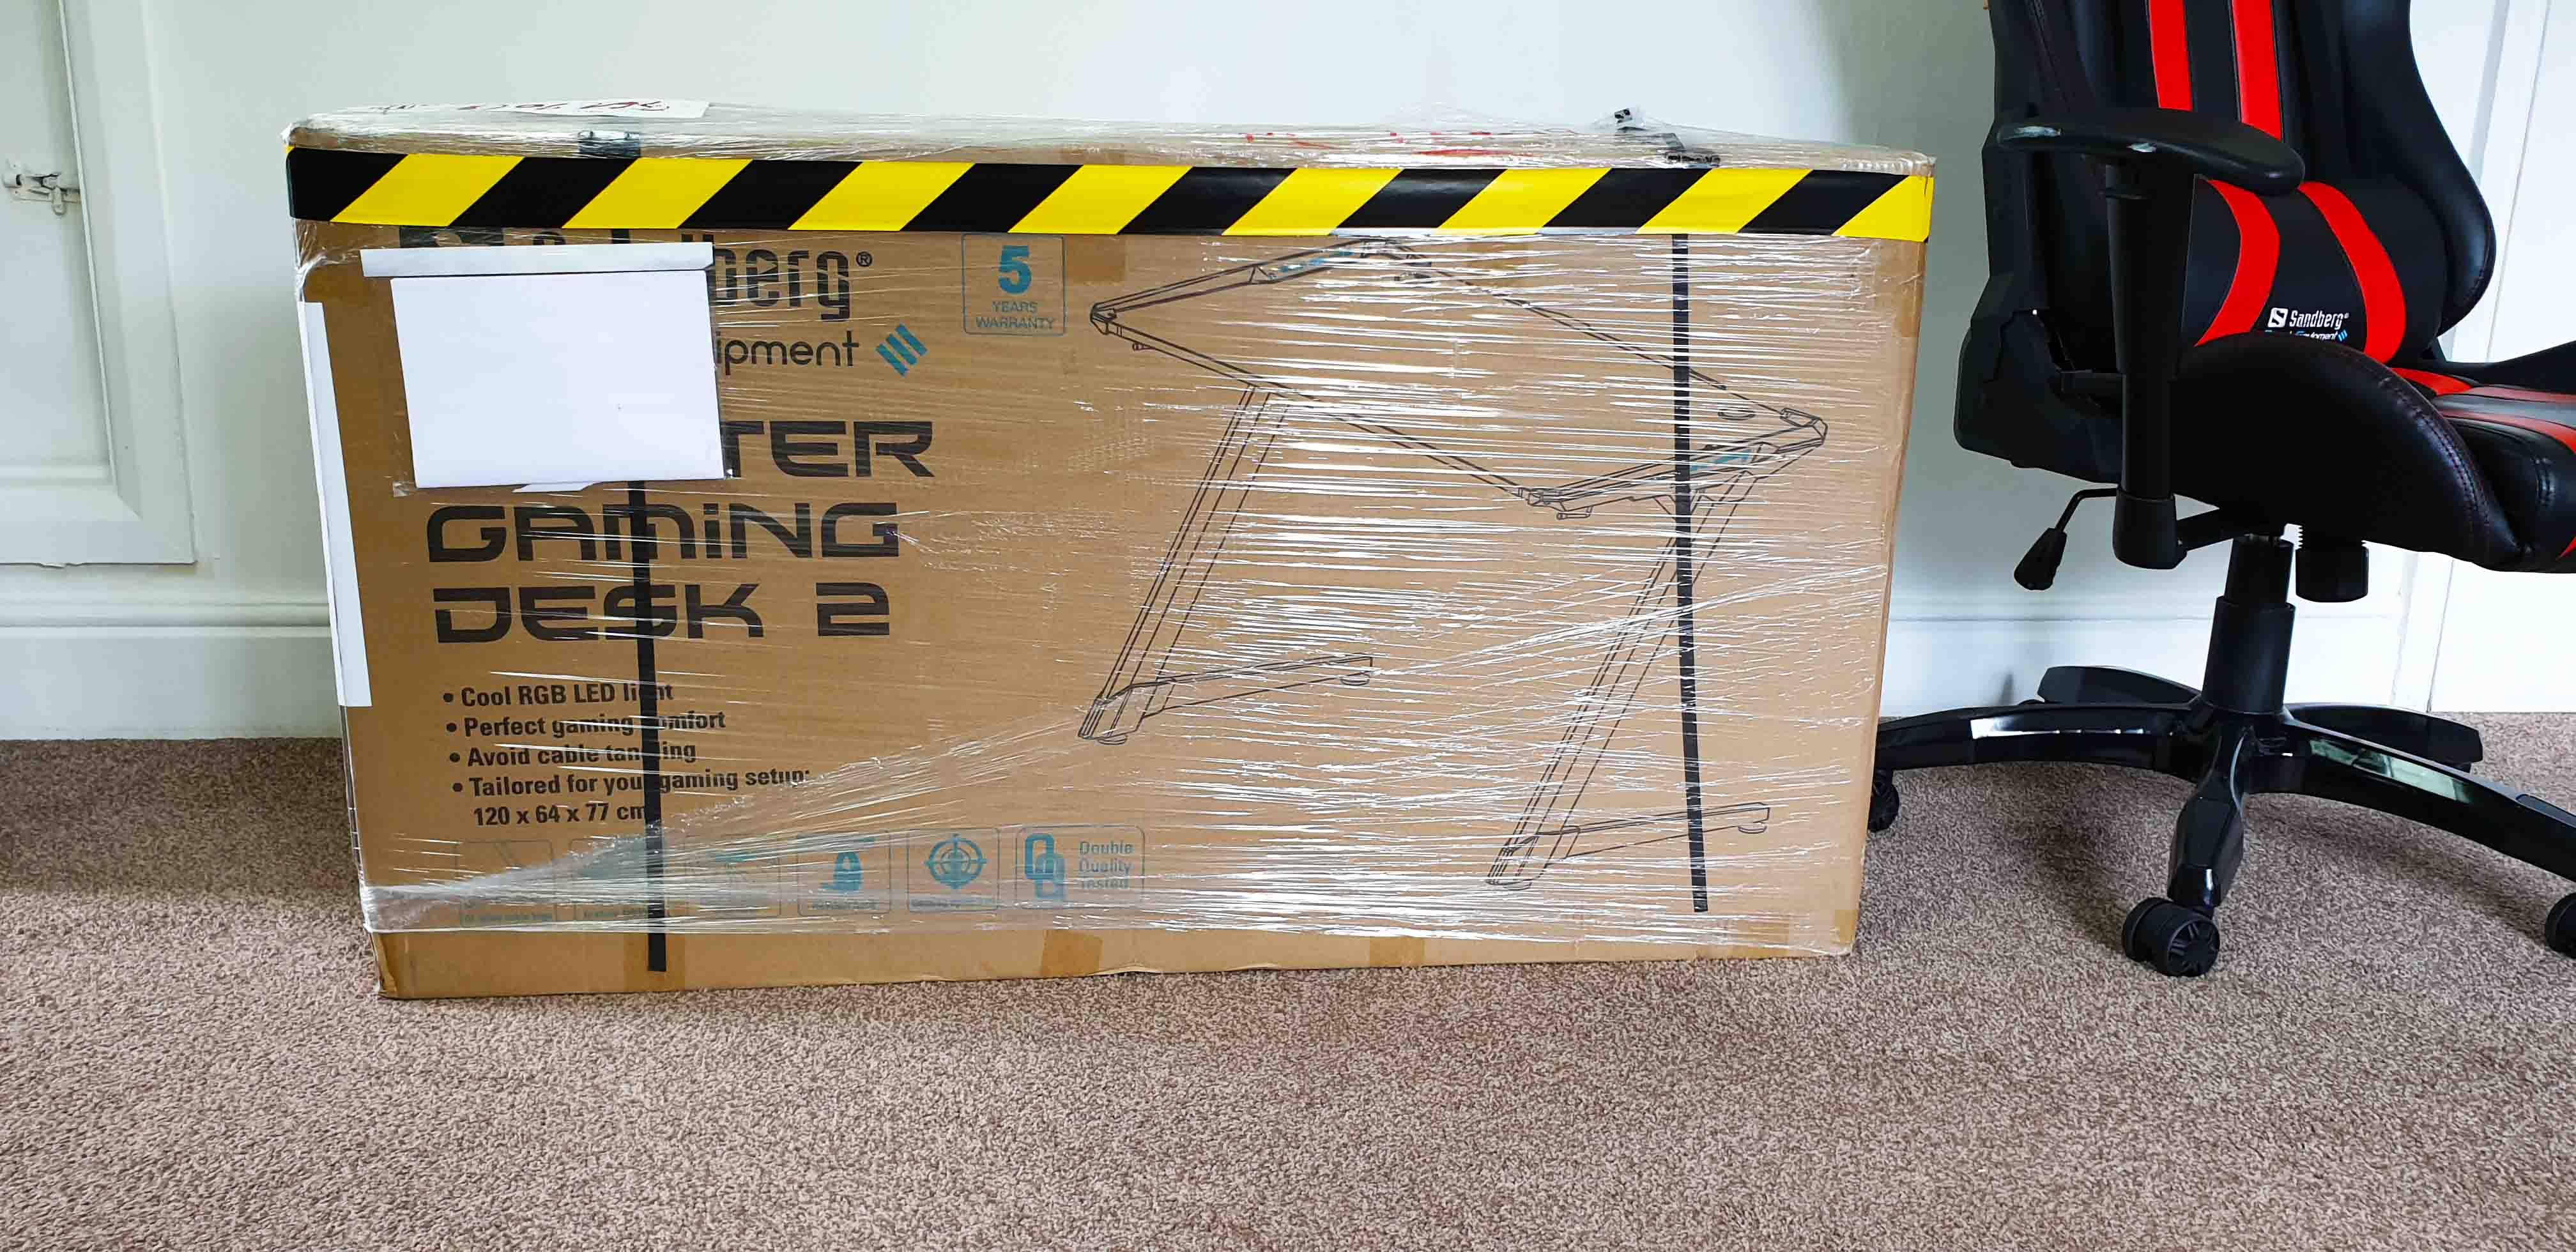
Underneath the wrapping, we have the actual box with a visual schematic of the desk on the right while on the left we have the main specs.
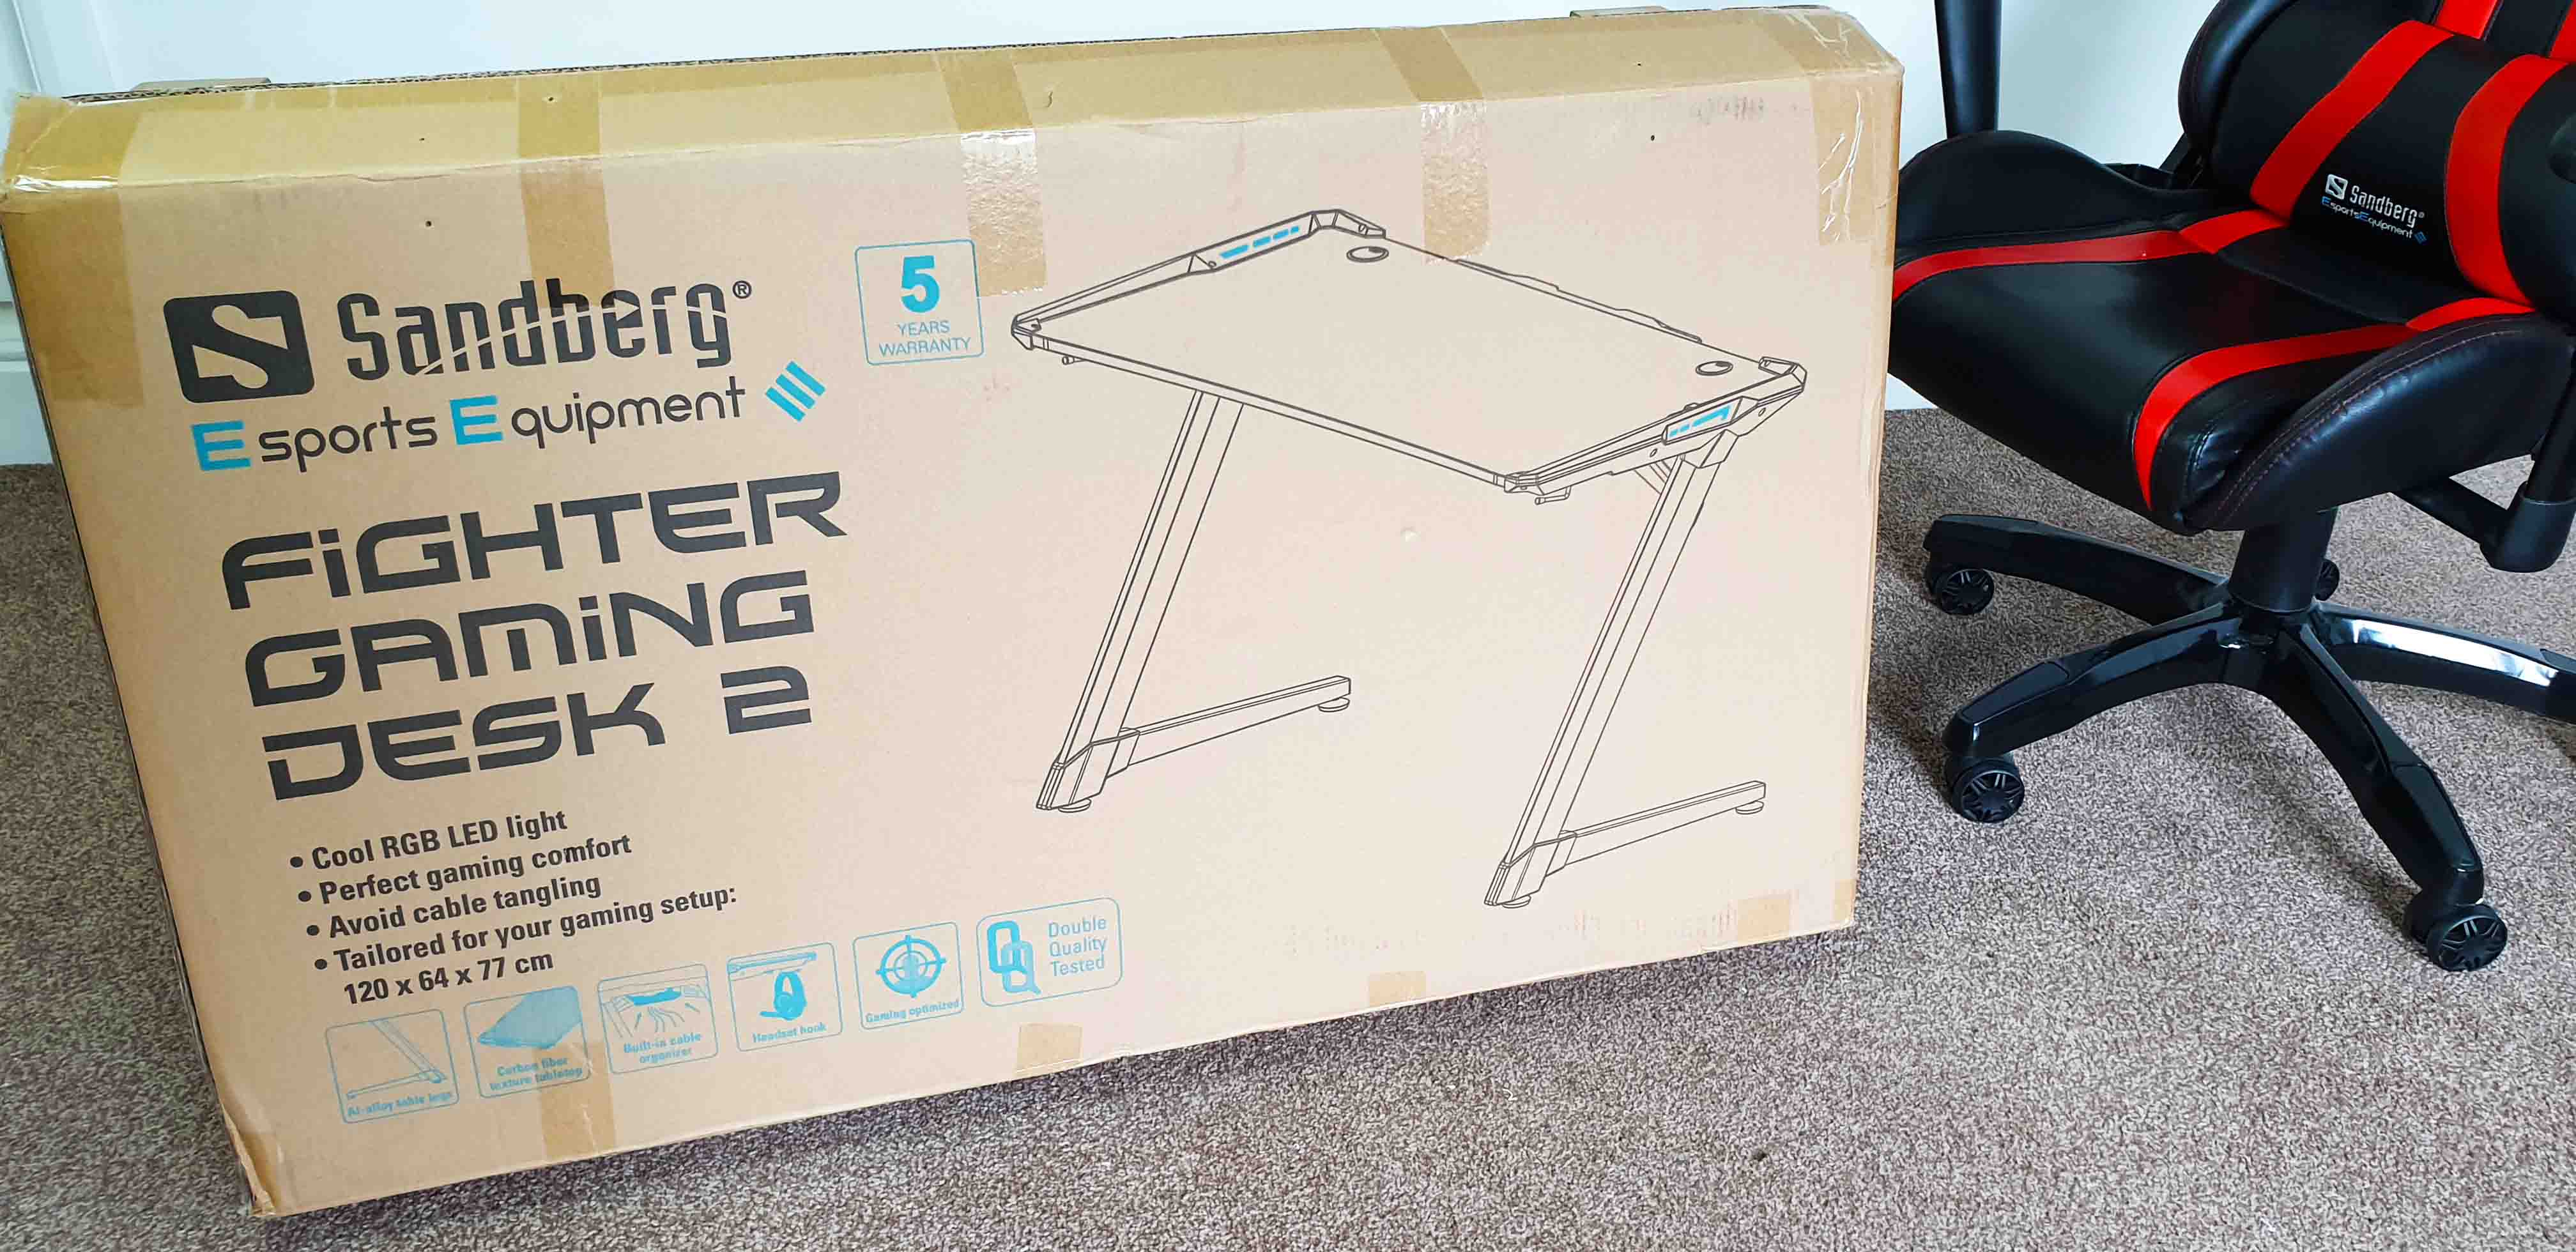
The cardboard box and the inside one are really sturdy with thick walls which are a must given the size, weight and value of the contents. Also everything is very well packed and protected.

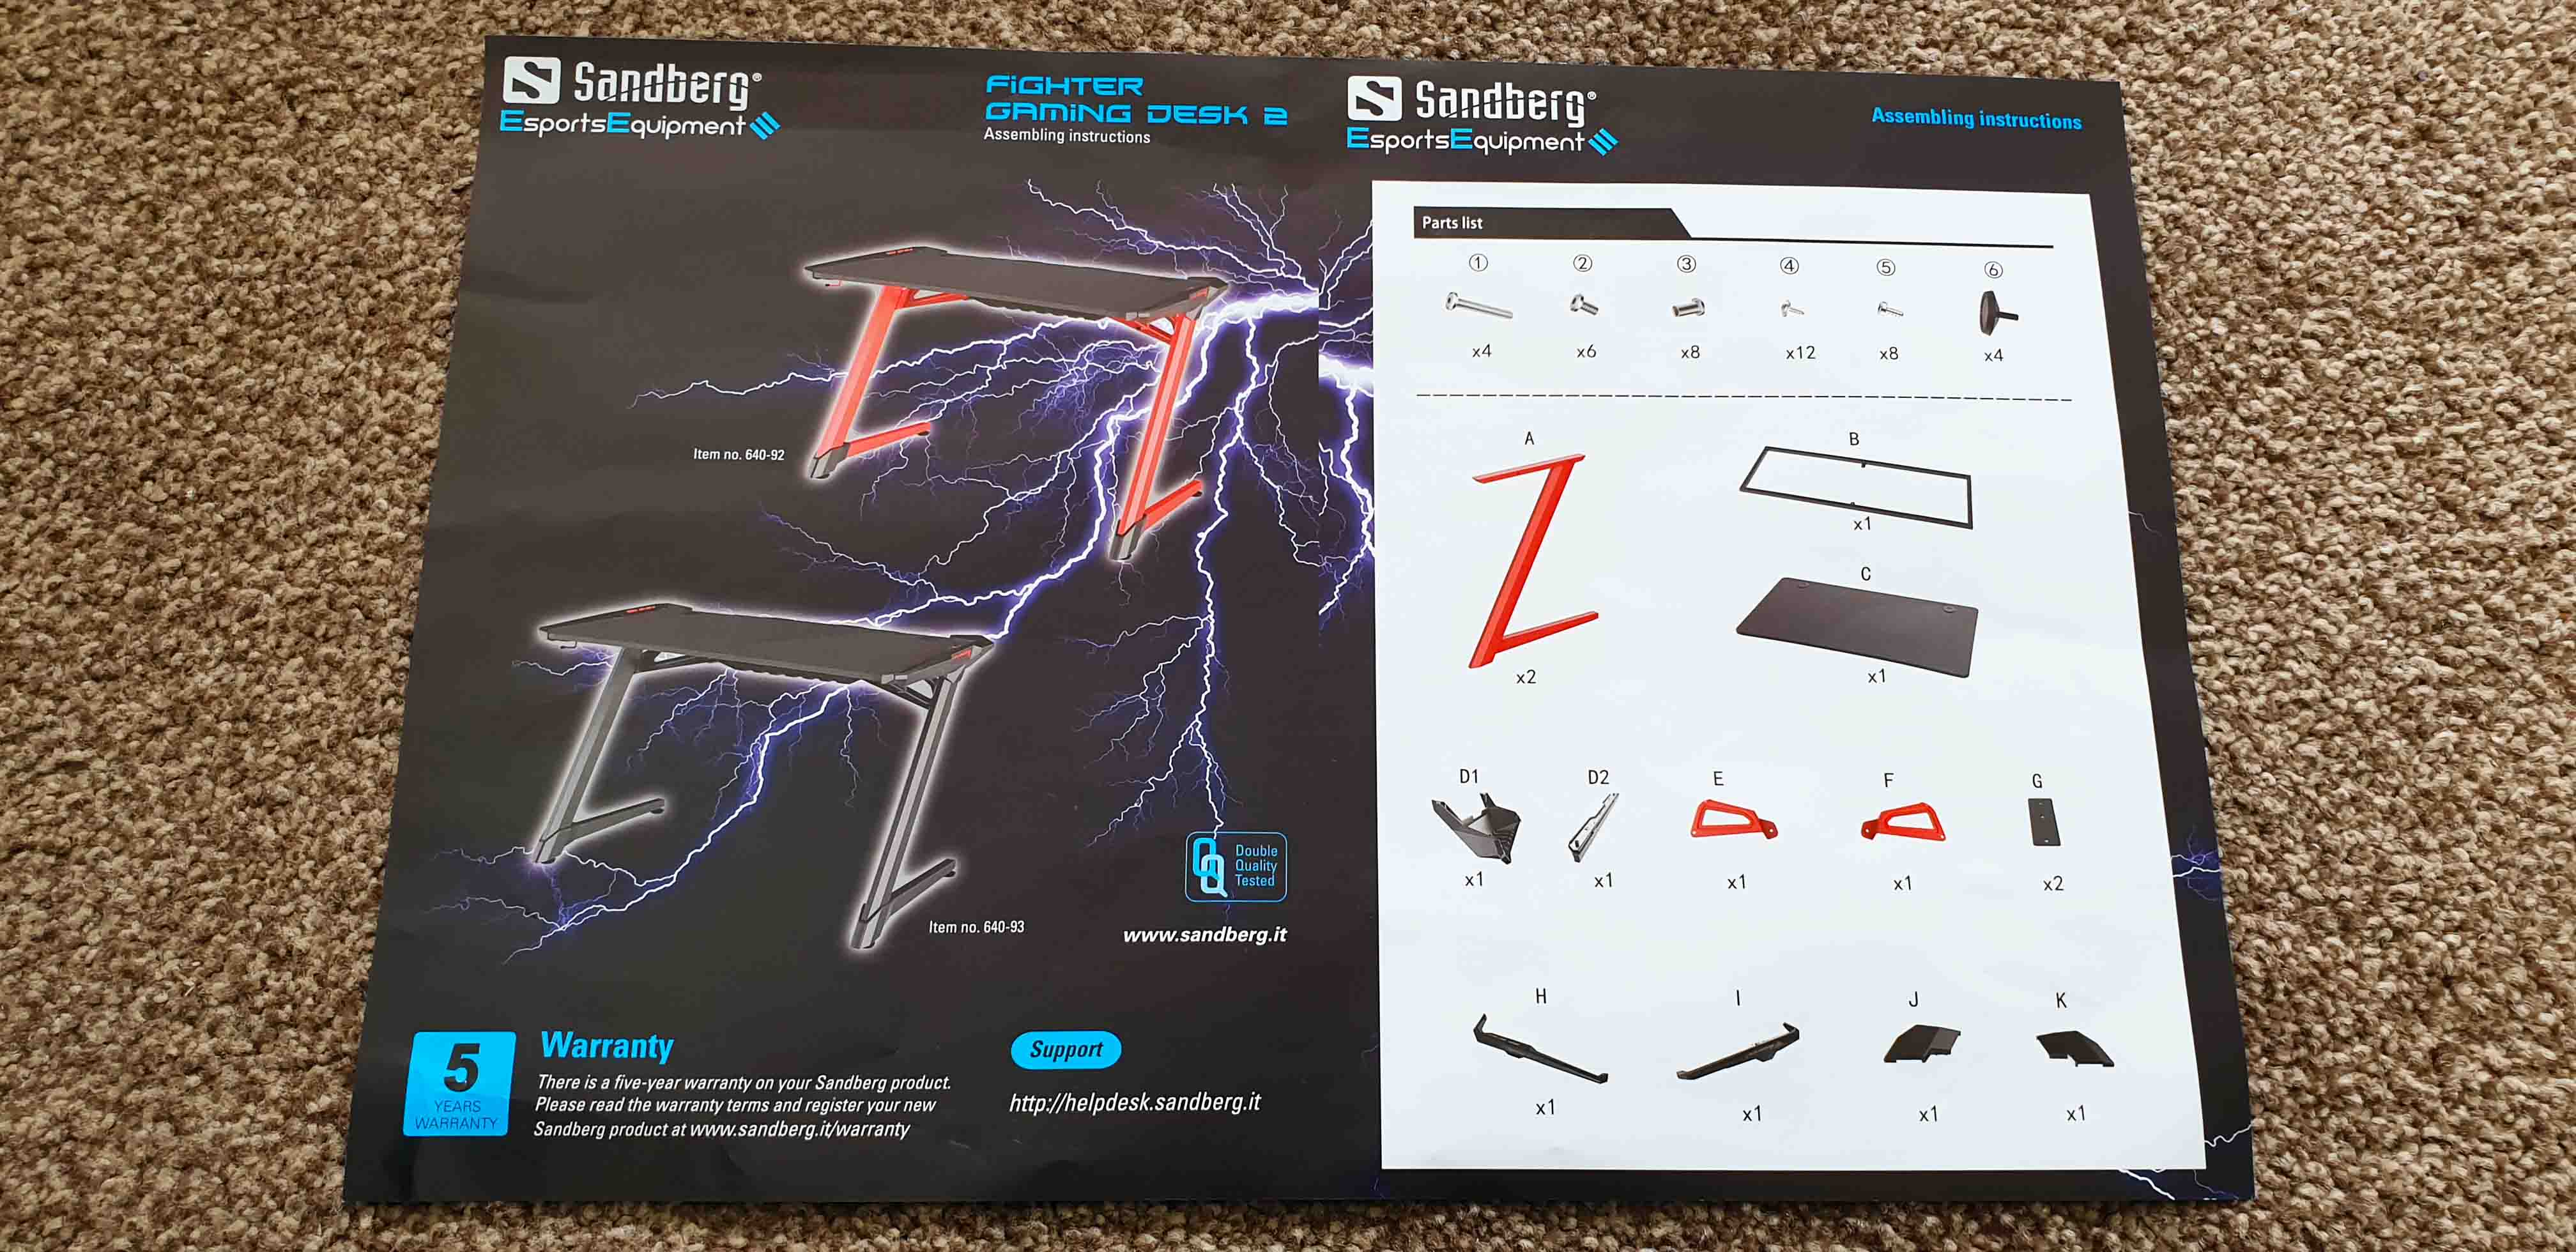
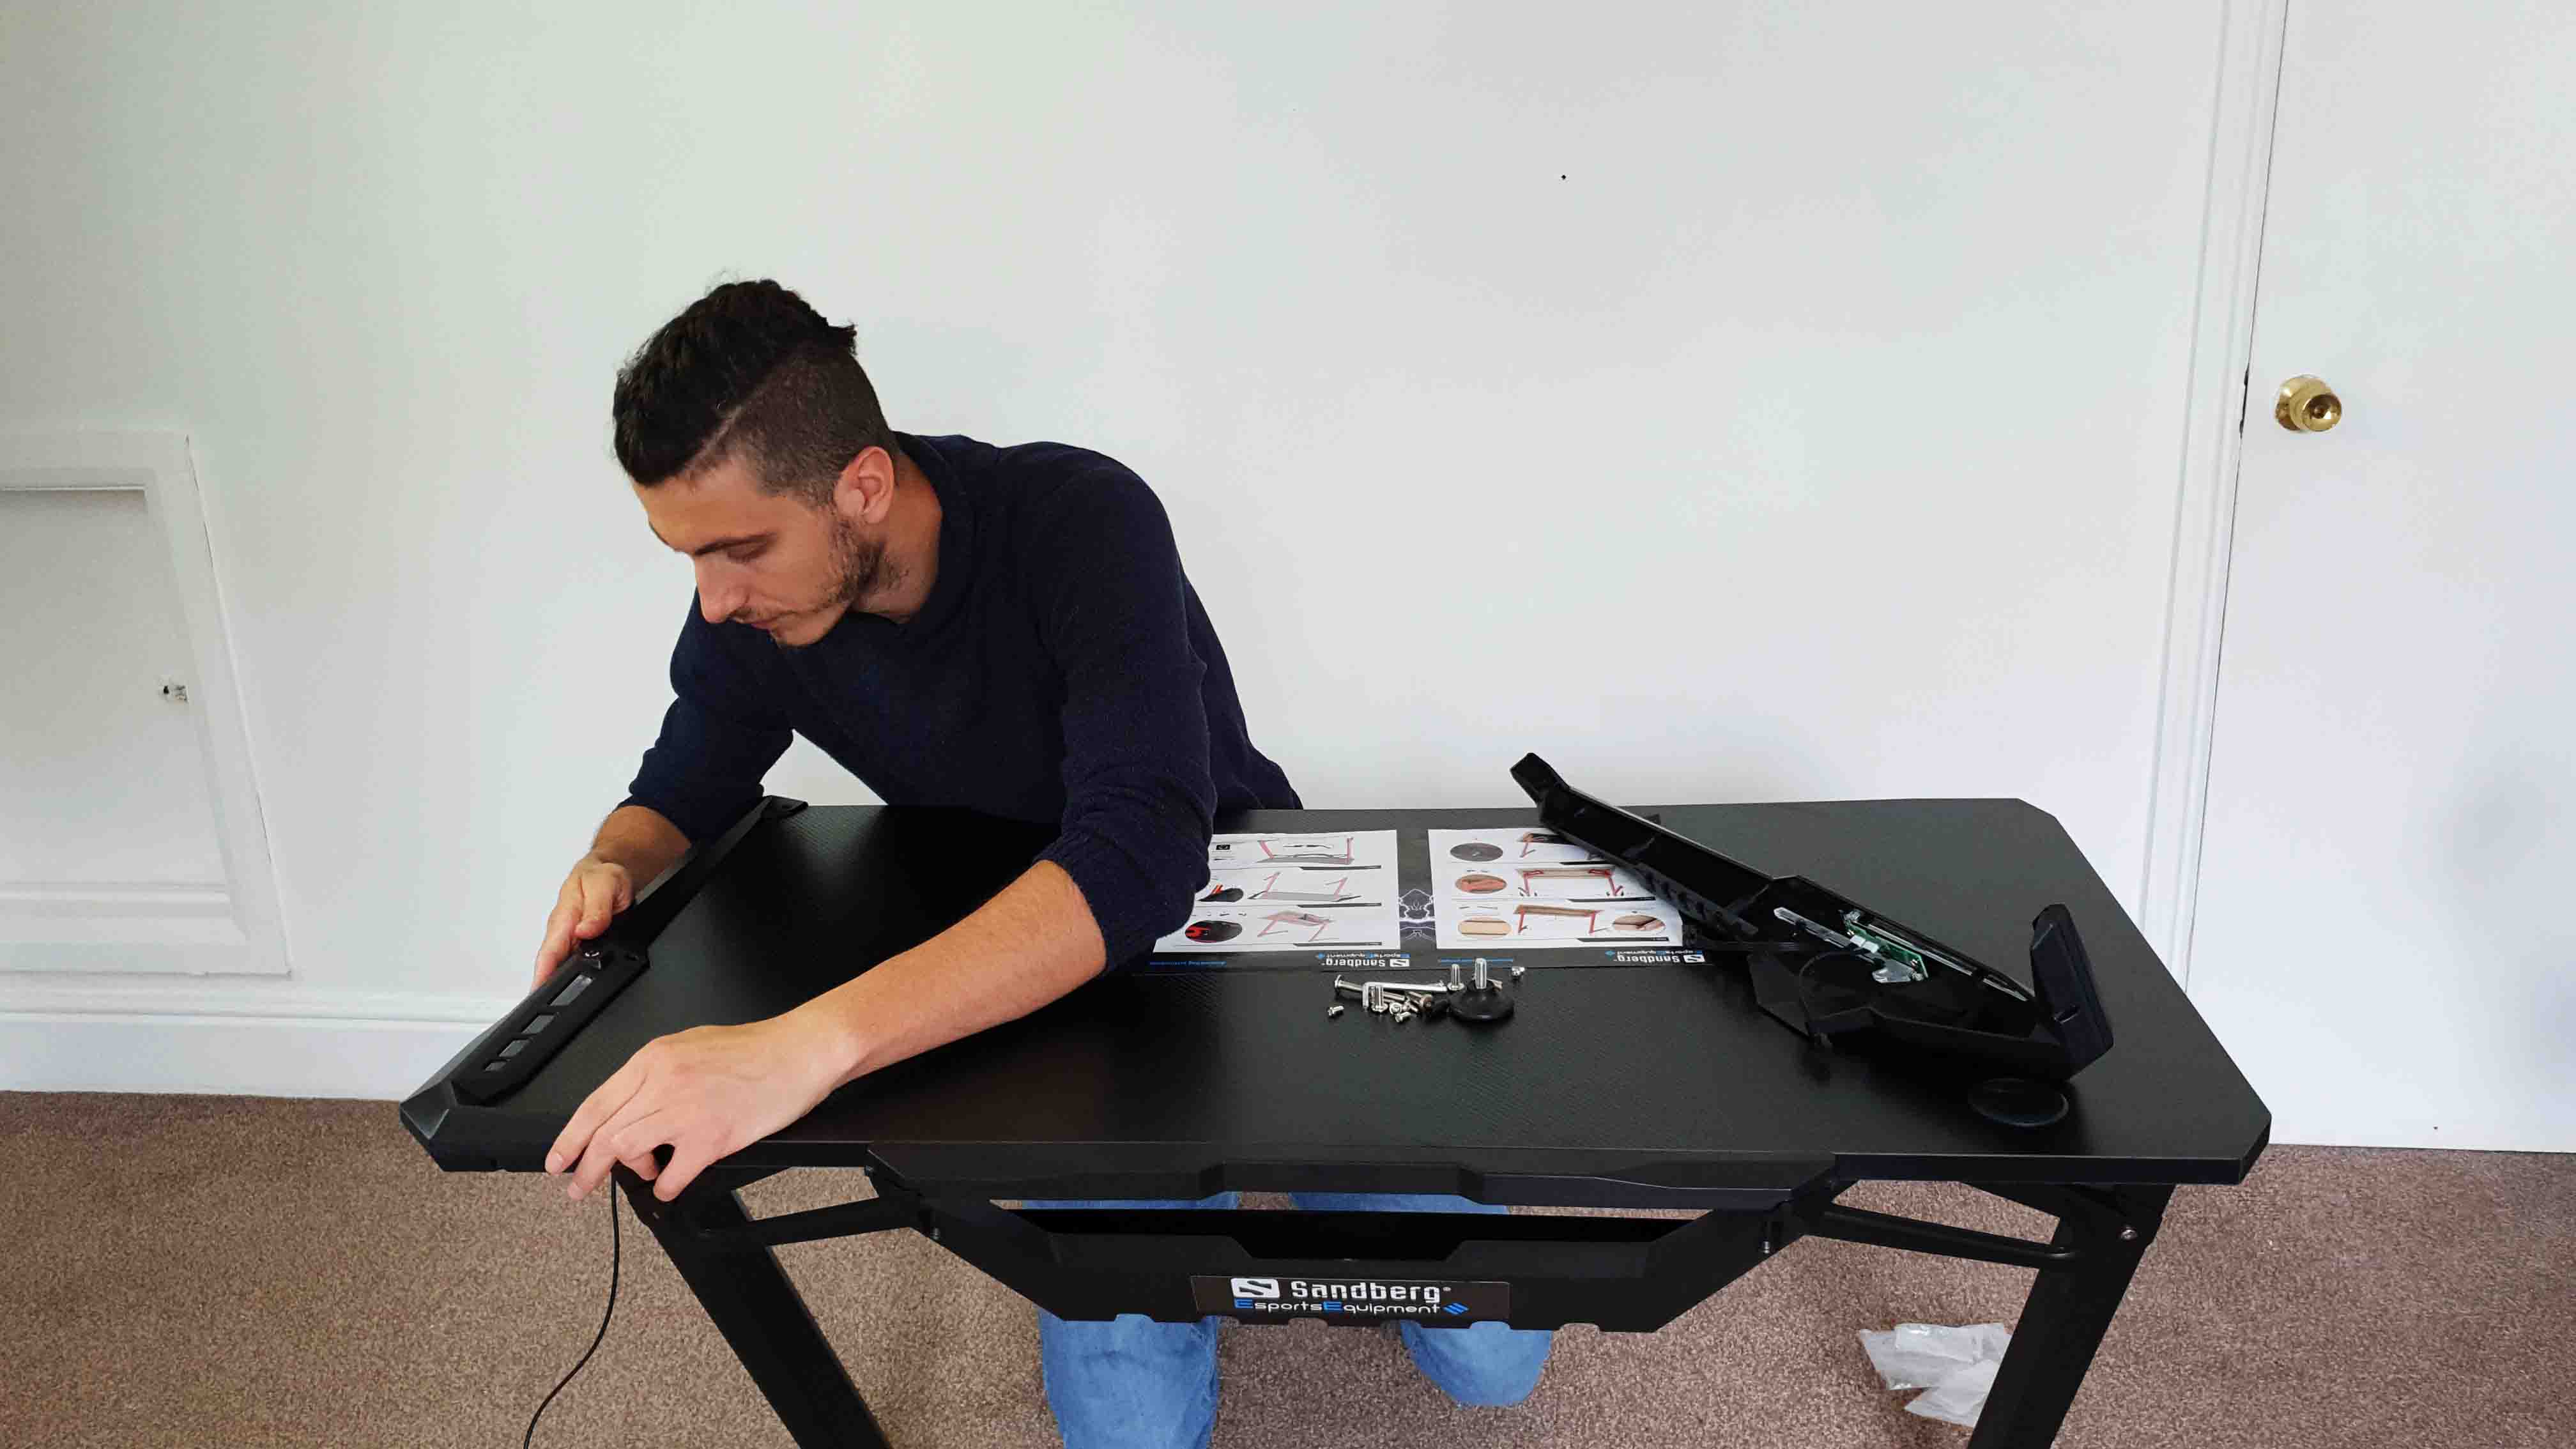
Taking everything out, it will look like this. Most of the accessories, bolt nuts and even Allen keys and a screwdriver are included which are all stored in a separate box.

The instruction manual is very short with just 6 steps. It is relatively easy to follow as long as you zoom in and take a good look at the pictures to see which type of screw/bolt is needed and where they go. Maybe those fonts could have been bigger.

The assembly process is much easier to follow from our video review (the link will be live soon) but here is a quick breakdown as well. (Pictures are taken from the video as well so excuse my presence in the clip)
1. Attach the legs to the metal H frame and screw in the round table feet (you have a 5th one as a spare). The table top will come later. Try to start the process on a carpet so you don’t scratch the carbon finish.

2. Next comes the plastic outer shells for the feet and the leg braces on both sides.

3. Make sure the table top is upside down and facing the right way so we can start to secure the H frame in. I suggest you start bolting it down from the outside in, without completely tightening all the bolts until you have everything in the right position.

Everything so far fitted as intended.
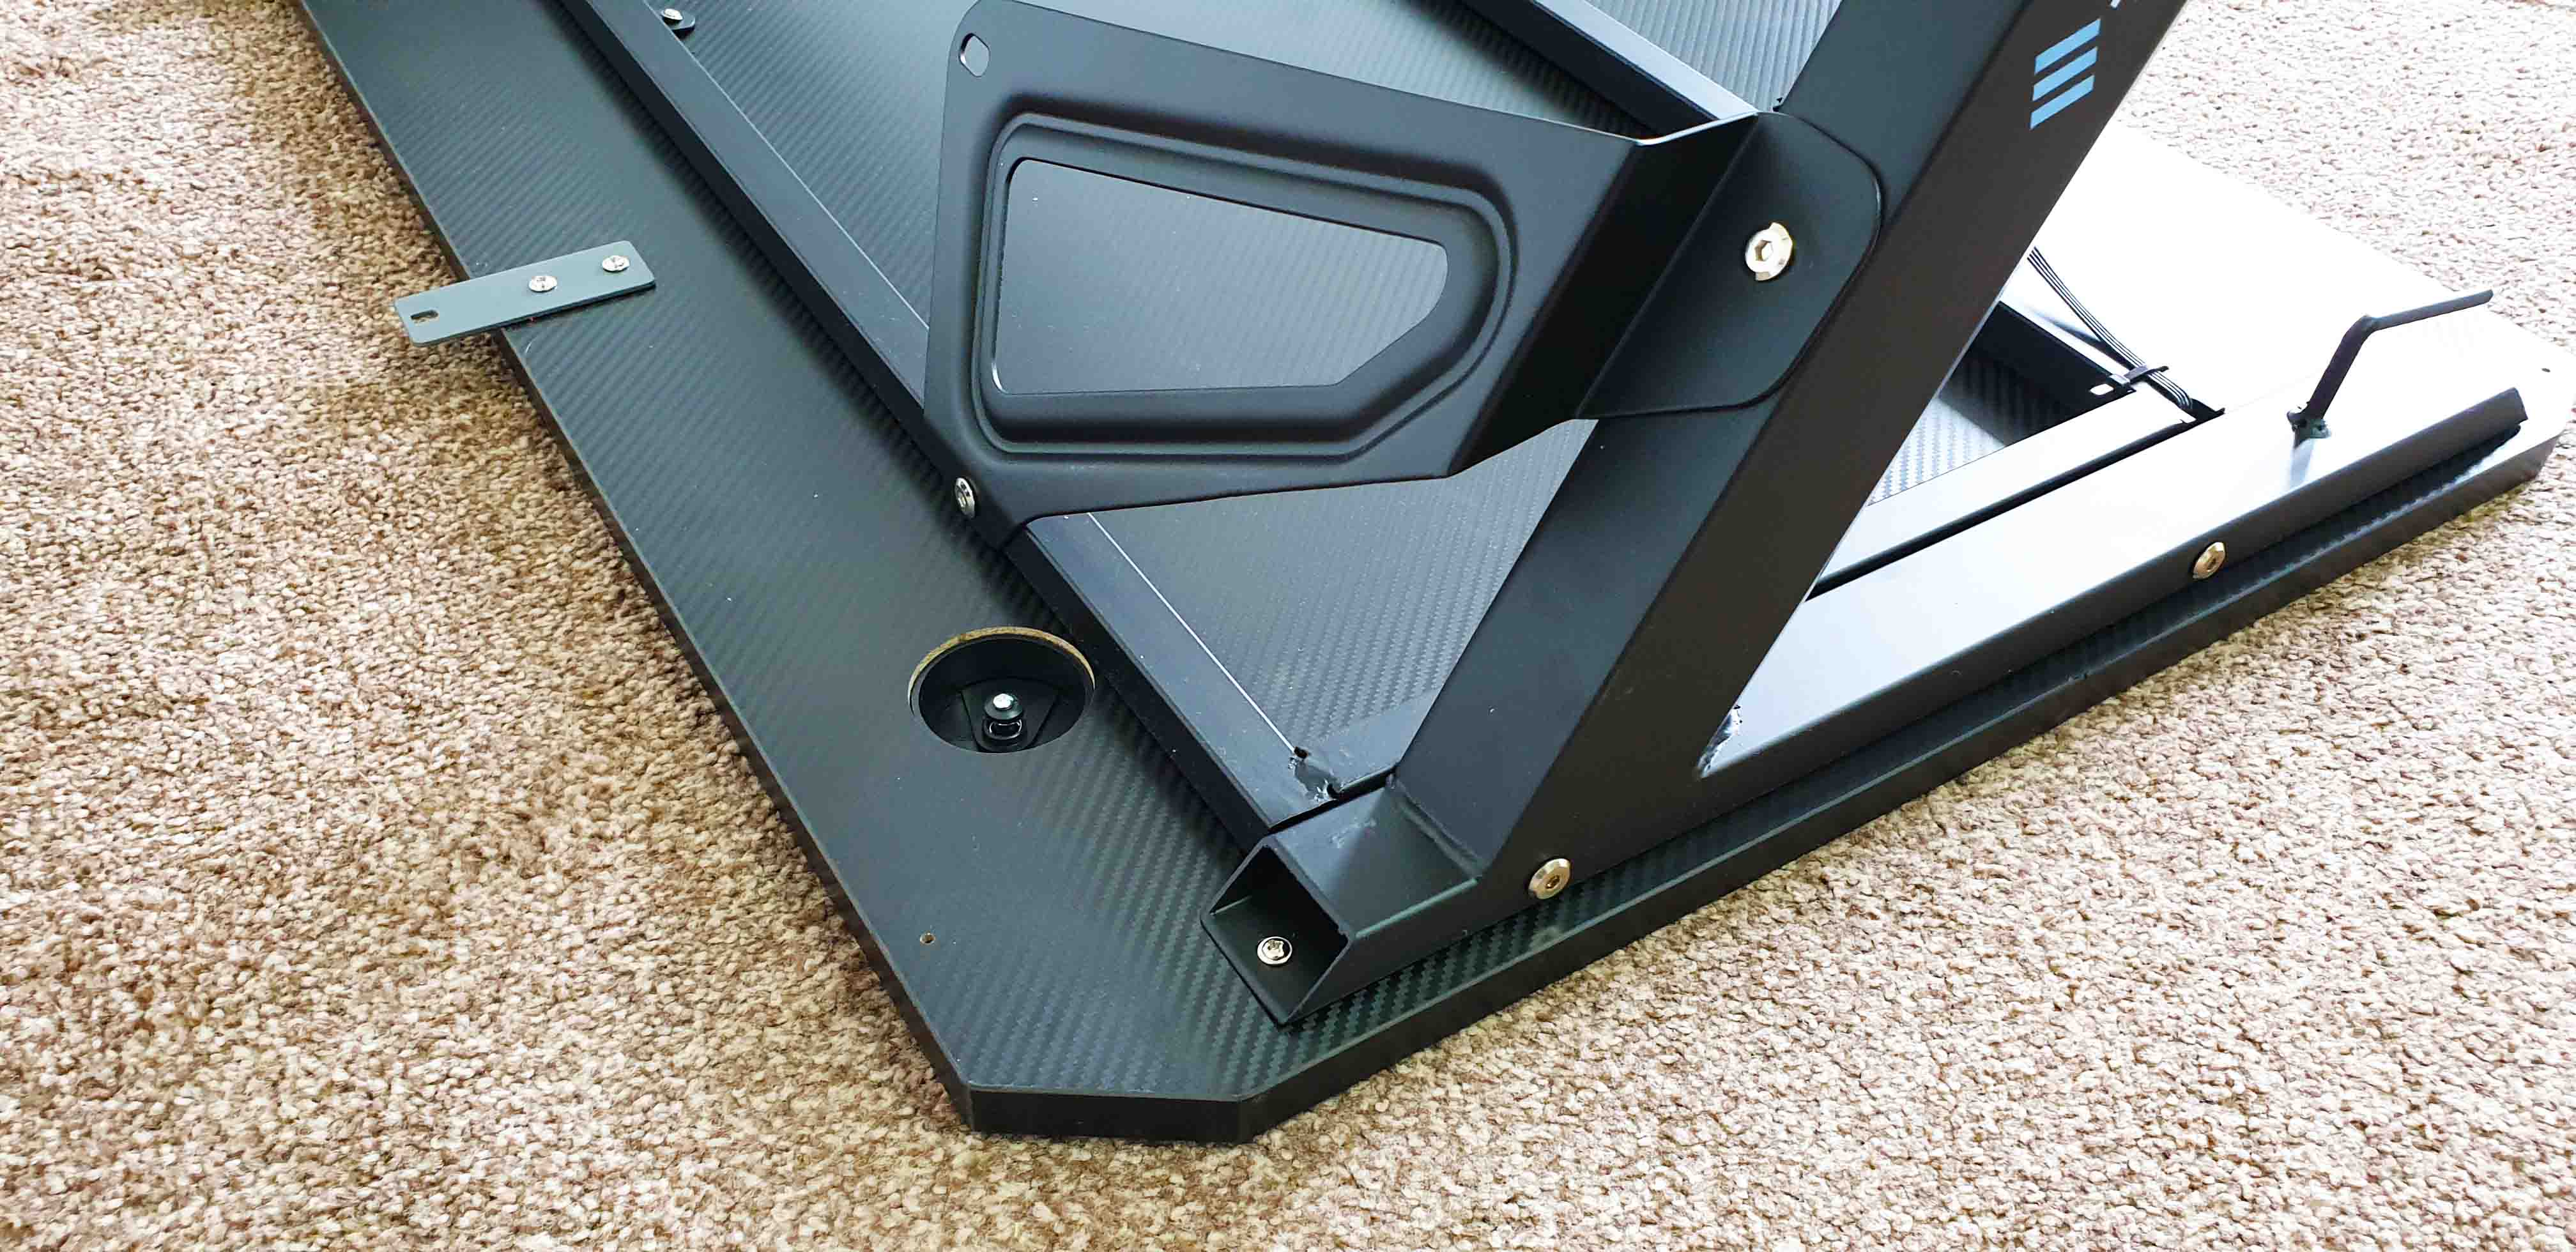
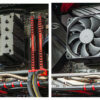
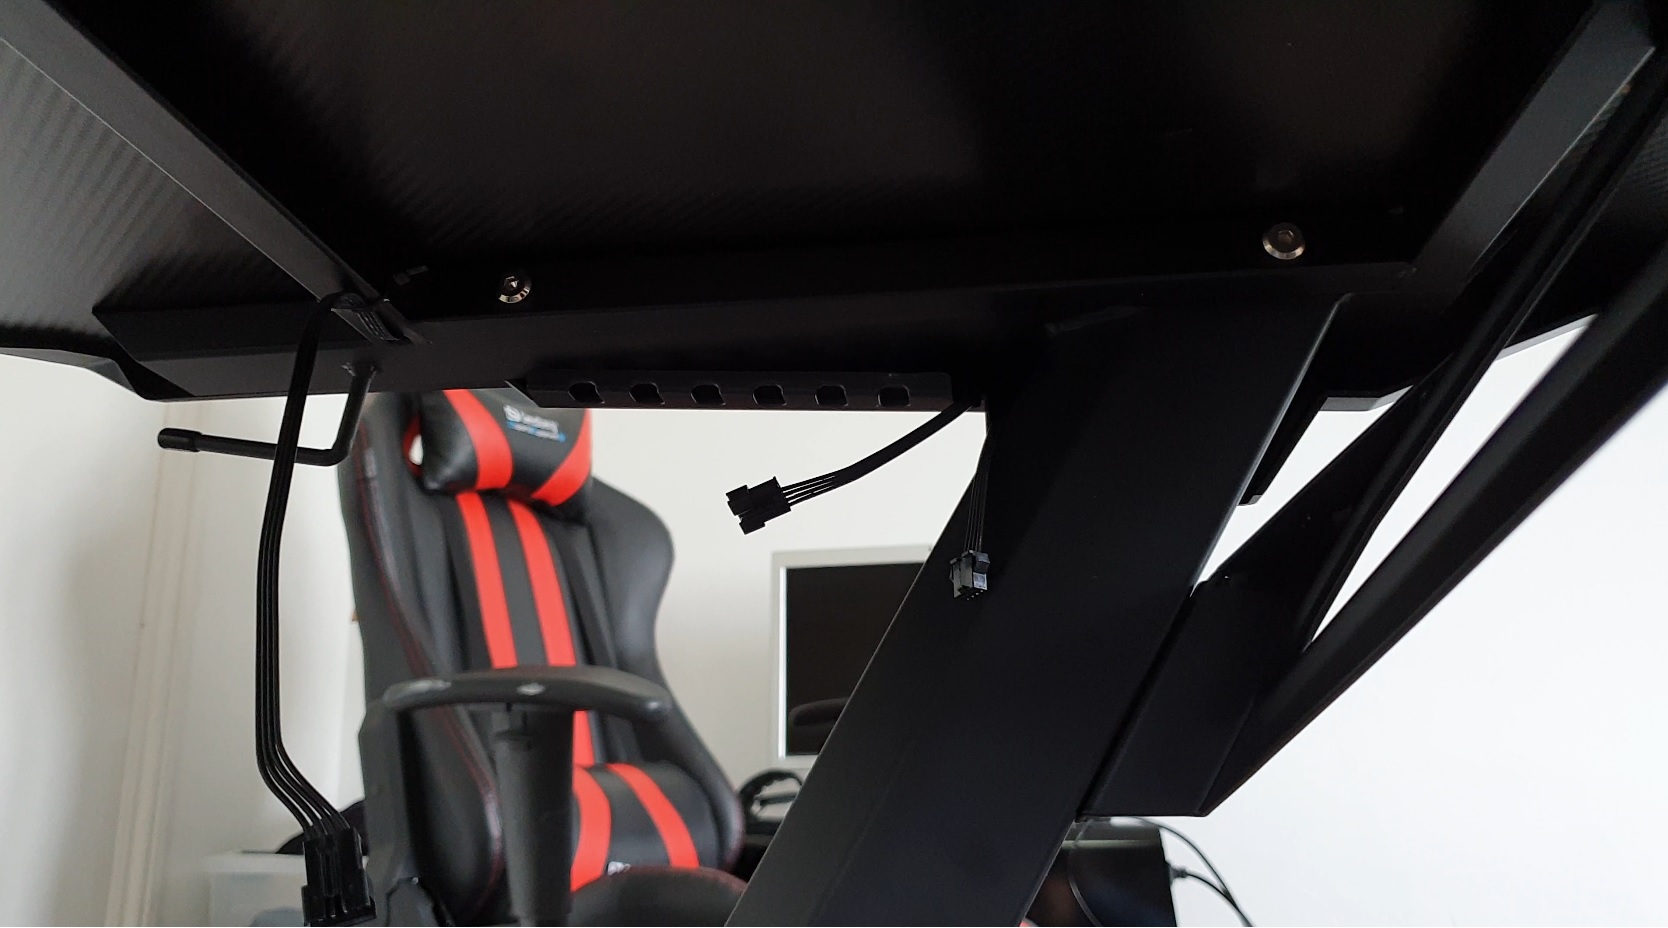
4. Next we have to install two metal brackets that hold the rear wall cable divider/bracket and the wire management holder tray.

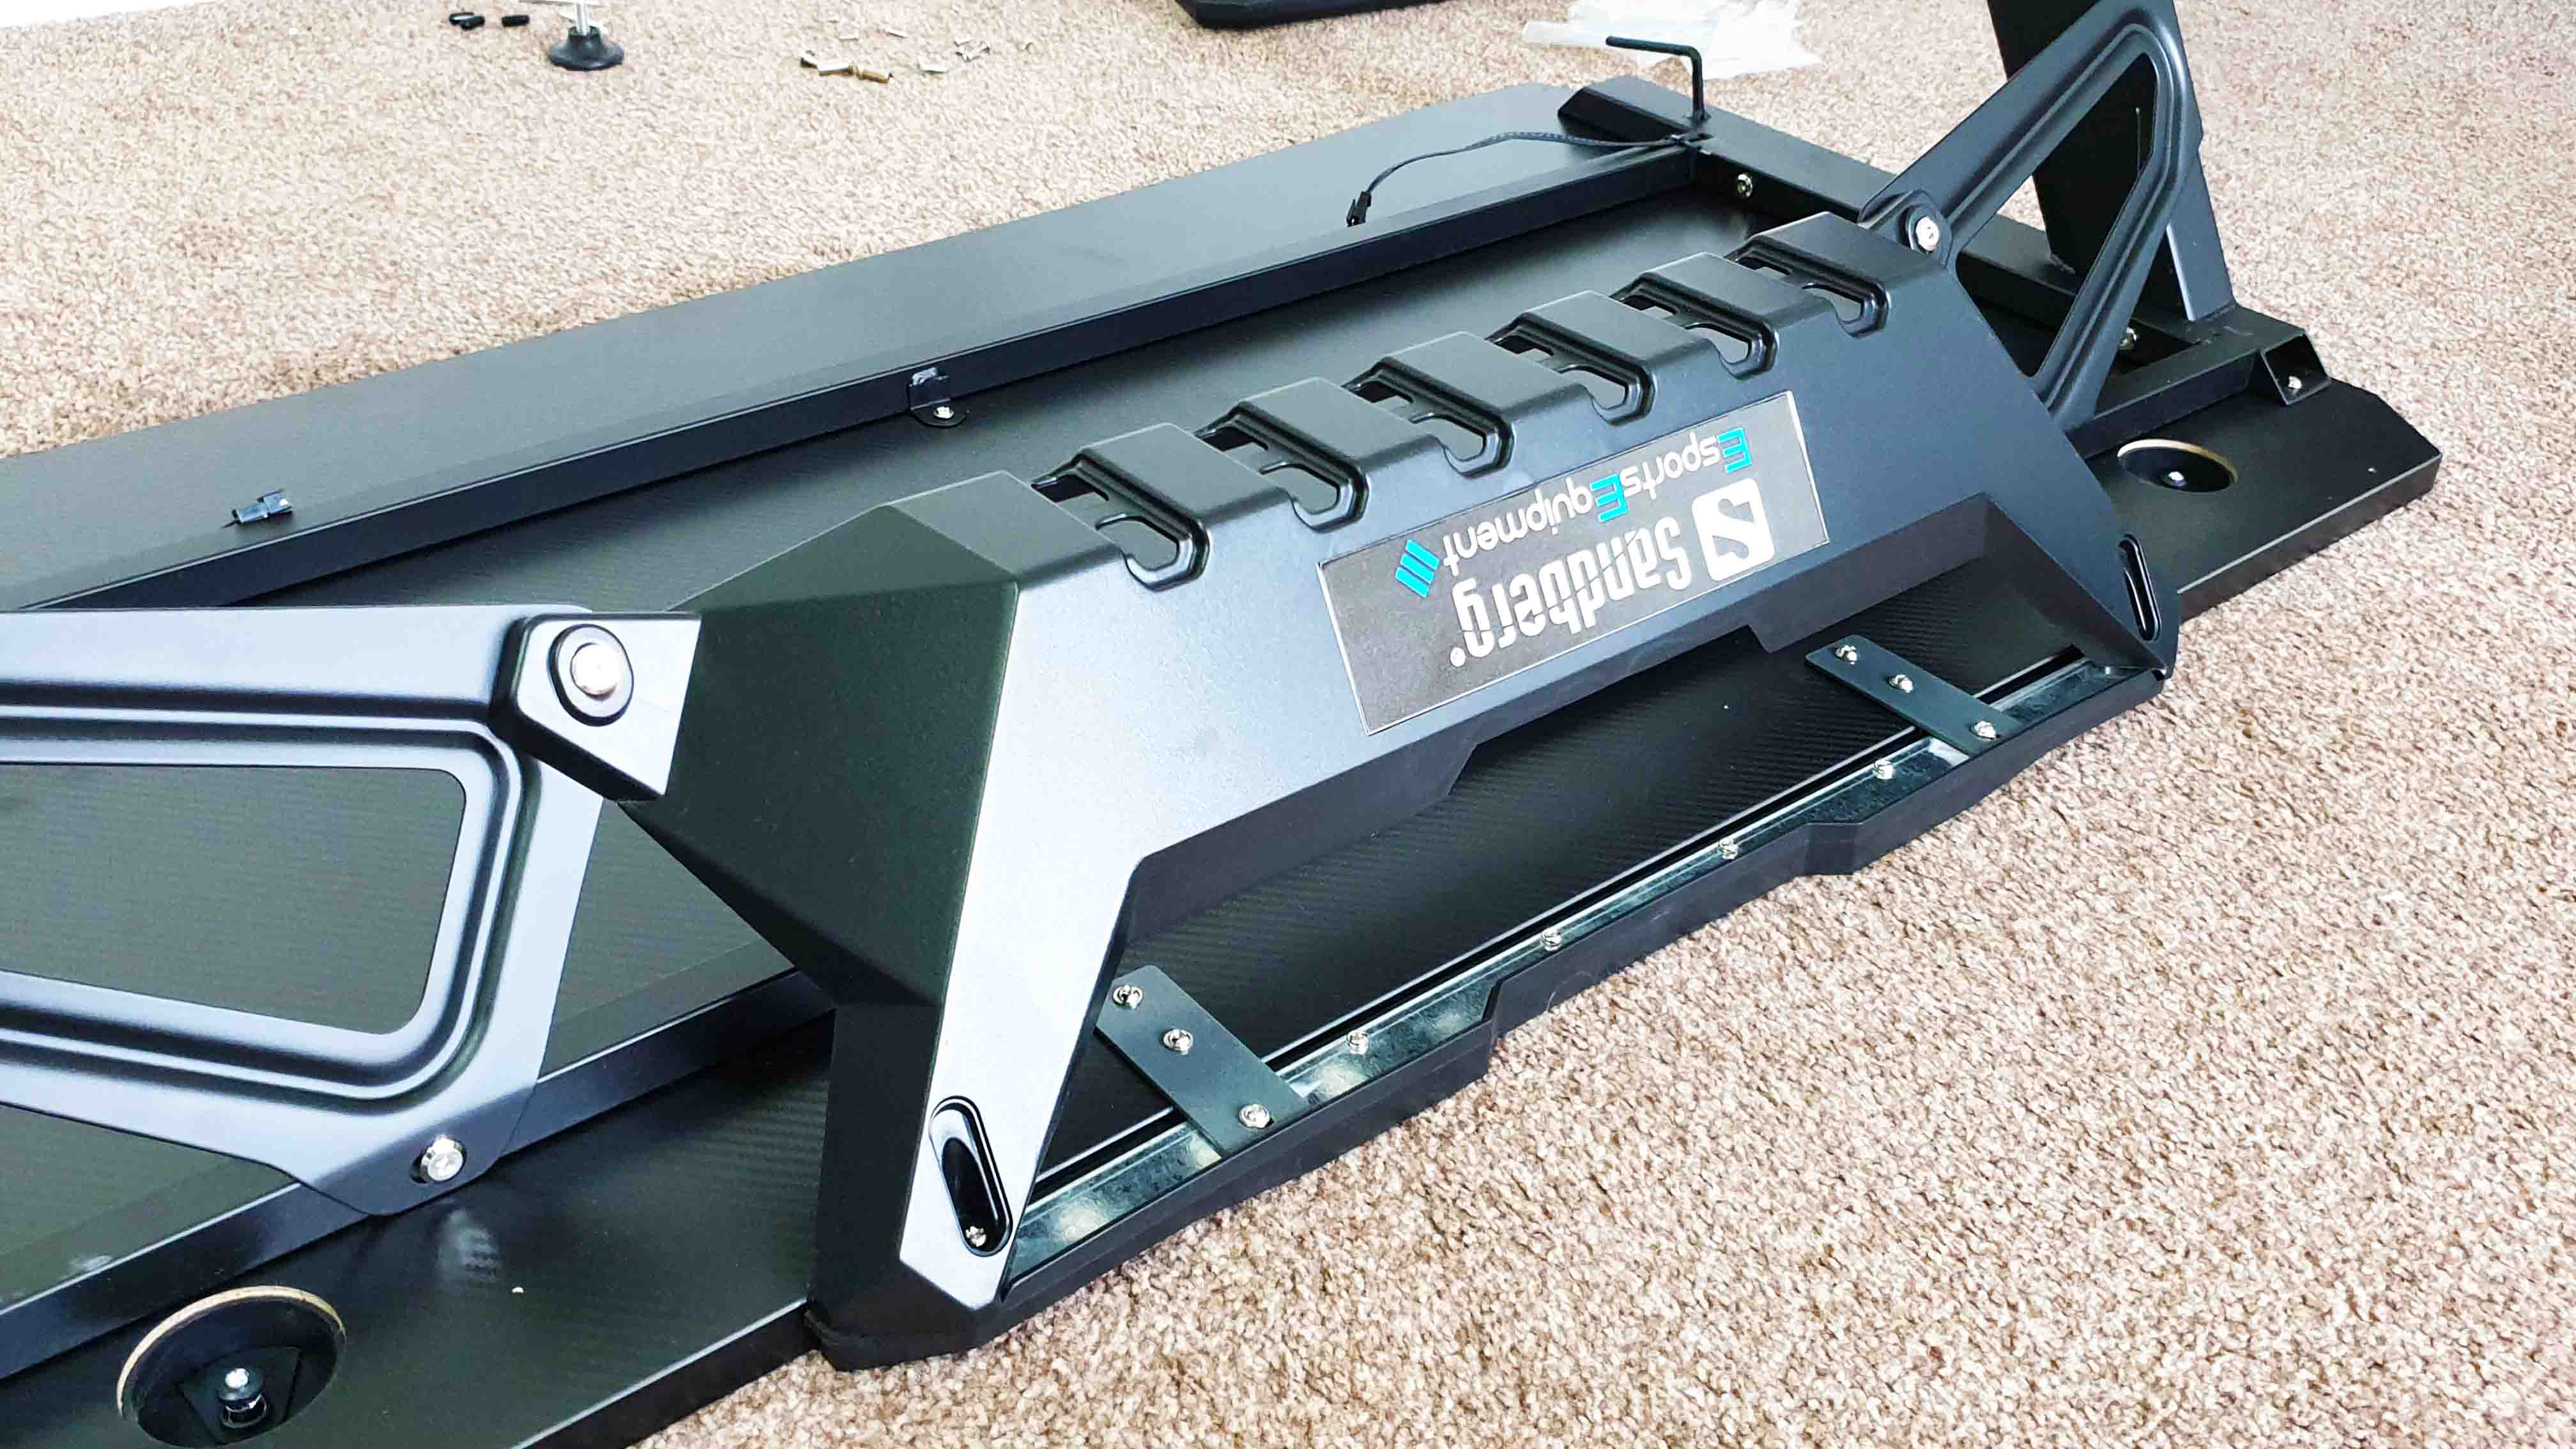
5. We are almost done – now we have to attach the side RGB LED brackets. These should have had black screws for a stealthier integration but that is just nitpicking on my end.
6. Connect the LED cables underneath on both sides and that’s it !
Testing, impressions and feedback
The assembly process shouldn’t take longer than an hour at the slowest pace. I think it took me like 40 minutes.
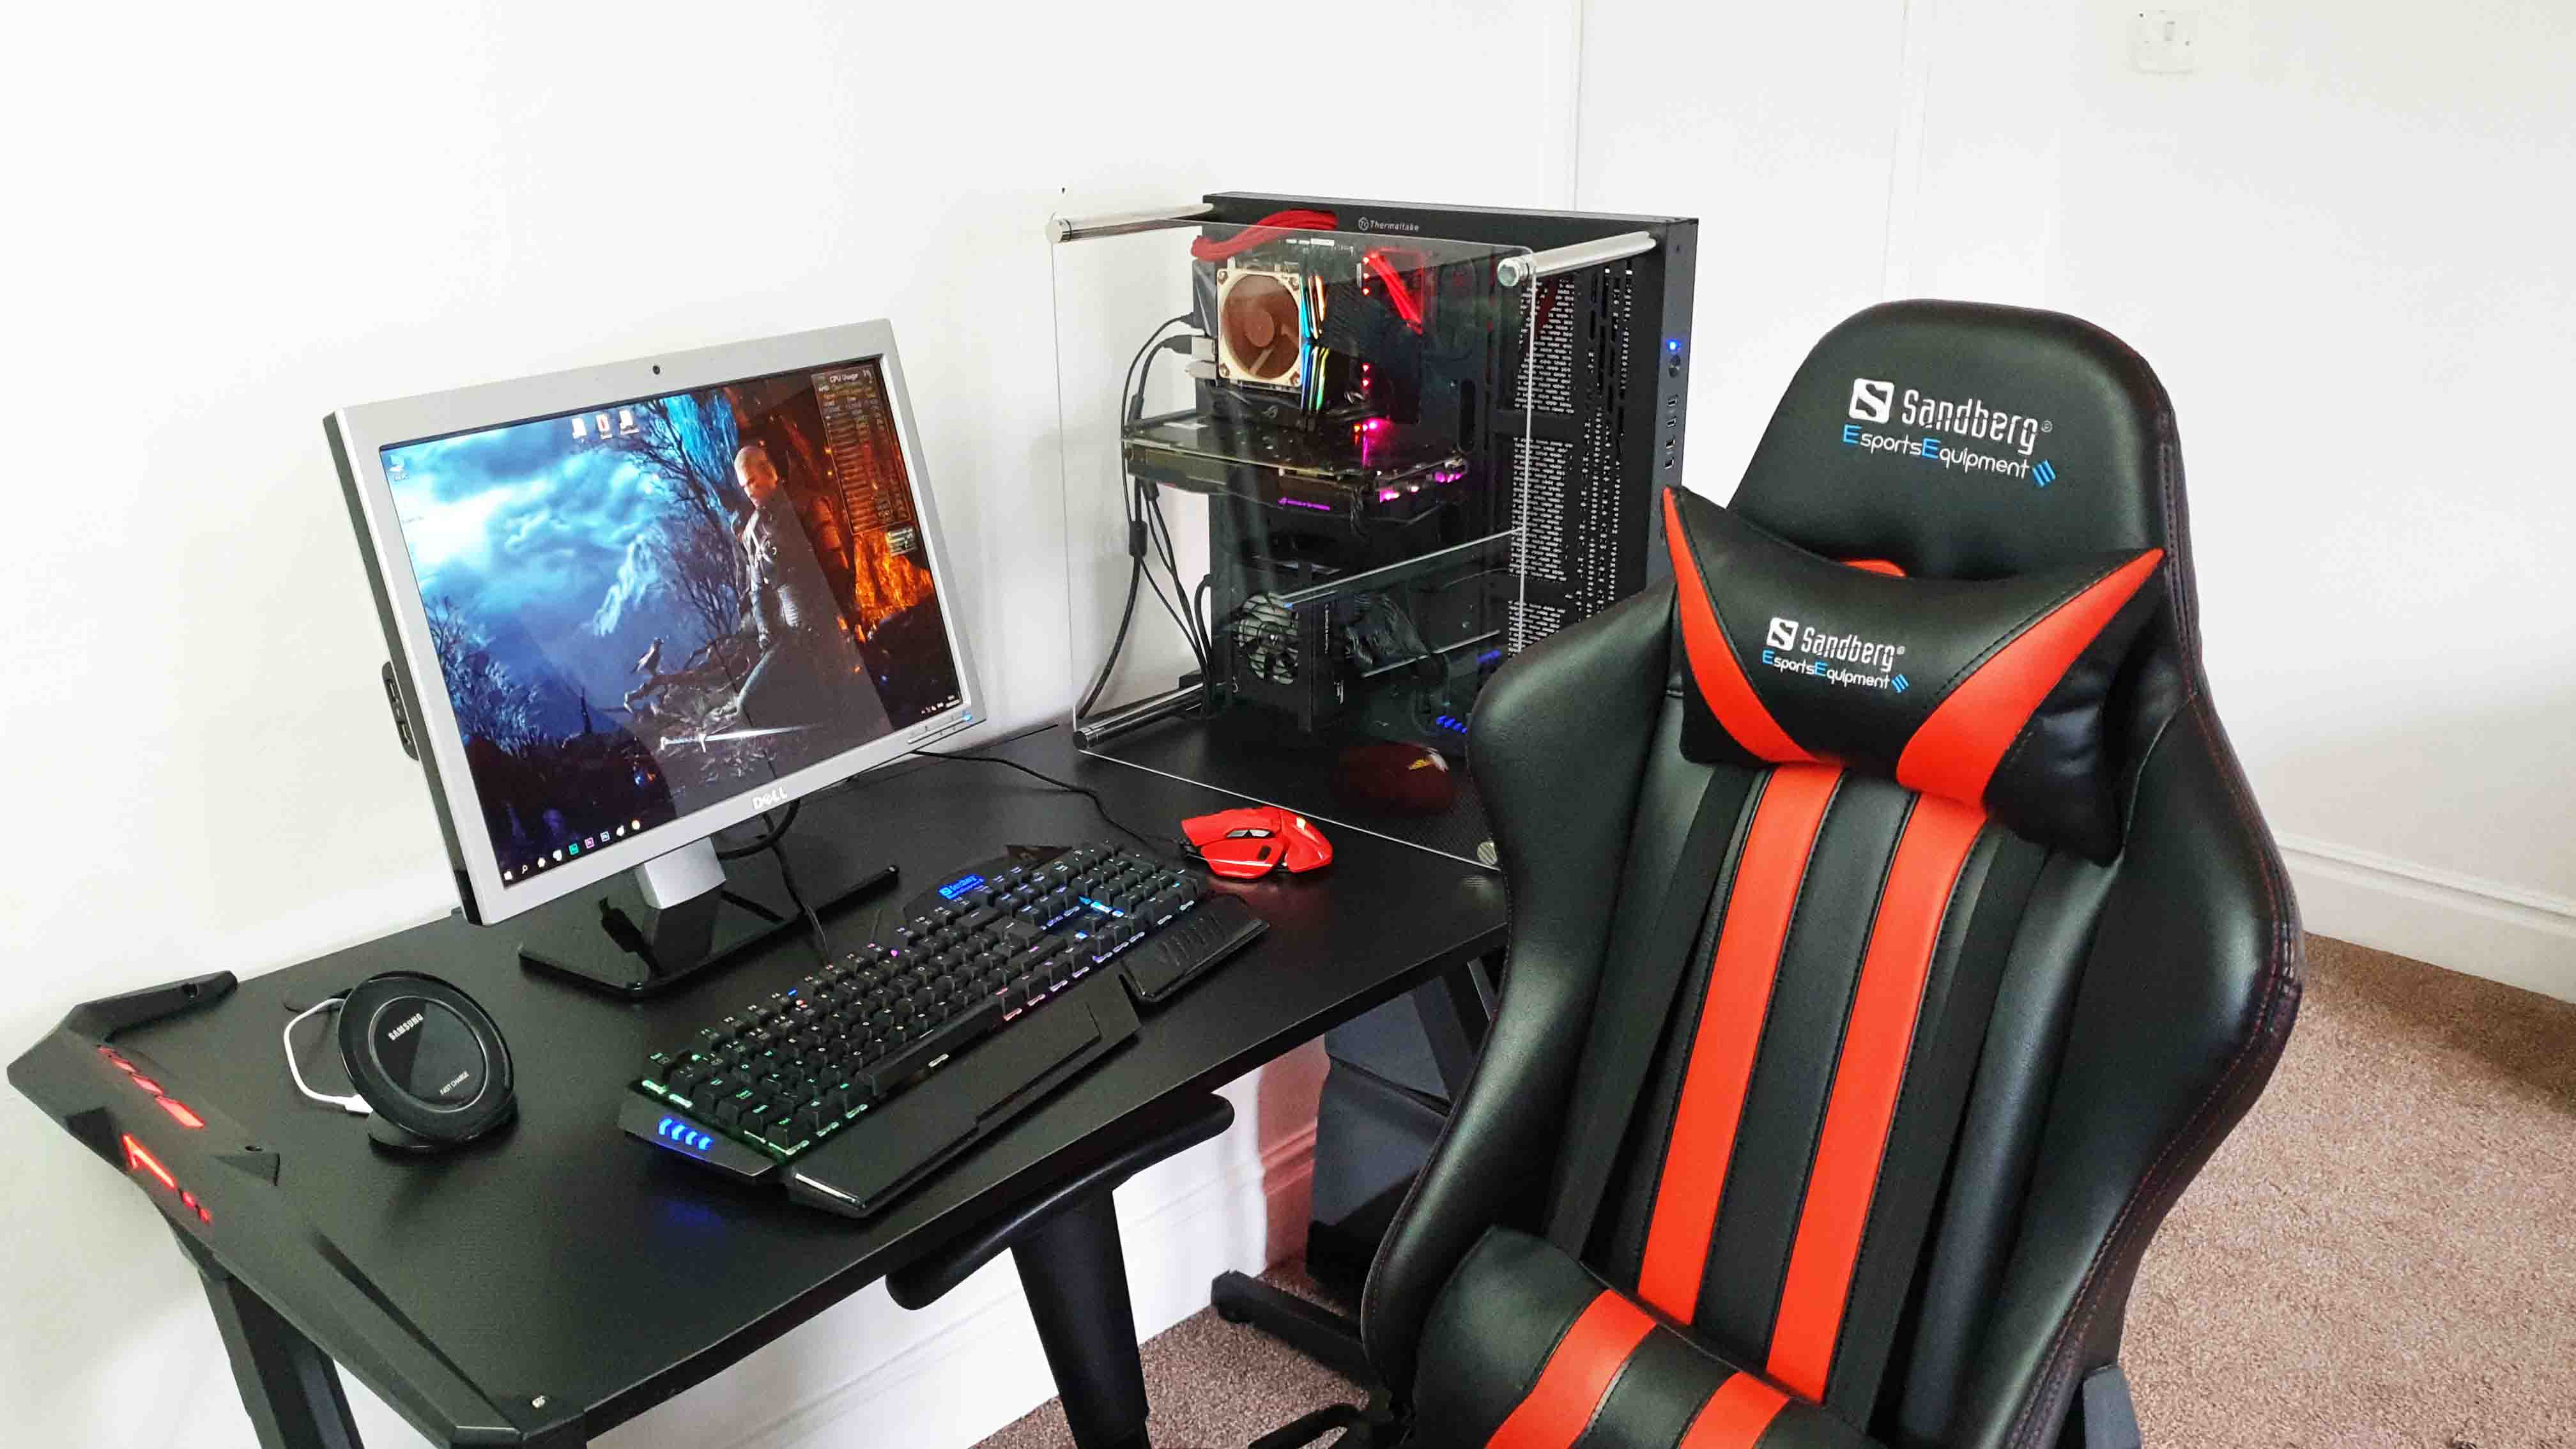
Here it is fully populated with what I use on a day to day basis to have an accurate feedback and interaction experience with it.
So from left to to right we have a Samsung wireless fast charger, a 20″ DELL monitor followed by my main PC built in the Thermaltake P3 E-ATX Core open frame case. I specifically put the computer on the table to see how much space is left if indeed you wish to do the same. As you can see there is sufficient space left for a keyboard and mouse. You can use up to two 27″ screens side by side as per my measurements and estimations.
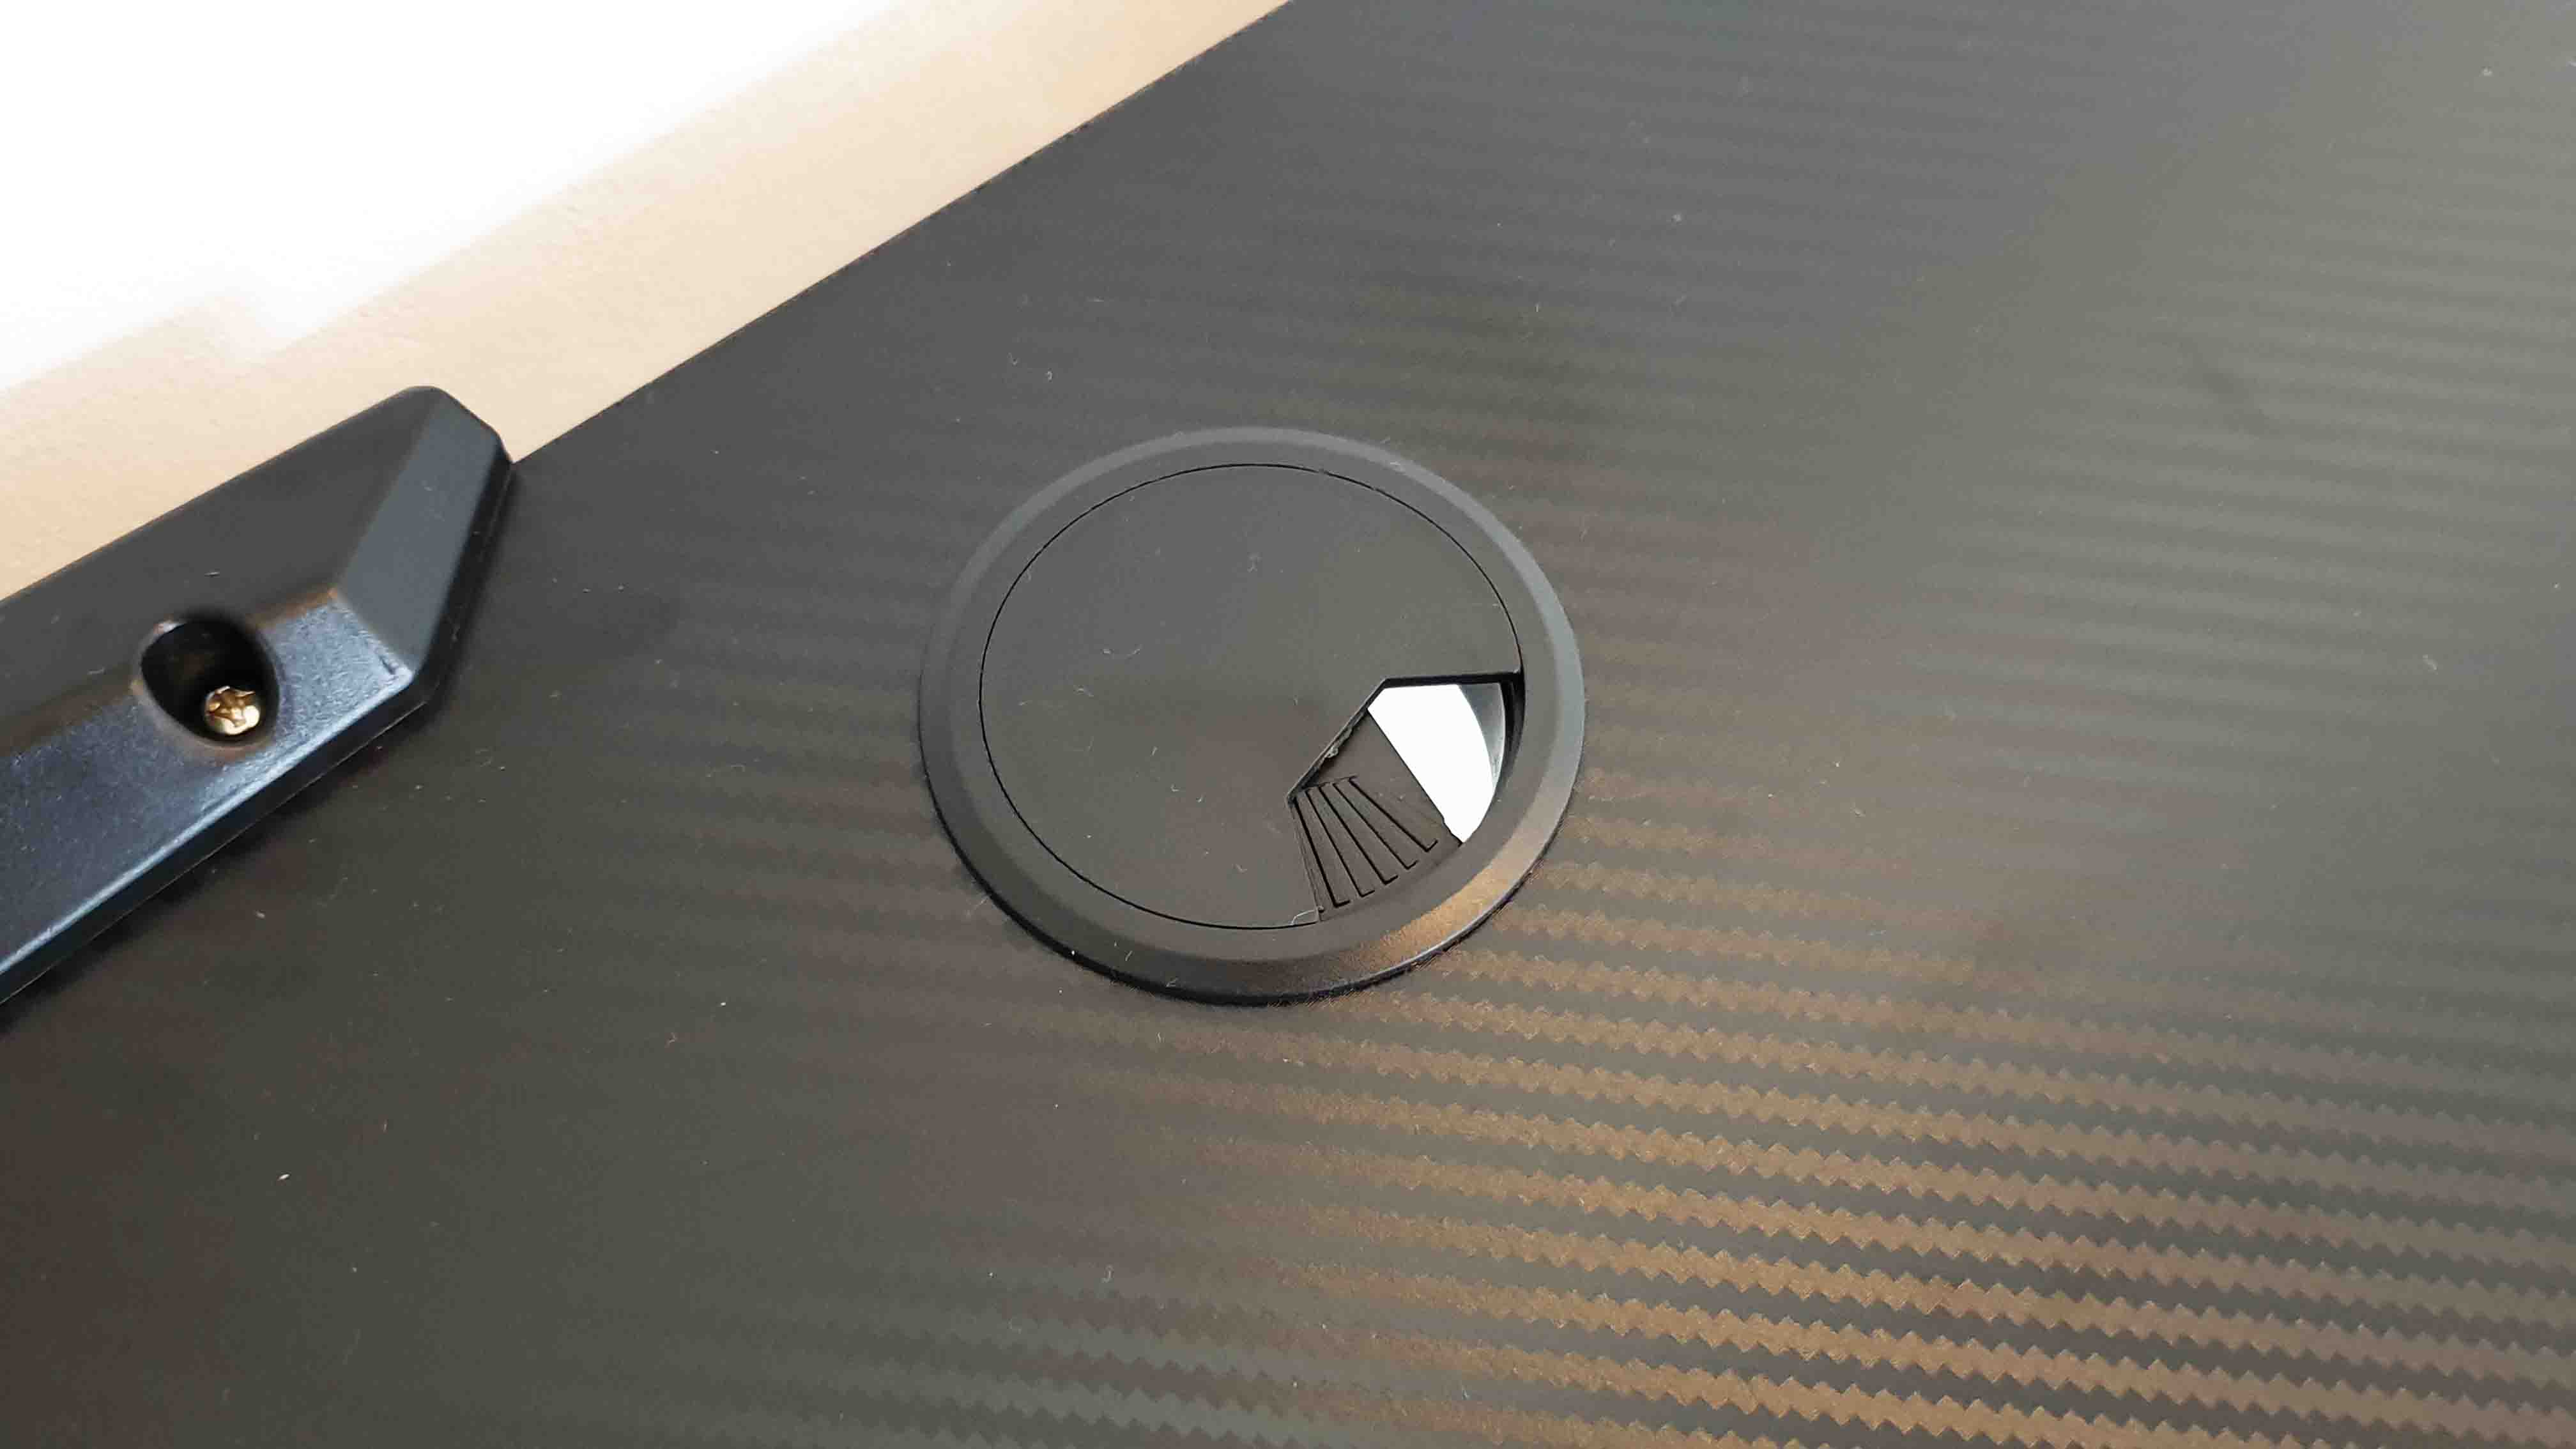
The carbon finish is excellent and smooth with no protrusion to affect the mouse for example. You have two cable slots (one on each side) built-in with an adjustable cap. This can also be removed altogether to allow passage for thicker/bigger cables, plugs etc
The desk has two headset mounts which are set right at the end of the desk and thus they don’t intrude when I move or swivel my chair around.

This back panel is excellent in offering extra clearance to pass even more cables through.

One of the best implemented features is the cable tray – in my case it holds really thick cables like the ones used for my DELL XPS 720 computer, a 4 port power extension lead and every cable that I have tucked in, fitted with no problems.

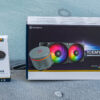
The final touch are of course the LED lights which are located on the top side and on the sides. They are powered by a USB. Colors are 6 in number (red, blue, light blue, green, purple and yellow) and two sets of animations; scheme one flashed through all colors while scheme two, cycles smoothly through all, which is also my favorite. As you saw, I have for now the popular all black and red color scheme so the ability to use just red for the lights brings a great relief for my overall matching idea. Also you can turn them off completely. Here is a quick look.
Conclusion
This desk is more than you need as a single user with multiple devices or screens as I have shown you in my review. The build quality and overall sturdiness is really good. Even if you put a heavy computer on the top, it should handle it with ease. Cable management is the reason why you should get this desk ! It basically eradicates any cables on the floor and thus has your OCD covered. The lights are a very welcomed feature since everything today is with RGB. Basically, I can’t fault it because it delivered exactly what it has promised !
The Good:
+ Excellent cable management
+ Sturdy build quality
+ Aggressive yet elegant design
+ RGB lights
+ 5 years warranty
The Bad:
– Should have used black screws for the top side brackets for overall color matching but this is a minor issue
– Since you already have to power the lights, maybe to include a USB port integrated in the sides to charge your devices could have been another great feature
Glob3trotters “Must Have!” Award 5 out of 5

A lot of thanks to Sandberg for supplying us with this epic sample !